Psycho for HO

By Alfred James Dill, TCA# 12-67056
My 15 year old daughter Darien loves to build things for her HO layout. When she’s not in the basement arranging track or running wires for lights and accessories, she can be found up in her room, watching black and white movies and scratch building at her desk. She enjoys constructing plastic airplanes, boats, houses, restaurants, stores, and banks from old kits, but her true love, is to create something out of nothing.
Darien and I were out and about one day checking into a local model train store that we had never been to before. We had read about the place on the internet, and were very interested in the fact that it had a used section. We love vintage stuff, so we were eager to see what old gems we could find.
The store was great! Packed floor to ceiling with everything a model railroader needs to build an HO empire. We made our way to the back wall where we could see rows and rows of old pre-assembled model buildings. Darien, like her dad, enjoys incorporating pre-built, dusty old structures in with her scratch builds. The aged models definitely do add a certain charm.

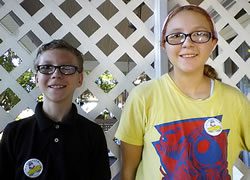
Darien is a member of TCA’s Kids Club, member # 16-7473. Her brother Jesse is also a member. They were featured in a previous e*Train article as seen below.
The Kids Club lets young people learn the fun of the train collecting hobby under the guidance of TCA members who share their knowledge and enthusiasm.
Darien is already displaying advanced skills and patience in constructing thoughtful layouts, which requires considerable planning and focus.
For further information on the Kids Club, please go here.
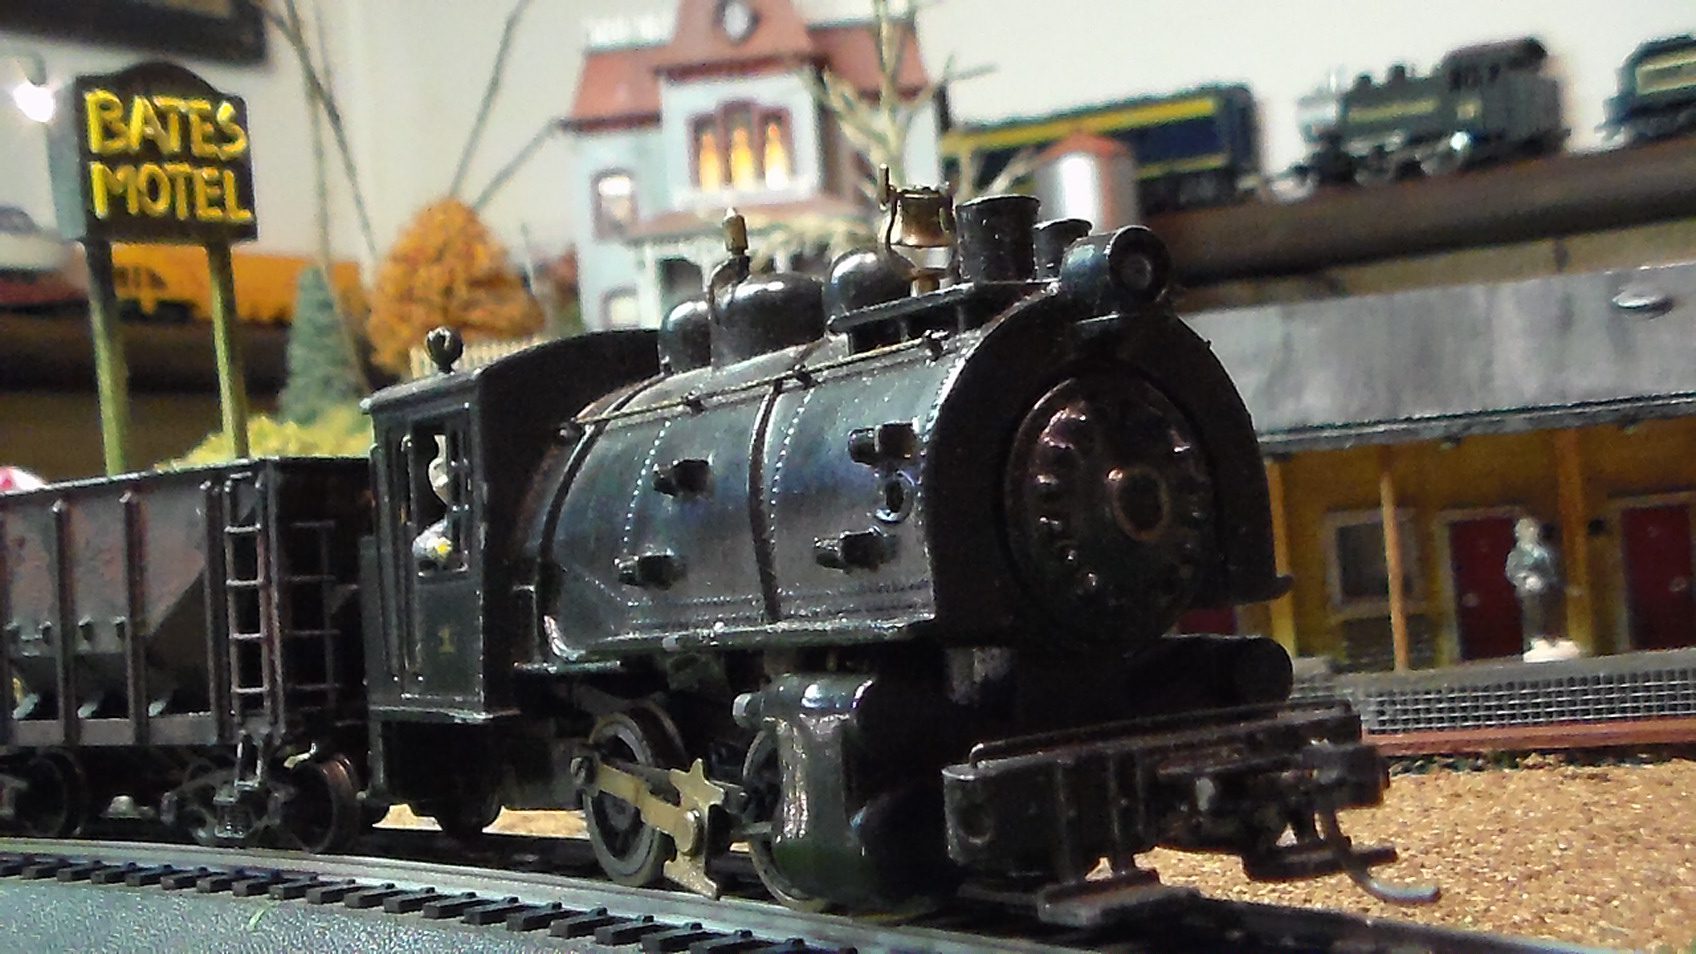
As we scanned the shelves, something caught my eye. Up on one of the higher shelves was a model that stood apart from the rest. “I can’t believe it!” I said aloud, as I nudged my daughter, (she hates that and I should know better by now) and brought her attention to my amazing find. Her annoyed expression quickly turned to glee when she spotted it, the “Bates Mansion” from the horror film classic “Psycho.” The model was beautifully built, (from a kit manufactured by Polar Lights) and hand painted. It sat on a patch of land covered with grass, trees, and shrubbery. It was evident that the modeler put much care and effort into the project.
You could tell it had been hastily cut out of his layout. There was chipped plaster around the edge of the base, wires hanging, and benchwork remnants. It was awesome, but it needed work.
Being a big fan of the film PSYCHO, the “Bates Mansion” was something that Darien (believe it or not) had planned to scratch build in the future. We were surprised to see it there, as we had no idea that a model kit even existed. We were most interested in purchasing this unique item. The shopkeeper gave us a great deal. We were more than pleased with our new acquisition.
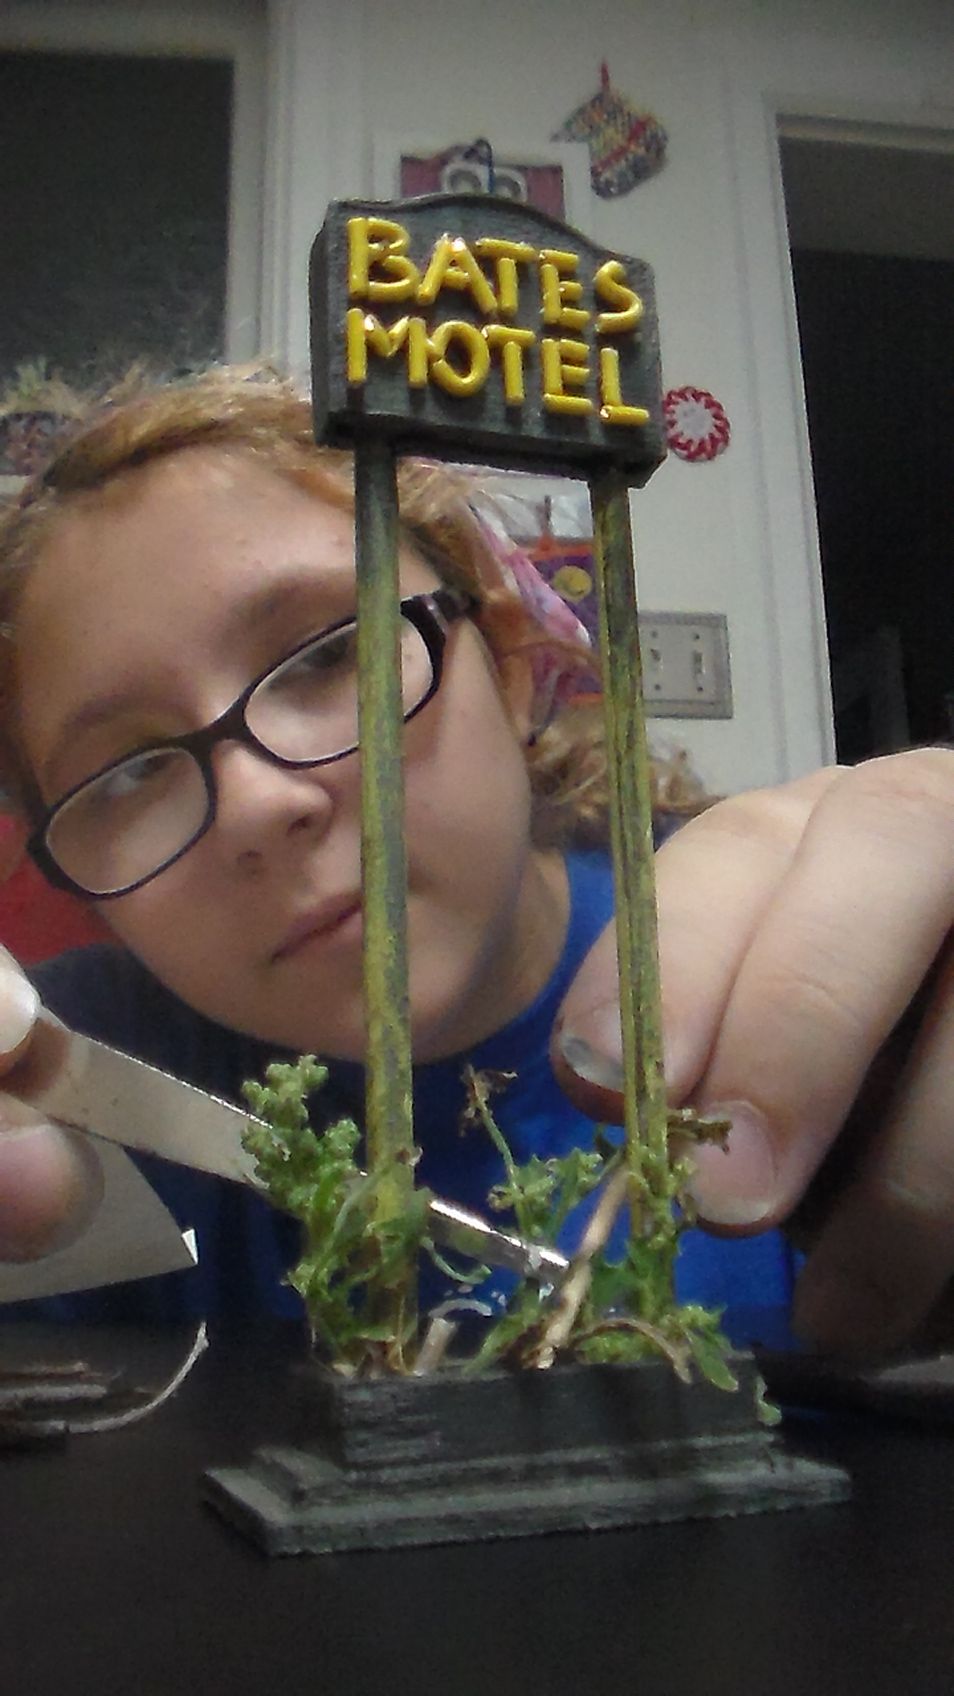
Now that we had the Bates Mansion, all that was needed was the iconic “Bates Motel”. There are no “Bates Motel” model kits on the market, but upon searching the web, I found that other modelers used Plasticville motels to accompany their Bates mansions. I mentioned this option to my daughter and she laughed. “No dad”, she said dismissively, “I’m going to build this one.”
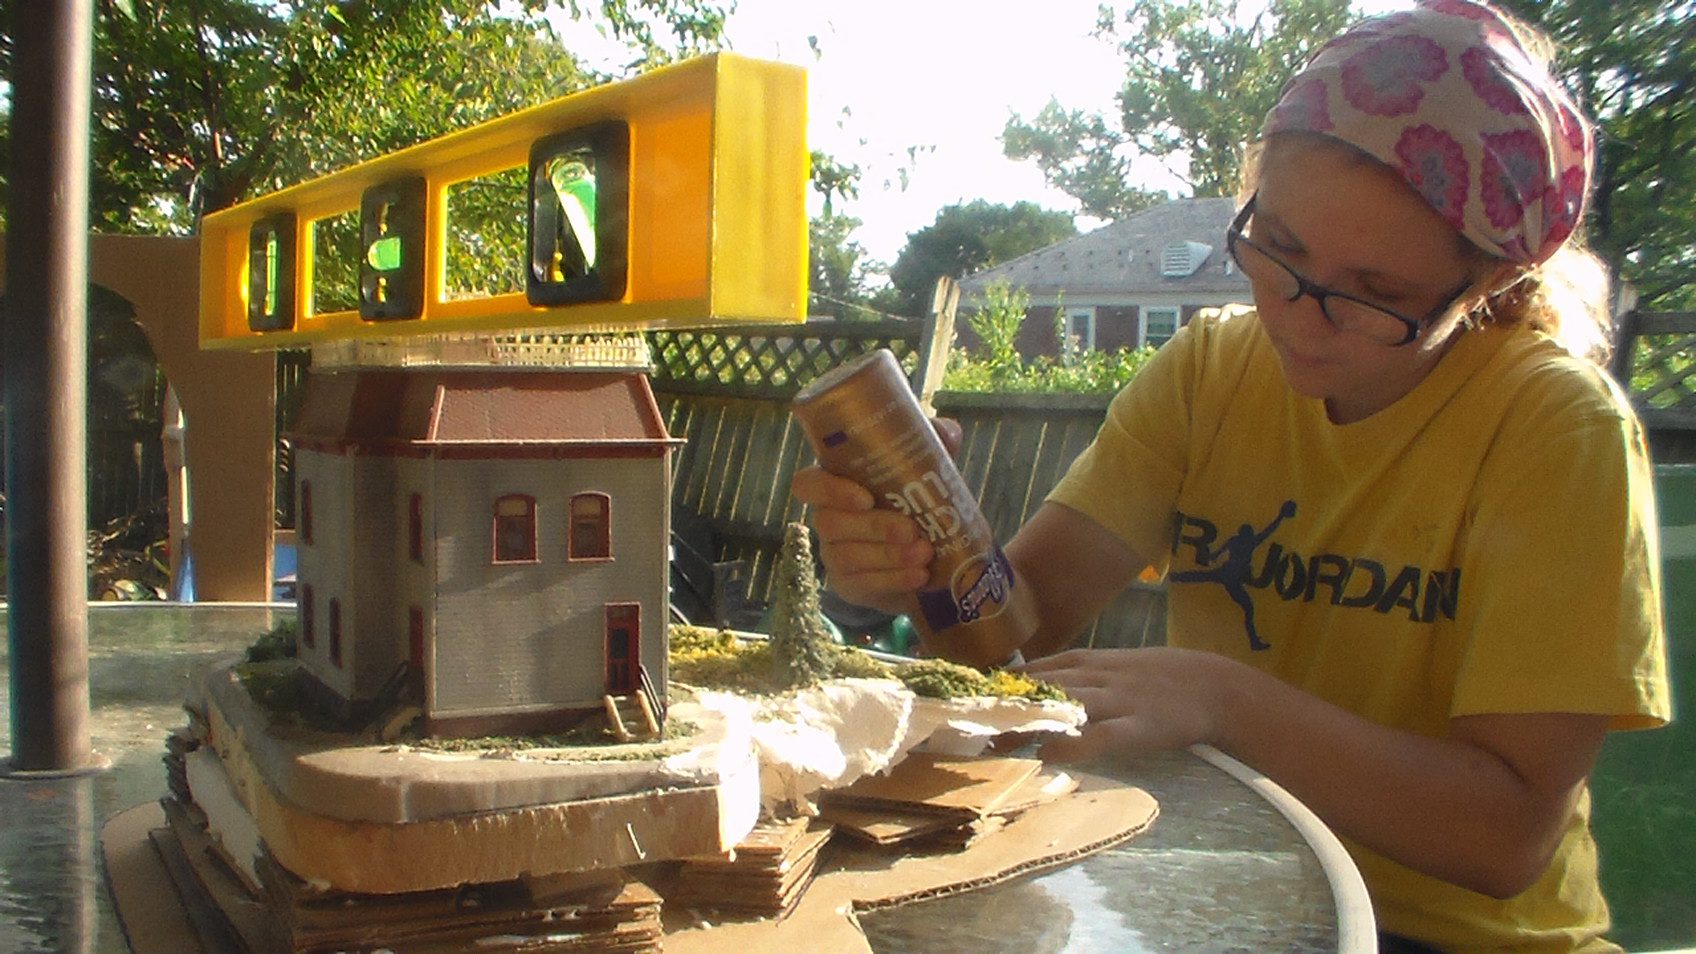
Before she started the Motel, she set to re-building the tattered base of the “Bates Mansion”. She used one inch strips of hand cut cardboard to make a basket weave structure, and incorporated thin plywood and foam for stability. She used a level throughout this project to ensure the mansions even perch upon the hill. When the structure was sound, she covered the hill with torn newspaper dipped in her own home made plaster mix. When the hill was smooth and dry, she painted it green. She then sculpted a precarious flight of stairs that would serve well enough to lead Norman home. After that, she peppered the hill with moss, sand (sawdust), and a blend of faux and real trees. She created a beautiful fall landscape that she then decorated with tiny pumpkins that she sculpted and painted herself. I must say, it was positively stunning!

With the mansion “layout ready”, my daughter prepared for the motel build. Being a model railroader, and being named after the legendary Hitchcock, I wanted in on this project. I gladly offered to lend my daughter a hand. Unfortunately, Darien finds me to be a bit impossible (annoying) to work with sometimes, but she reluctantly obliged.
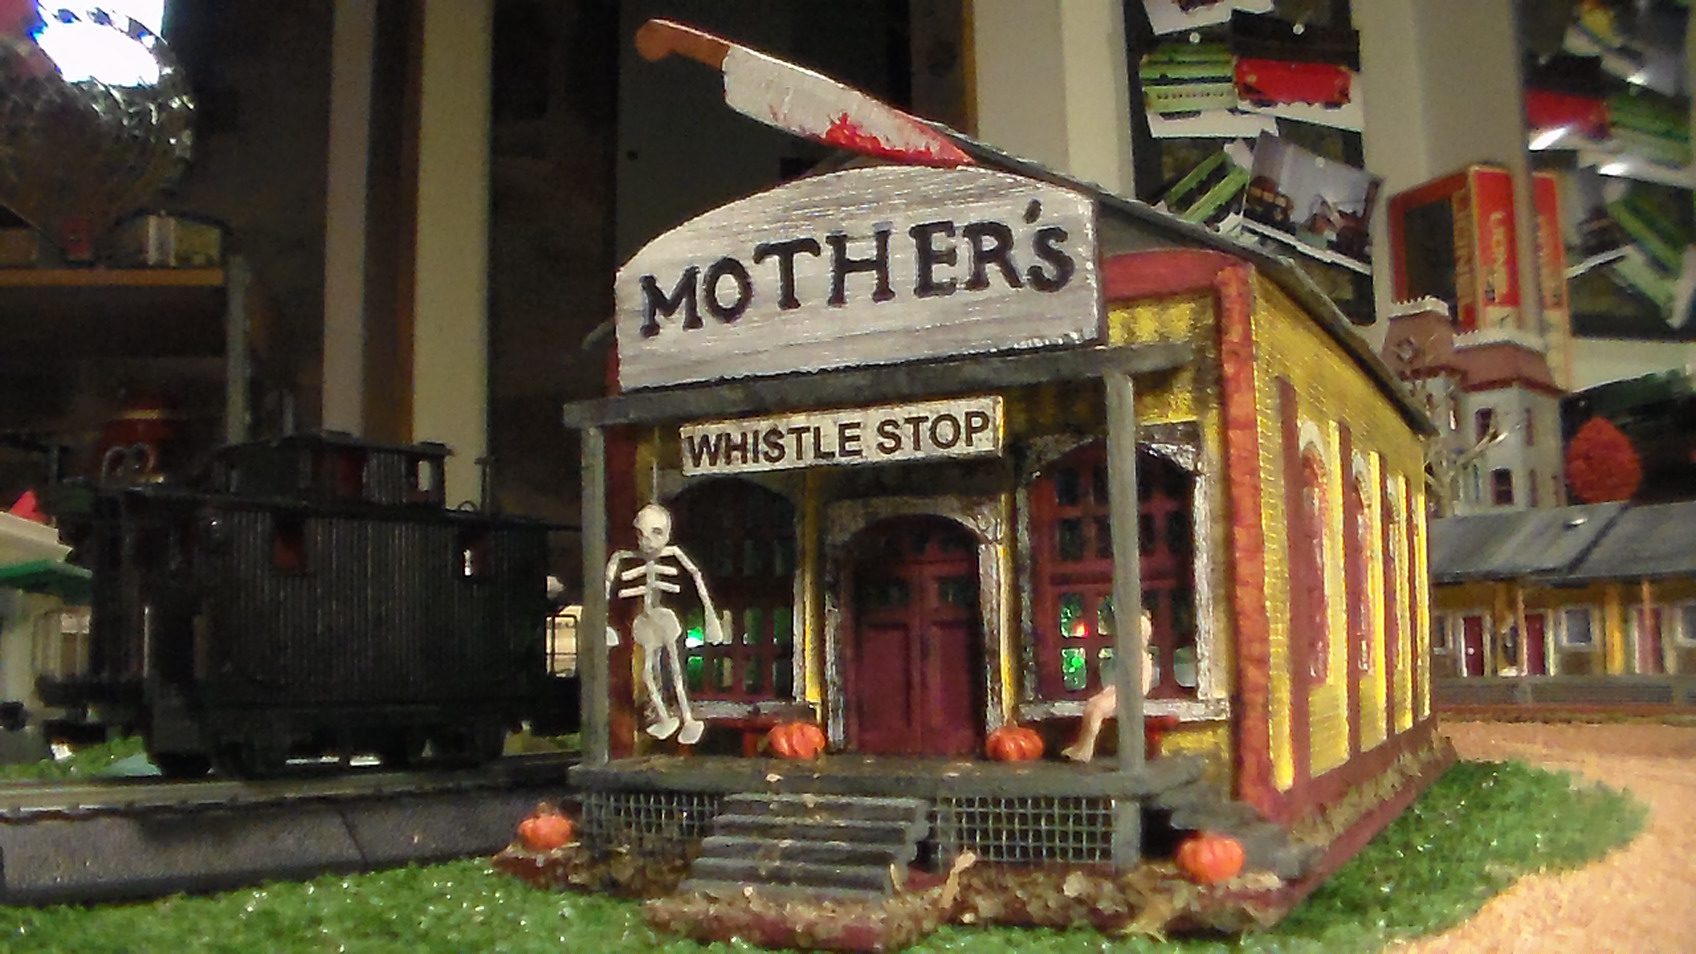
Much of the needed supplies were already in our basement. Plywood, cardboard, glue, and paint stood at the ready. We purchased tiny strips of molding and coffee stirrers from a craft store for good measure. Browsing pictures of other Bates Motel attempts, I noticed that most modelers kept the structure a solid “L” shape, making the motel one piece. The actual prototype is split, with a breezeway between the buildings. The two buildings are slightly staggered to create space for a back patio. The buildings are connected by the roof, porch, and foundation. The roof in turn, shades the patio, (which is a great place to relax and dry off after a shower). The breezeway is very important, without it, you can’t have the accurate amount of rooms, which are twelve “cabins” and an office. Another detail overlooked by other builders is the way the roof and porch are designed. The original motel is built on a slight incline, so to make it truly PSYCHO; you have to have the tri-level roof with a gradually descending porch.


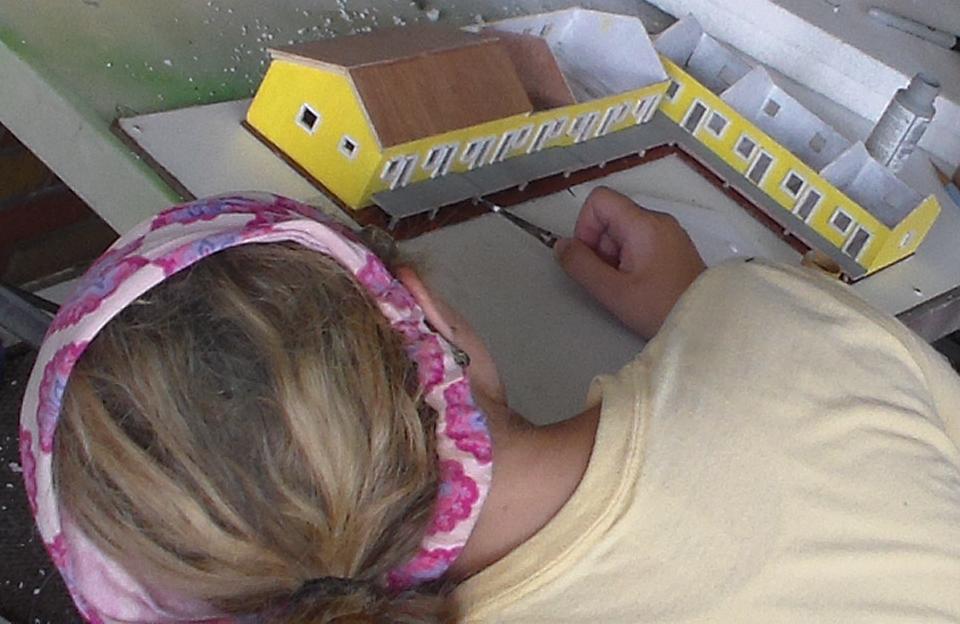
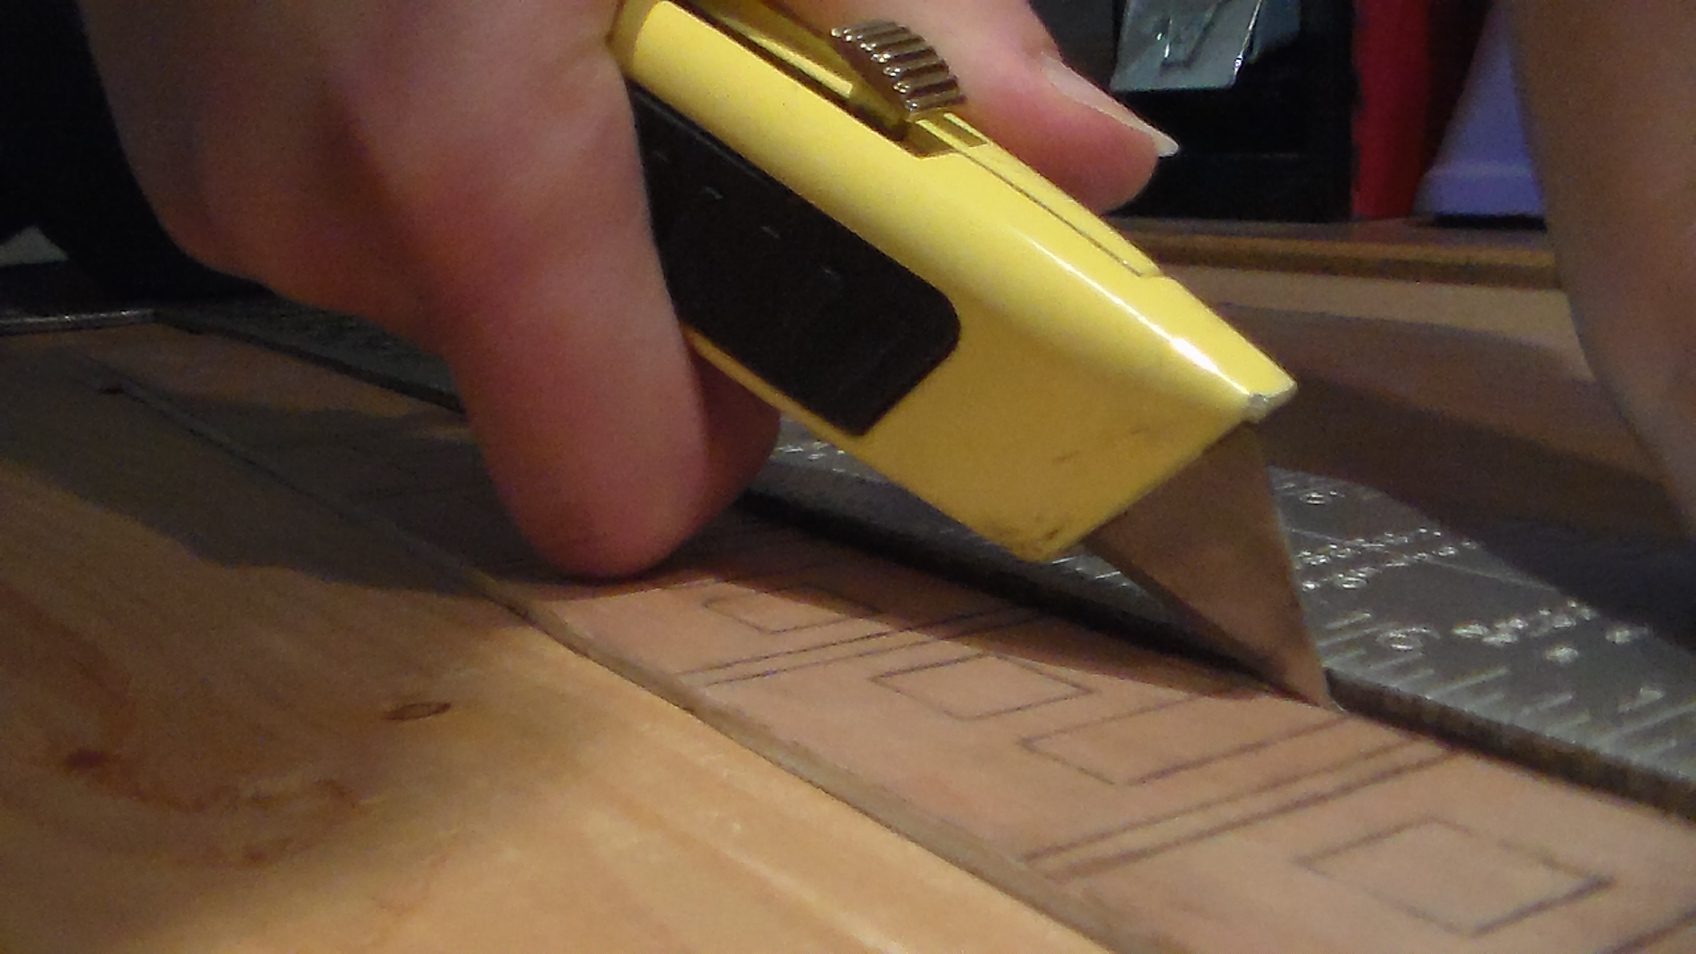
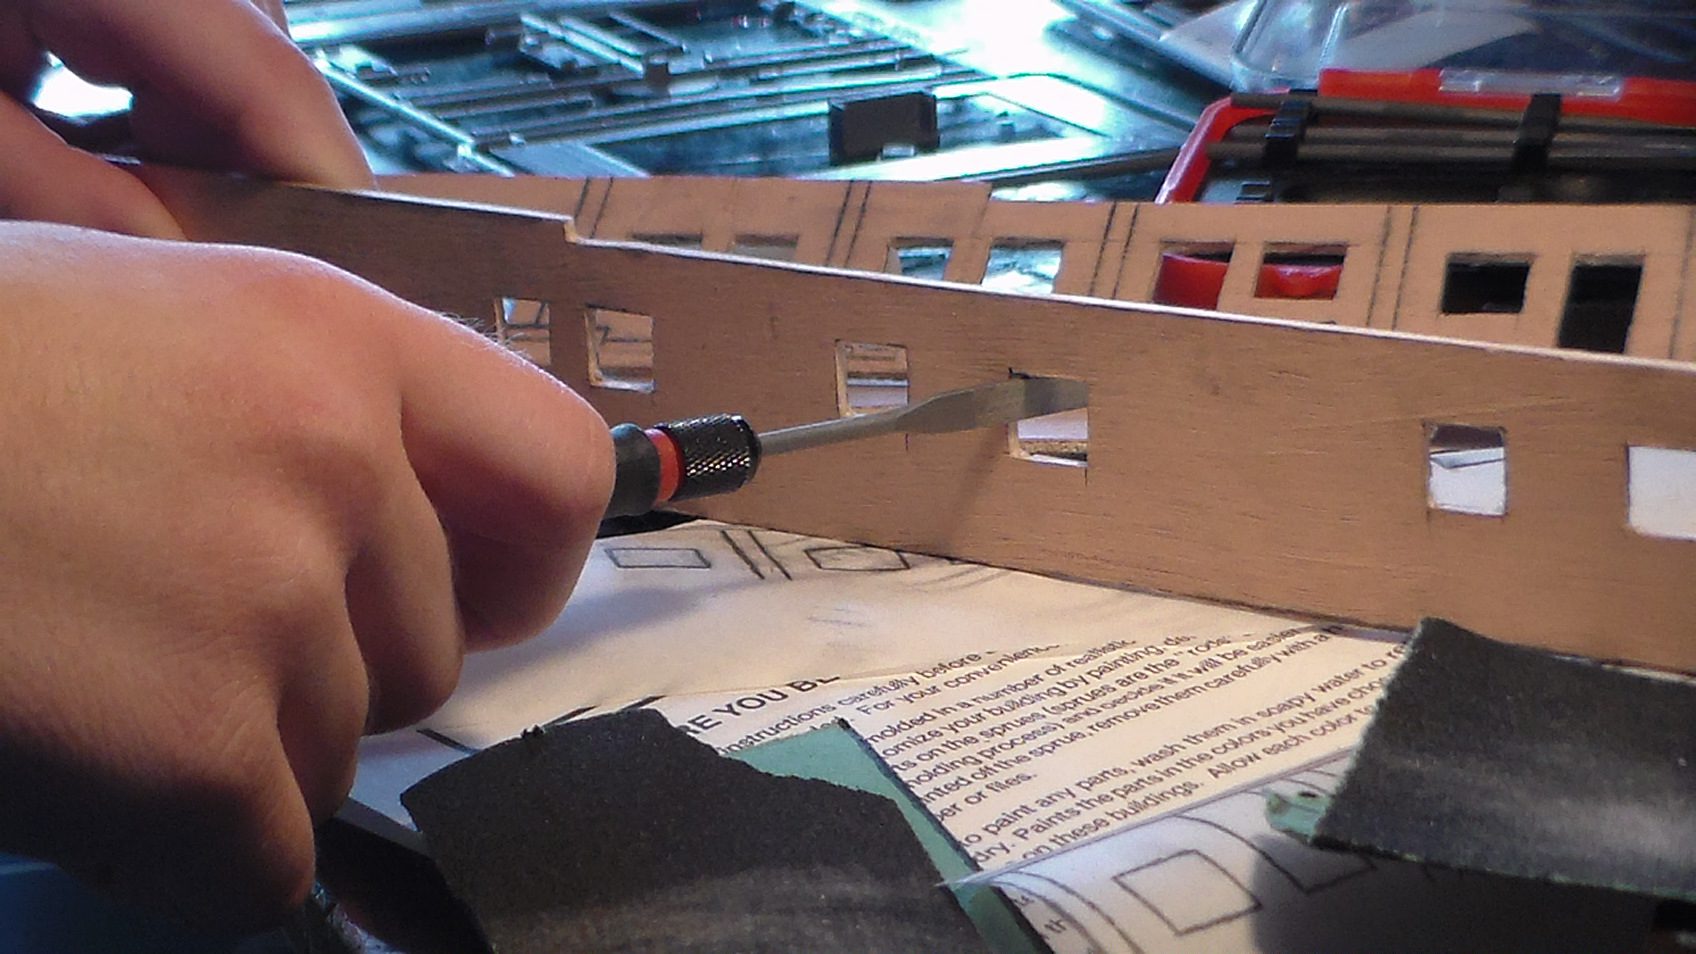
Though Darien and I were confident we could build an accurate Bates Motel just by studying the film, I was fortunate to find the motel’s floor plan on the internet. The floor plan served as an invaluable tool. I started by making a template using my computers archaic “paint” program. I outlined where all of the doors and windows should be, and the height and width of the front and back walls. After I printed out the template, Darien traced it using a pencil and parchment paper. She then taped the parchment paper to a thin sheet of plywood, and transferred the design by rubbing it with a nickel. The bare wood accepted the pencil lines perfectly. After that, I assisted her in cutting out the walls, doors, and windows with a utility knife. I am a bit more cautious using a knife than Norman Bates, so no blood was shed on this project.

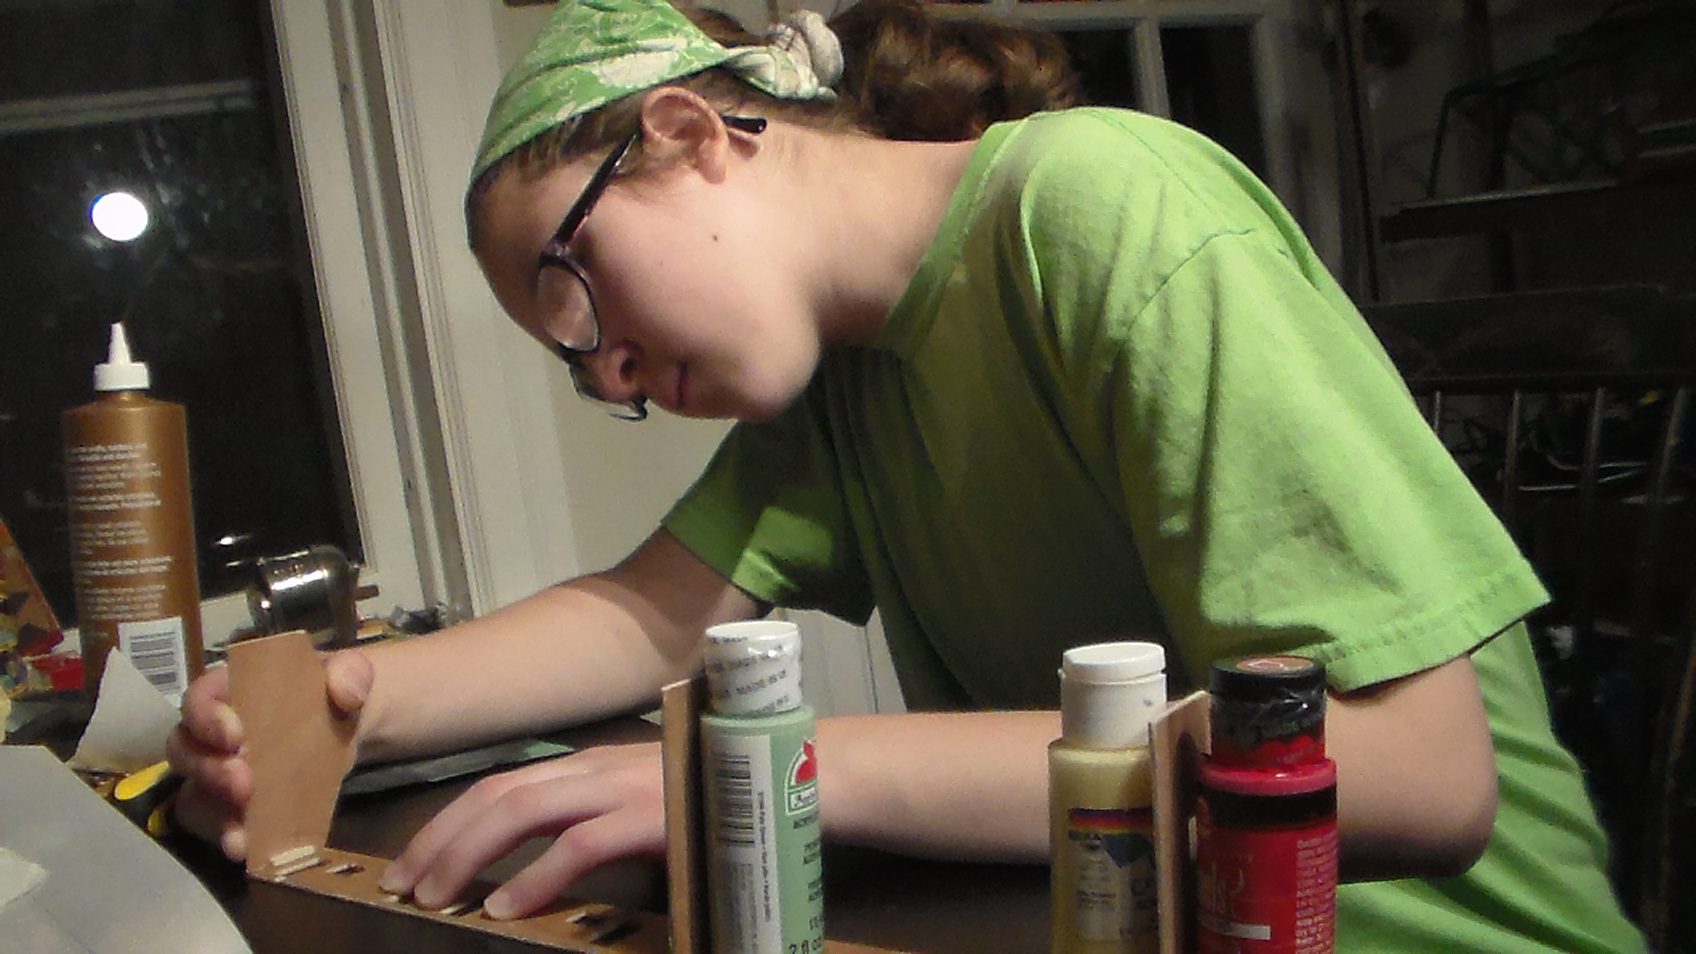
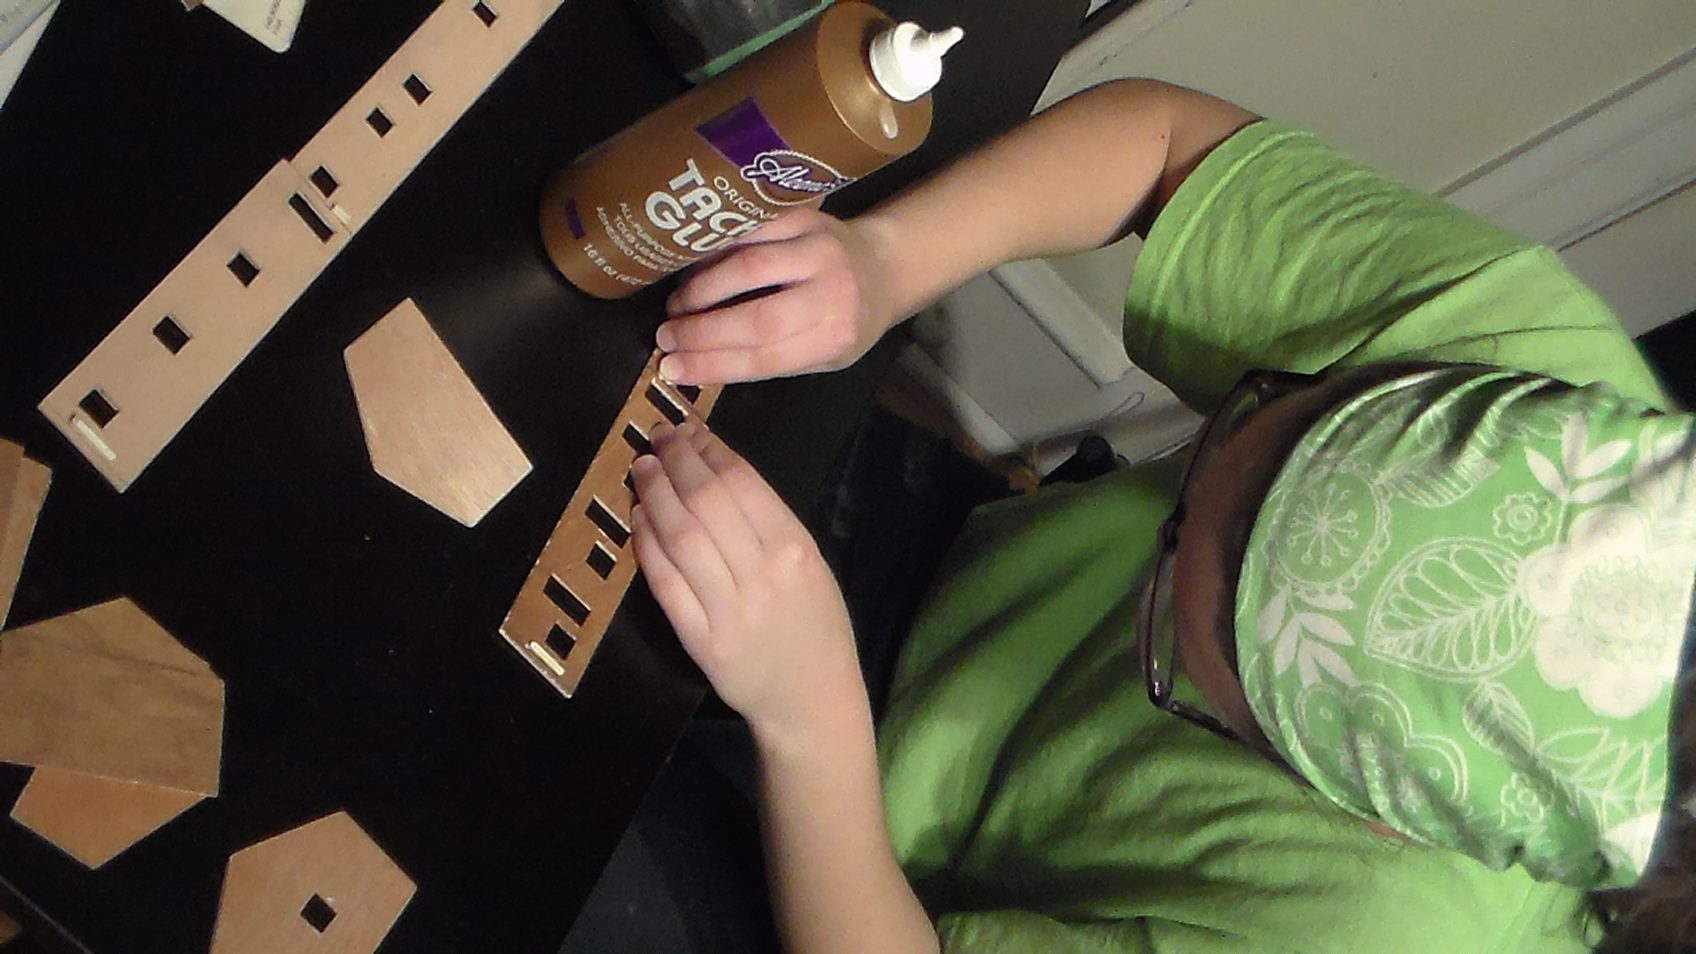
Over the next few days, the build progressed nicely. We measured and cut four side gable walls from plywood, then glued all 8 of the walls together corner to corner. We glued vertical beams into each corner for support. Throughout the structure, we added floor beams and joists made from pine and bamboo, keeping it code. When we were done with basic construction, Darien primed the wood, and painted it a cheerful yellow. Mother loves yellow. It was with great patience that Darien trimmed out and painted all of the windows and doors. After that, she weathered everything with a crude brushing of Minwax stain, she then cut out clear plastic for the windows, and added curtains. I’m so glad that my daughter has the perseverance to sew up those tiny details, I sure as heck don’t. That’s the beauty of being a “helper” on a project like this, you can kind of pick and choose your jobs. My interests lie in tackling the motel’s distinctive roof and front porch.
I did the roof in sections, just as the real motel was built. The roof that shelters the office, rooms 1, 2, & 3, I made this section to be removable. I built it using durable thin plywood and framed it out with wooden beams. Working left to right, the second roof segment I used medium gauge cardboard dropped roughly 2 centimeters. For the rest of the roof I used lighter cardboard. Overlapping the wood and cardboard was a simple way to give the roof its grade. I’m no roofer, due to my acrophobia, but I was happy with the results.
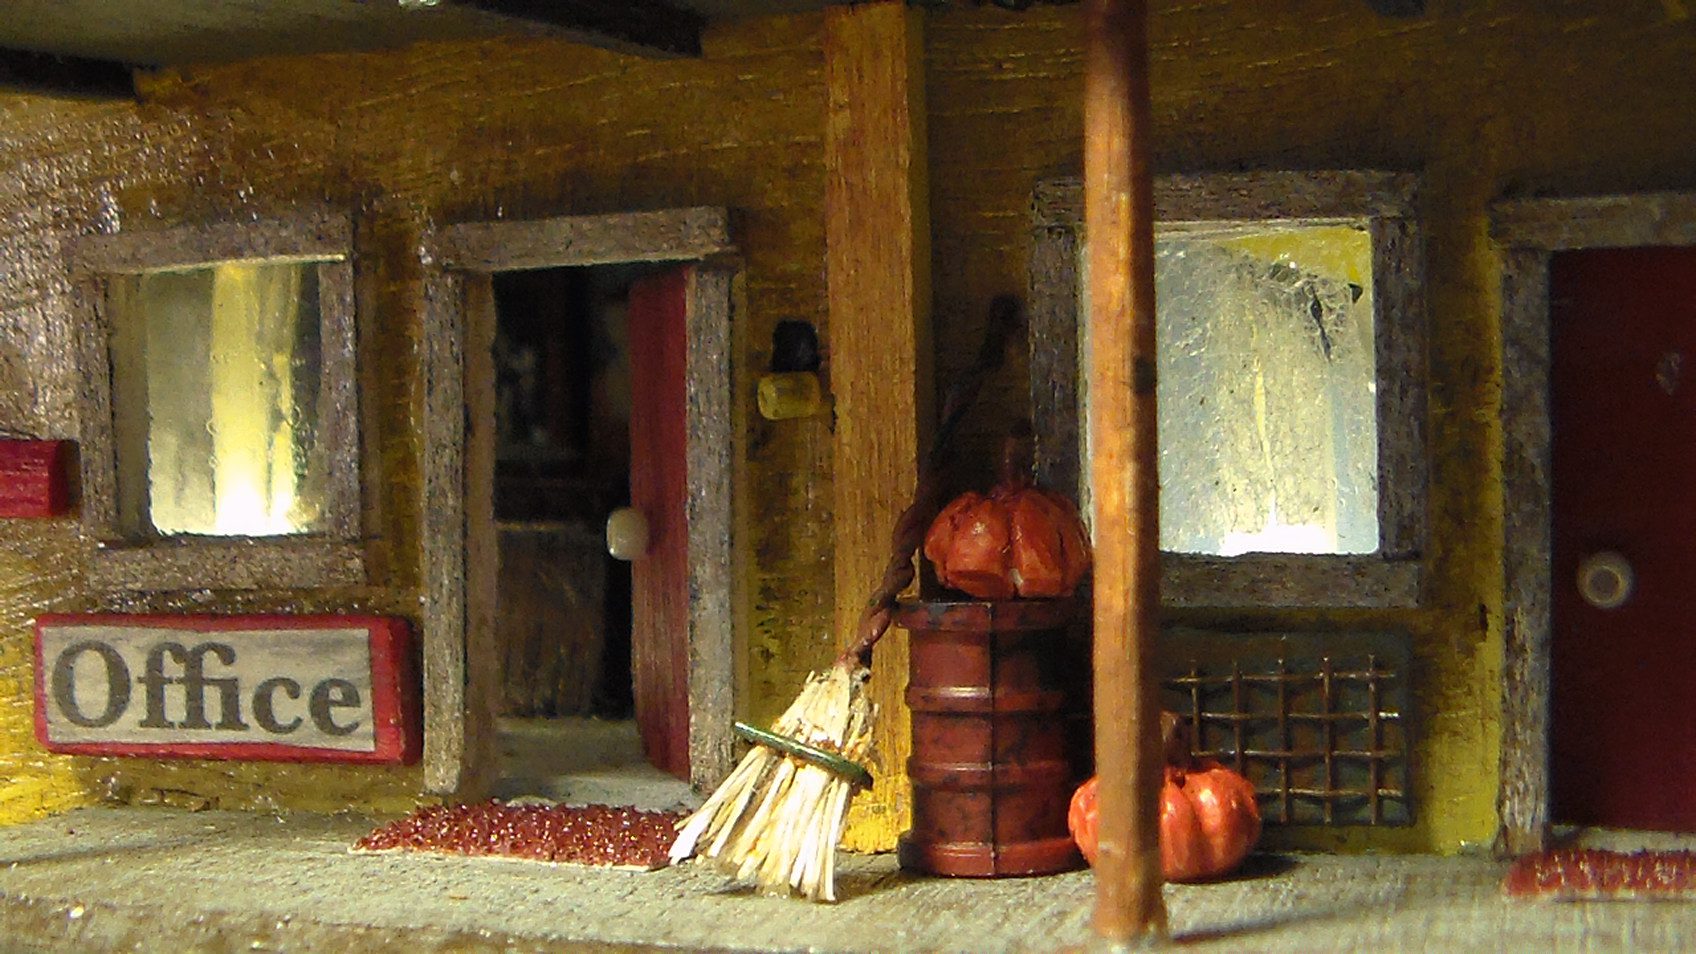
After the roof was in place, I added the porch and overhang. The porch followed the same principle as the roof, having a three level grade. We cut up some matchsticks and toothpicks to serve as our porch posts and pillars. Mostly all of these fabricated parts were painted and weathered before assembly.
Now that the bulk of the construction was complete, my daughter and I started in with the fun details. Tiny beads did the trick for simulating door knobs and porch lights. Darien modified and painted old Plasticville figures that would represent Norman Bates, and his unfortunate guest, Marion Crane. The two figures were then situated in the motel’s office with a “reception” desk. We completed the office scene by adding a ledger and a wall key holder. Just under each window of the motel’s exterior, we placed built in electromechanical cooling devices (air conditioners), made form cardboard and screen. Darien found a Plasticville person who looked like Hitchcock. She painted him, and placed him on the porch so that he can oversee the operation.

We continued to detail the exterior of the motel by adding lattice (painted metal screens) to seal the openings under the porch. I hand painted all of the room numbers while Darien crafted a straw broom to lean just outside the office door. We found that course sandpaper cut into small rectangles made excellent doormats. My daughter also added trash cans, and a few more of those cute little pumpkins. Being a motel, an ice machine was necessary, so I built one using coffee stirrers and the thin cardboard from a cereal box. Darien made a soda machine for the back patio in the same fashion. For extra detail, we added some embellishments to the roof, like chimney vents and a crawlspace hatch. We made a nice little sign for the place, and then added lights to the motel and house.

With the scene in place on her layout, Darien added more moss around the bottom edge of the hill. Also, she completed a dirt (sawdust) parking lot and foot path leading from the motel to the steps on the hill.
The build was complete, but there was one detail missing; a 1957 Ford Custom to sit in the parking lot. The Ford Custom was the movie car in which Marion Crane rolls up to the Bates Motel. I contacted a friend who deals with slot cars; he told me that he had never come across one. I checked the internet, and to my surprise, didn’t find what I was looking for. At this point, I was desperate, so I took a trip with my family to a store that I try to never go, Wal-Mart.

Wouldn’t you know it, there was the 57′ Ford waiting for me in the toy aisle, only one left, of course. It was however, not the right color. The one in the film is white, and the one I found was 2 toned brown. Fortunately this little car, manufactured by M2 Machines, was designed to be easily disassembled. We brought the car home, took it apart, and sprayed the shell with Krylon white. When it dried, I gave it a bath of black water color to dirty it up a bit. I then painted all of the silver pin-striping and door handles. Darien re-assembled the vehicle and added rhinestone headlights to catch the light. We placed the custom Ford in the parking lot in front of room one and there it was, Marion had arrived.
Smiling ear to ear, my daughter and I could officially say that the Bates project was done. We darkened the train room and hit the switch to illuminate only the Motel and mansion. The place looked magnificent. It just came alive with color, light, and shadows. It was creepy, as it should be, but the pumpkins made it a bit more welcoming.
This build was great fun. Hopefully my daughter enjoyed working with her father as much as I enjoyed working with her. Taking a scene from a movie and making it 3 dimensional on your train layout is pure magic. It is with a great sense of accomplishment that we got the Bates Motel up-and-running and ready for business. Although, I wouldn’t recommend staying there, as the rooms are a little small, and the owner is a bit strange.


