Will It Run? Pt. 2
by Bradley Kaplan
follow up to Will it Run? Pt 1
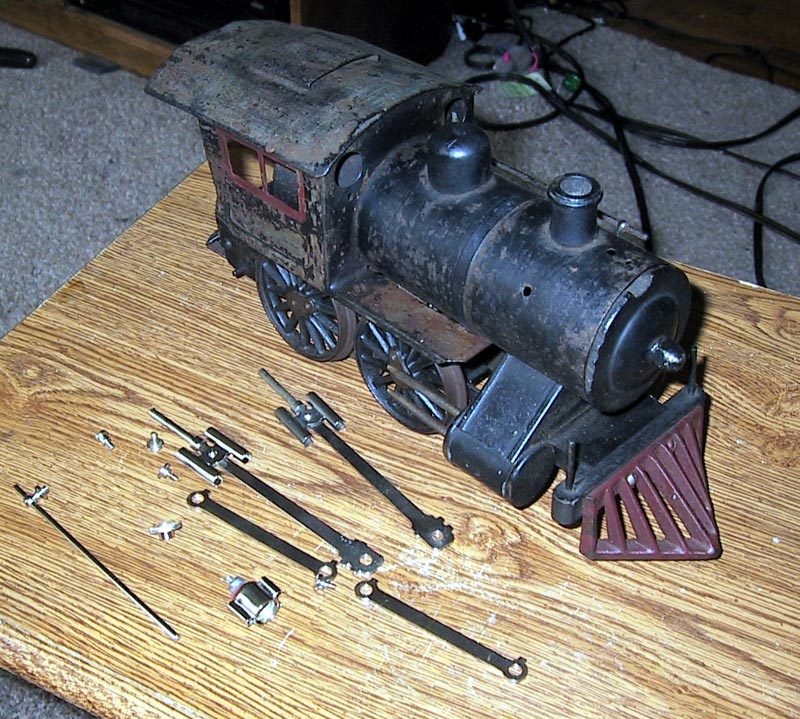
As the photo and the story went from the previous article, this engine was in sad shape.
First I would like to thank Joe Mania of JLM Trains who helped me with this project and endured too many phone calls of mine. Since Joe makes repro of this engine he knows it inside and out and his help was necessary to accomplish this project. Luckily for me after I bought the JLM Trains repro #7 that I reviewed, I became good friends with Joe.
The first thing that needed to be done was to disassemble the engine.
The 5’s cab has a long rod that runs from the knob on the boiler front (which had a hexnet) through the boiler into the cab. I unscrewed the hexnut, threw it in the garbage (since the proper piece for the front was the knob that Joe Mania gave me.
The cab/boiler then detached from the frame by removing 3 screws. The front screw also held the steam chest in place.
Then from here the cab and boiler just separate. The whistle and smoke stack on the engine are wood and get removed by removing screws from inside the cab.
What I learned quickly was that the owner who repainted the engine disassembled it as well. They carefully painted the boiler, the frame and the steam chest and the wheels.
The first thing I did from here was fully disassemble the steam chest. The steam chest is part wood and part metal. It looks like the previous owner disassembled the train in this manner.

At the recommendation of Joe Mania, I used “Citrusstrip” as my paint stripper. He said this stripper is particularly effective on the boiler because it will remove the black paint and keep the Russian blackening.
Paint stripper always seems to require a lot of scrubbing. Make sure you wear gloves. I used the paint stripper on my roof but initially neglected the glove part! My hands became numb for a day. Never again will I make this mistake.
After disassembling the steam chest I stripped the paint pretty easily with the Citrusstrip. I also found the previous owner painted all the screws. So I had to remove the paint from the screws as well. A photo is included of the steam chest painted and half disassembled and then reassembled after cleaning.
The steam chest did not come out looking 100% brand new, but it shows is 95+ years of age very well.
The next step was to removed the motor from the chassis since it did not run. Interestingly the chassis was painted black and the motor was not painted.
So the previous owner who painted it removed the motor.
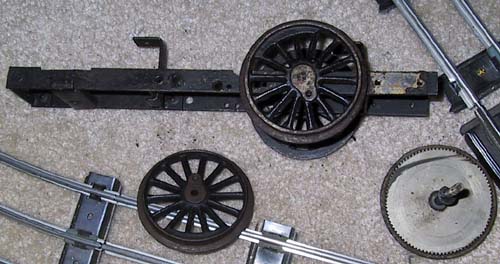
Interestingly the previous owner never properly attached the wheel onto the powered axle and it just twisted off.
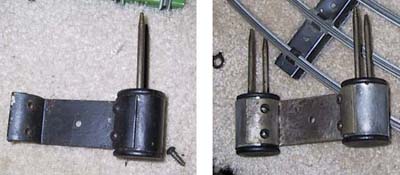
The cowcatcher just came off with 2 screws and the reversing unit came off with 6 screws.
Joe recommended that I leave the whole chassis, and wheels in Citrusstrip overnight. I did this and then took a rag with lacquer thinner and the paint wiped right off the chassis. I used a rage with lacquer thinner almost like buffing a shoe. The paint came very easily off the frame and drive wheels. I used this same technique for the boiler.
The plating on the frame was slightly tarnished, but not that bad for its age.

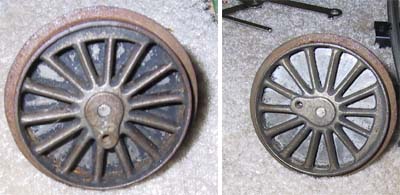
One one of the wheels, a gear is attached to it. A challenge was to remove the paint on the gear since it was literally under the wheel.
This process ended up taking over a week with soaking it in lacquer thinner and Citrusstrip, sticking Q-tips into the wheel, etc etc etc. There is a photo I included that shows the wheel partially clean and then fully clean of paint.
There is a nickel band that runs around the boiler. This band was difficult to get shinny. It is very fragile. I finally wrapped it around a metal can and used my Dremel’s polishing wheel. The band would have gotten very hot if I did not wrap it around the metal can. The can absorbed a lot of the heat from the fraction between the Dremel and the band.
I put the cab back together so I would not loose the parts. I took a photo to show how it looks. It does not look brand new, but looks much better and is original.

The next step was to work on the motor. This motor is one of Lionel’s earliest designs, but works similar to mostly all Lionel motors made in prewar and postwar designs. The field coil is grounded on one end, and then the other end of the field coil is hook to a brush and the other brush is hooked to the positive current.
Though the armature has a completely different winding then latter Lionel designs. However looking at the armature I saw the wires were not attached to the commutator. And one of the wires was broken. Simple enough. I re-soldered the wires onto the armature, and then soldered the broken wire to the commutator as that is where it belonged.
I put new brushes into the motor and ran it. It ran fine for a minute, then started getting very hot, then I watched liquid globs of solder go flying off the armature! I re-soldered the leads and had the same thing happen. After 3 times I realized something was more seriously wrong with the motor.
Knowing that Joe Mania builds identical motors to this for his repros, I put the motor it in a box and sent it to Joe. Joe received the on May 24th. I sent him an e-mail to confirm he received it and the next day I received the following e-mail from him:
From: Joe Mania JLM Trains [mailto:[email protected]]
Sent: Friday, May 24, 2002 9:05 AM
To: Bradley Kaplan
Subject: RE: Did the box arrive?
Yup, got it.
I’ll mail it back out tomorrow. Rewound the armature. There was a short to the shaft and internally on the commutator.
Joe
—–Original Message—–
From: Bradley Kaplan [mailto:[email protected]]
Sent: Thursday, May 23, 2002 7:09 PM
To: ‘Joe Mania’
Subject: Did the box arrive?
UPS shows the box arrived I sent…
I just want to confirm it did.

That is true service. Within less then a day of Joe receiving the motor, he rewound the armature and sent it back to me! The motor photo is how it came back from Joe.
The next area I concentrated on was the reversing unit. The reversing unit has 2 rings. An outer ring with brass clips and an inner wring with more pieces for the brass clips to rub against and make electrical connections.
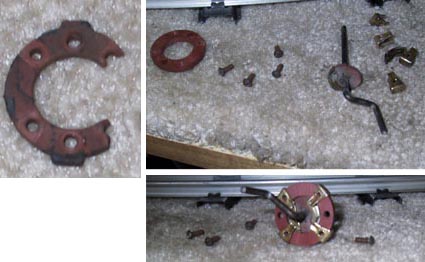
The outer O-ring was broke when I took the engine apart. Looking at it carefully it looks like the previous owner glued it back together. Luckily Joe Mania make this piece for his engines and sent it to me in the mail and it is a perfect match for the original. I used my Dremel to polish up all the small brass pieces for the reversing unit. During this process one of the polishing wheels on the Dremel broke and the small microscopic piece from the reverse unit flew across the room! Luckily, and I do say “luckily” I quickly found where the piece landed!
I easily reassembled the reversing unit around Joe’s new outer reverse unit. It works perfectly.
Hopefully in the next installment this engine will be running!


