Rare Variation, One-of-a-kind, Fake, Fraud Or A Madison Hardware Find…?
…and you can do it yourself!
By Bob Mintz
Before I lived in Battery Park City across form the World Trade Center, I used to live in another interesting part of Manhattan, that being the Greenwich Village area.
Around the corner from my office, there were three (count ‘em; three) train stores on 45th Street between 5th and 6th Avenues at one time. A client of mine was located near the Empire State Building, and of course, lunchtimes were spent at Polk’s Hobby.
As an accountant, I had several clients “uptown” and would frequently walk home to avoid the often-crowded NYC subway system. Upon my journey home down Park Avenue, I would start to feel this mysterious magnetic pull as I was between 24th Street and 23rd Streets. Of course I am talking about Madison Hardware, the holy grail of train purchases.
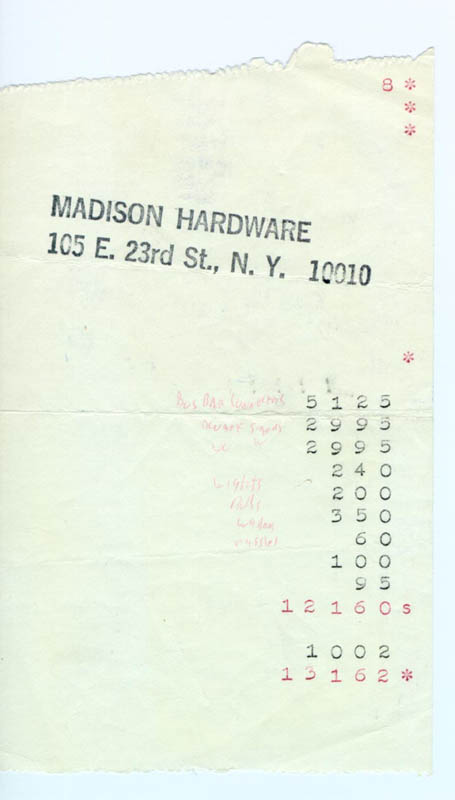
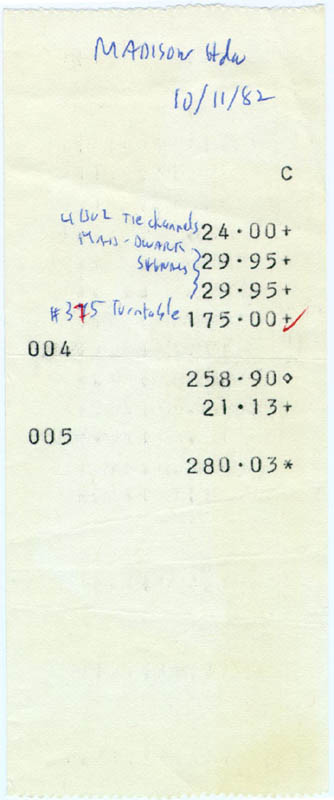
According to my records on October 4, 1982, I purchased some bus bar connectors (for my Super-O track); various bulbs, lights, washers, missiles and two “special” dwarf signals ($29.95 each) that were displayed on the counter. I remember being so impressed with these larger, albeit not to scale, dwarf signals, that I returned the following week to purchase two more of these signals. As the receipt clearly shows (busted!), I was so in the train-spending mode, that I also picked up some tie channels for the trestle set and a mint in the box # 375 Turntable (for $175). This turntable is forever ingrained in my mind, especially since the day I hurriedly slid across my bed to answer a phone call, and fell into the corner of the wood base that I built for this accessory. The dent on the top of my head to this day pays homage to my purchases on that solemn day.
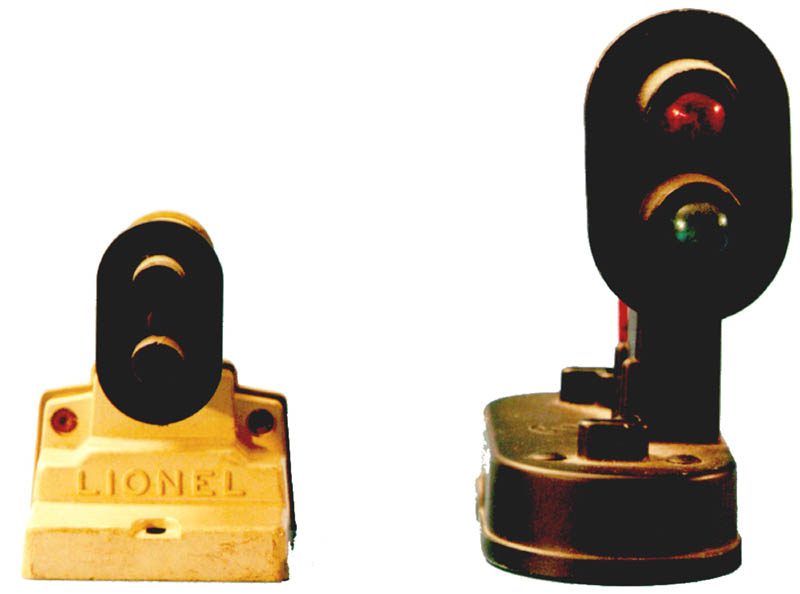
The original dwarf signals are, well, dwarfed, not for a better word, by the one that Madison Hardware built out of common Lionel parts that are readily available today. Not wanting to keep this to myself any longer after all of these years, I am now willing to not only share with you my special find, but will also give you detailed information so you can make your own real live customized Lionel “Frankensignal”.
I will be using the Greenberg’s Lionel Service Manual as a reference. Obviously, with recent re-issues of some of these pieces, newer and less expensive substitutions are readily available.
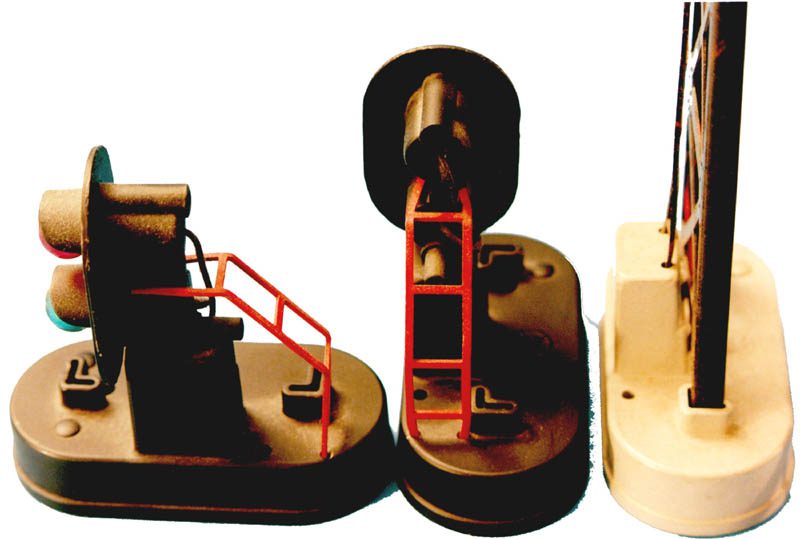
Basically, we will be using the following orphans; # 153 Block Signal, # 151 Semaphore and #450 Double Overhead Gantry Signal, or heaven forbid, a # 452 Single Overhead Gantry Signal.

The first part that we need is the base assembly part # 450-51 or # 452-14 as mine was. No wonder there are so few of these to be found at York! It should be painted a flat black matte finish. Two small holes are to be drilled next to the upside down “L” shaped protrusion at the rear of the base to hold the ladder assembly and two screw holes are drilled to hold the target assembly on top of the small part coming out of the base. Two small electric wire holes for the positive and negative wires are already there. The third or ground wire, is attached to one of the two screws.
The next part needed is either # 153-11 (screw type) or # 153-46 (bayonet type) target assembly. After screwing the head to the base, inserting the wires through the holes, and connecting the ground wire to one of the support screws, the ground wire is soldered to the single clip # 3. The upper bulb is connected to clip # 2, and the lower bulb is connected to clip # 1. For some reason, Madison Hardware put the red bulb on top. You can of course, choose either way.
The final step is to attach three inches of a cut piece of ladder # 151-22 from the semaphore. I suppose that the red color against the black background is a better contrast, although the orange ladder # 153-19 from the block signal will do just as well, or you can paint it red if you like.
The top ladder rung is cut off, so that the ladder is bent around the rear bulb assembly; it is then bent at a 45-degree angle downward at the first rung. At the third rung, it is again bent 45 degrees downward, and the fifth rung is cut to open up that part, which is inserted into the two holes next to the backwards “L” shaped protrusion on the base, and then bent inwards to hold it in place.
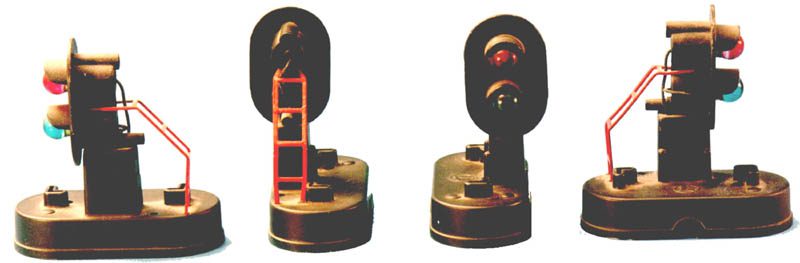
Seems easy enough, considering that I bought this item already pre-assembled by “the pros”. But theoretically, if you follow my directions, as well as review the photographs, you should be able to do this project and get a rather interesting looking trackside signal.
Although the “real” # 148 dwarf signal may be more prototypical, I believe that this one will be more visible on your layout.
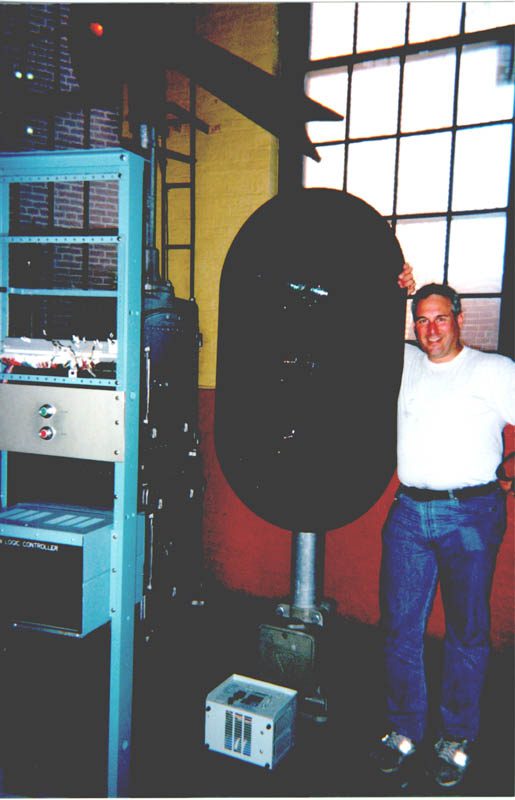
So impressed by my “find”, the B&O Railroad Museum even built one of their own.

Have I discovered yet another unknown Postwar motorized unit either built by Madison Hardware or found in the Lionel archives? Tune in to the next issue of E*Trains for the answer!


