Build an Overhead OPERATING Layout!
By Bob Harder – TCA 11-66091 [email protected]Fall 2017
Editor’s Note:
This outstanding article brings to mind the overhead trains in the Wegmans markets that we recounted in the last issue.
We’d hasten to add that Mr. Harder’s work is much more precise, with great practical suggestions!.
Many of us have been in restaurants and “fine drinking establishments” where a model train was zipping along in a large loop around the top of the walls or suspended from the ceiling. Typically these trains are fairly large so they can be seen from below. G-gauge (think LGB or Lionel Large Scale) or Lionel Standard Gauge are the most popular sizes for these elevated railroads. I often thought to myself, “Wow! That is so cool! I wish I had room for one of those in my house …. “
When I got back into our beloved model train hobby in 2009, I staked out the computer/office room in our house as the perfect spot for a modest model railroad, starting with the ever-traditional 4-foot by 8-foot layout and a single loop of Lionel FasTrack. In a couple of years, it grew into a 12-foot by 12-foot “L-shaped” railroad empire with switches, buildings, lights, and lots of operating accessories. Soon a dozen tracks appeared on shelves along the walls, each carrying their own engine and car consists just waiting for their turn to “run the loops.”
Using easy and fast-to-rearrange Lionel FasTrack, I change my layout around every couple of years for variety and fun. As I worked on the layout from time to time, I often glanced up to the ceiling and walls, thinking “I wonder if I COULD run a train ‘up there’?” Then one day it struck me: not only COULD I run a train up there, I could fill it with lots of operating accessories that would really increase the “action” on the railroad: bells, flashing lights, crossing gates and more! And so I built it … and you can too!
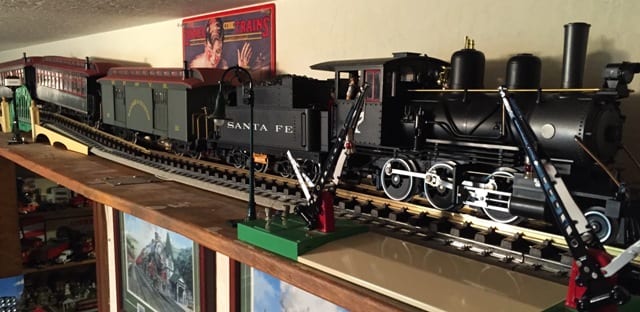
Most rooms are rectangular in shape and this makes an overhead layout very easy to build. In typical Northern California wood-framed homes like ours, ceilings are usually eight feet above the floor and the tops of door and window frames are about seven feet above the floor. This leaves a height of one foot “clearance” for the track and trains – plenty of room for O-gauge, G-gauge, or Standard gauge trains. I alternate between Standard and G-gauge, changing back and forth every six months or so. Both of these large scales are very easy to see from “down below,” but O-scale can also be used if the track is positioned close to the edge of the supporting boards.
Here is the support technique I used. I bought enough “1-by-12” boards to go all around the walls of my 10-foot by 18-foot train room. I also bought a dozen white 9-inch by 12-inch “L-shaped” metal shelf brackets to support the track board around the room. In my case, I painted the brackets to match the wall color but they can be any color of your choosing. I cut the boards to fit the lengths of each wall and stained them to match our brown woodwork. Again, the track board color can be anything you choose.
One at a time, I placed each track board on top of the door and window frames and installed the brackets to match the height of the frames. Using the door and window frames and the brackets, the track board was well supported around the room.

The next step is to place the track. I went to the local train shop and bought enough Standard and G-gauge track to encircle the room. I bought curved pieces with a fairly “tight” radius (2-foot) so the track could better “hug the walls” at the corners. Most Standard and G-gauge engines and cars can easily negotiate such curves. I also picked up a selection of very short straight pieces with various lengths so that I could “fit” the track to the room size. I used MTH RealTrax for the Standard gauge train and LGB track for the G-gauge layout. I placed the MTH RealTrax down first, enabling me to “hide” wiring right under the track bed (RealTrax is similar to Lionel FasTrack in that they both have a wide base of simulated ballast and numerous realistic ties).
When I am ready to run my G-gauge train, I just place the LGB track right on top of the Standard gauge track. The weight of the engines and cars, combined with the slower speeds typically used for overhead trains, keeps the track from moving; a few well-placed nails or screws could also be added if desired. (See photo at top of article that shows the stacking of the track.) For power, I used a Lionel CW-80 80-watt transformer.
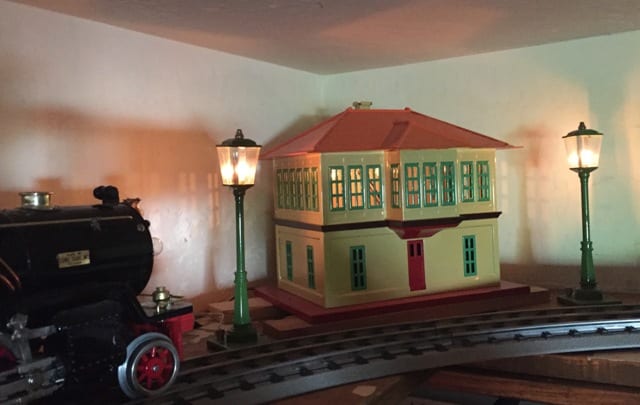
To add some interest to the layout, I next added a variety of Standard Gauge bridges, buildings and lights. For the bridges, I started with a classic Hells Gate bridge. Its 11-inch height just fits within the track for top ceiling clearance.
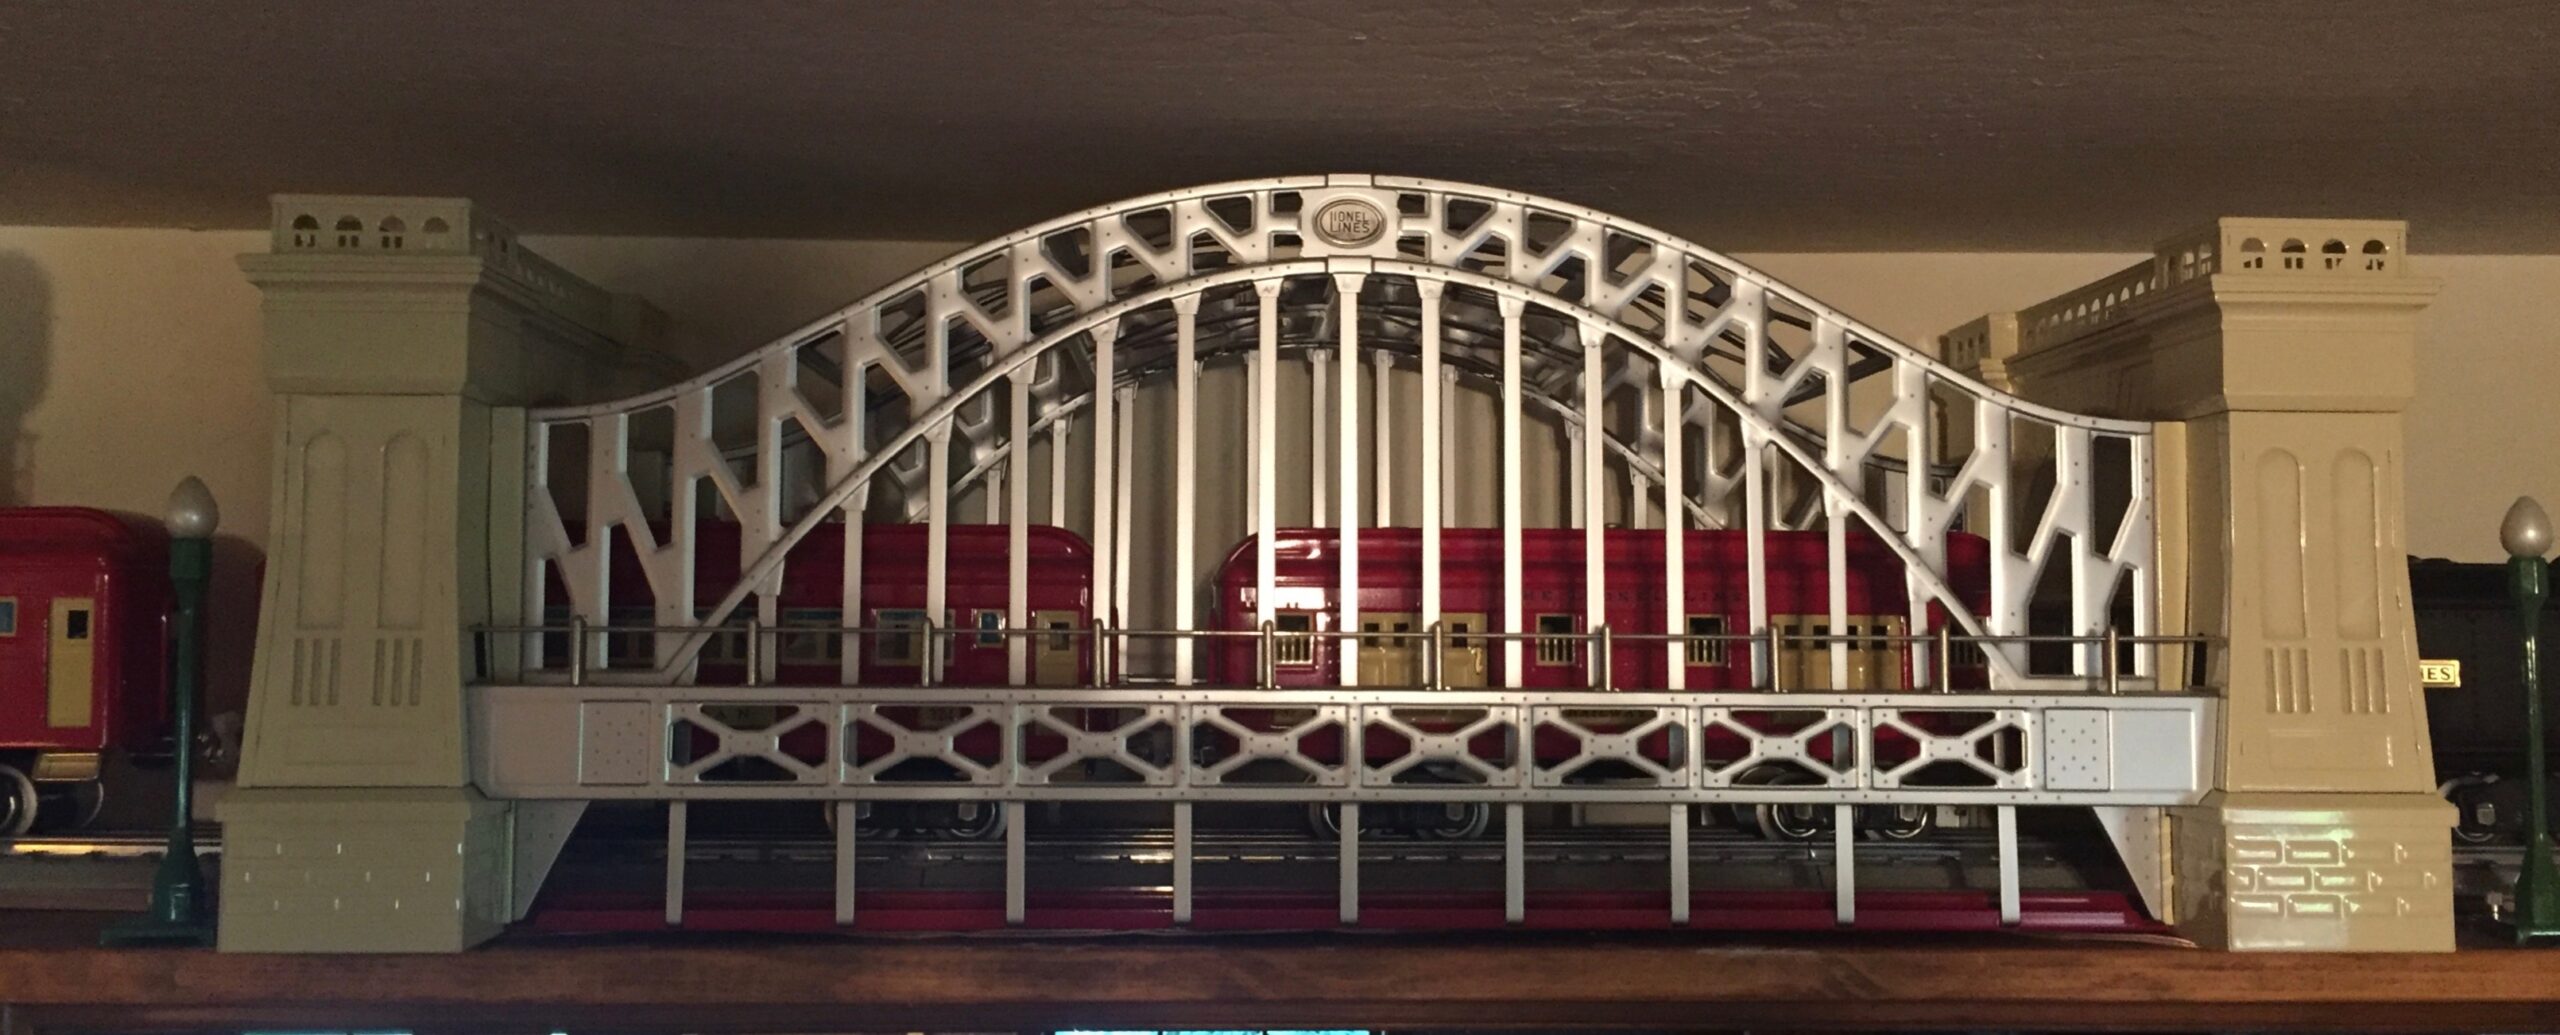
Other bridges included the #101 arch bridge with ramp approaches, and #280 green bridge. For the buildings, I used new MTH reproductions of classic Lionel accessories, including the #436 powerhouse, #437 switch tower, #438 signal tower, #126 passenger station, and #2256 station platform.
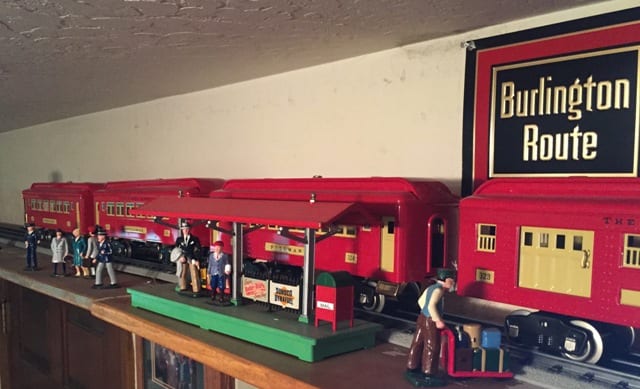
Similarly, I used reproduction lights: #56 gas lamps, #57 corner lamps, #59 gooseneck lamps, and #580 teardrop lamps. To power the building and street lights, I used a second Lionel CW-80.
Finally, to add real OPERATING interest to the layout, I added a selection of classic prewar Lionel operating accessories, again MTH reproductions. These included #47 crossing gate and signal, #69 operating warning bell, #78 automatic control signal, #79 flashing warning signal, #87 railroad crossing signal, #99 automatic block signal, #153 operating block signal, and #154 highway flashing signal. These are powered by a third CW-80 transformer.
To activate the operating accessories, I used four Lionel 153IR infrared controllers, one on each side of the layout.
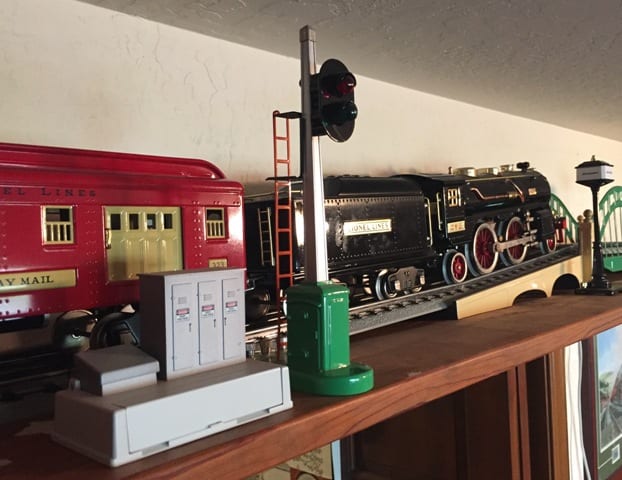
These activate accessories when a train passes by the controller. As the train moves around a corner curve, it passes the controller, activating the two or three accessories along that side of the layout. As it moves around the next corner curve and passes the second infrared controller, the first accessories turn off and those on the second side of they layout. This continues each time the train makes the curve as passes the next controller. This makes for lots of action as the train travels around the room!
A final note on powering the layout …
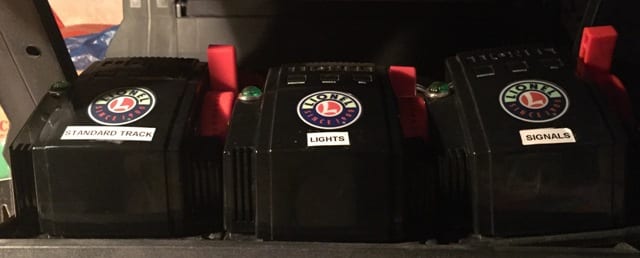
As previously mentioned, I use three separate Lionel CW-80 80-watt transformers to control track, light, and signal power. Rather than having to adjust and set the correct power (voltage) to control track speed, light brightness, and signal strength, I set each throttle to the appropriate setting for the desired result (i.e. speed, brightness, and sufficient power to properly activate the various operating accessories.
I then use three wireless remote control switches (available at home improvement and hardware stores) to turn the transformers on and off.
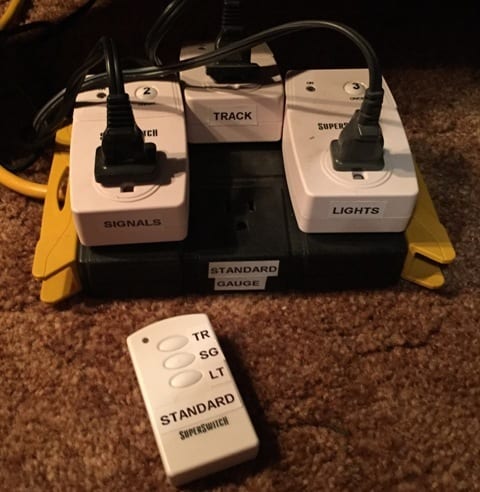
This provides great interaction with visitors as I invite them to “Hit the ‘TR’ button on the remote” … and the train starts moving! “Hit the next one” … and the operating signals start flashing and ringing as the train passes by! As I dim the room lights, I then say, “Hit the third one” … low and behold, the operating layout is illuminated by appropriately spaced lights! The smile on the “Engineer’s” face is truly a joy to behold.
Time to set up the stained or painted track boards: about an hour. Time to place track and wire up the accessories: one to two hours, depending on how many accessories you select. Time to place your trains and start up your overhead OPERATING layout: almost immediately! Smiles on your visitors’ faces: priceless!
Happy Railroading!


