A Railroad Empire You Can Build with Mobius!
By Dave Chasco, TCA# 99-49483 Fall e*Train 2023
I had high hopes in the early ‘70s of building a railroad empire, operating as many as a dozen trains on long runs in my limited basement or attic. What you’d see at a train club or organization is: (1) Long O- gauge trains of more than a few cars; (2) Long routes that took longer than 15-30 seconds to see a train coming back around; (3) Operate a dozen trains simultaneously; and (4) Look realistic, with roads, buildings and bridges. We all have seen some terrific layouts: In private homes; at clubs, like the Lionel RR Club in Milwaukee: in public displays at railroad depots; or at places like Cincinnati’s “EnterTRAINment Junction” or the Chicago Museum of Science & Industry (back in the day).
What I had was a transformer, a Lionel steam engine, tender and 4 cars and an 8-foot loop of track.
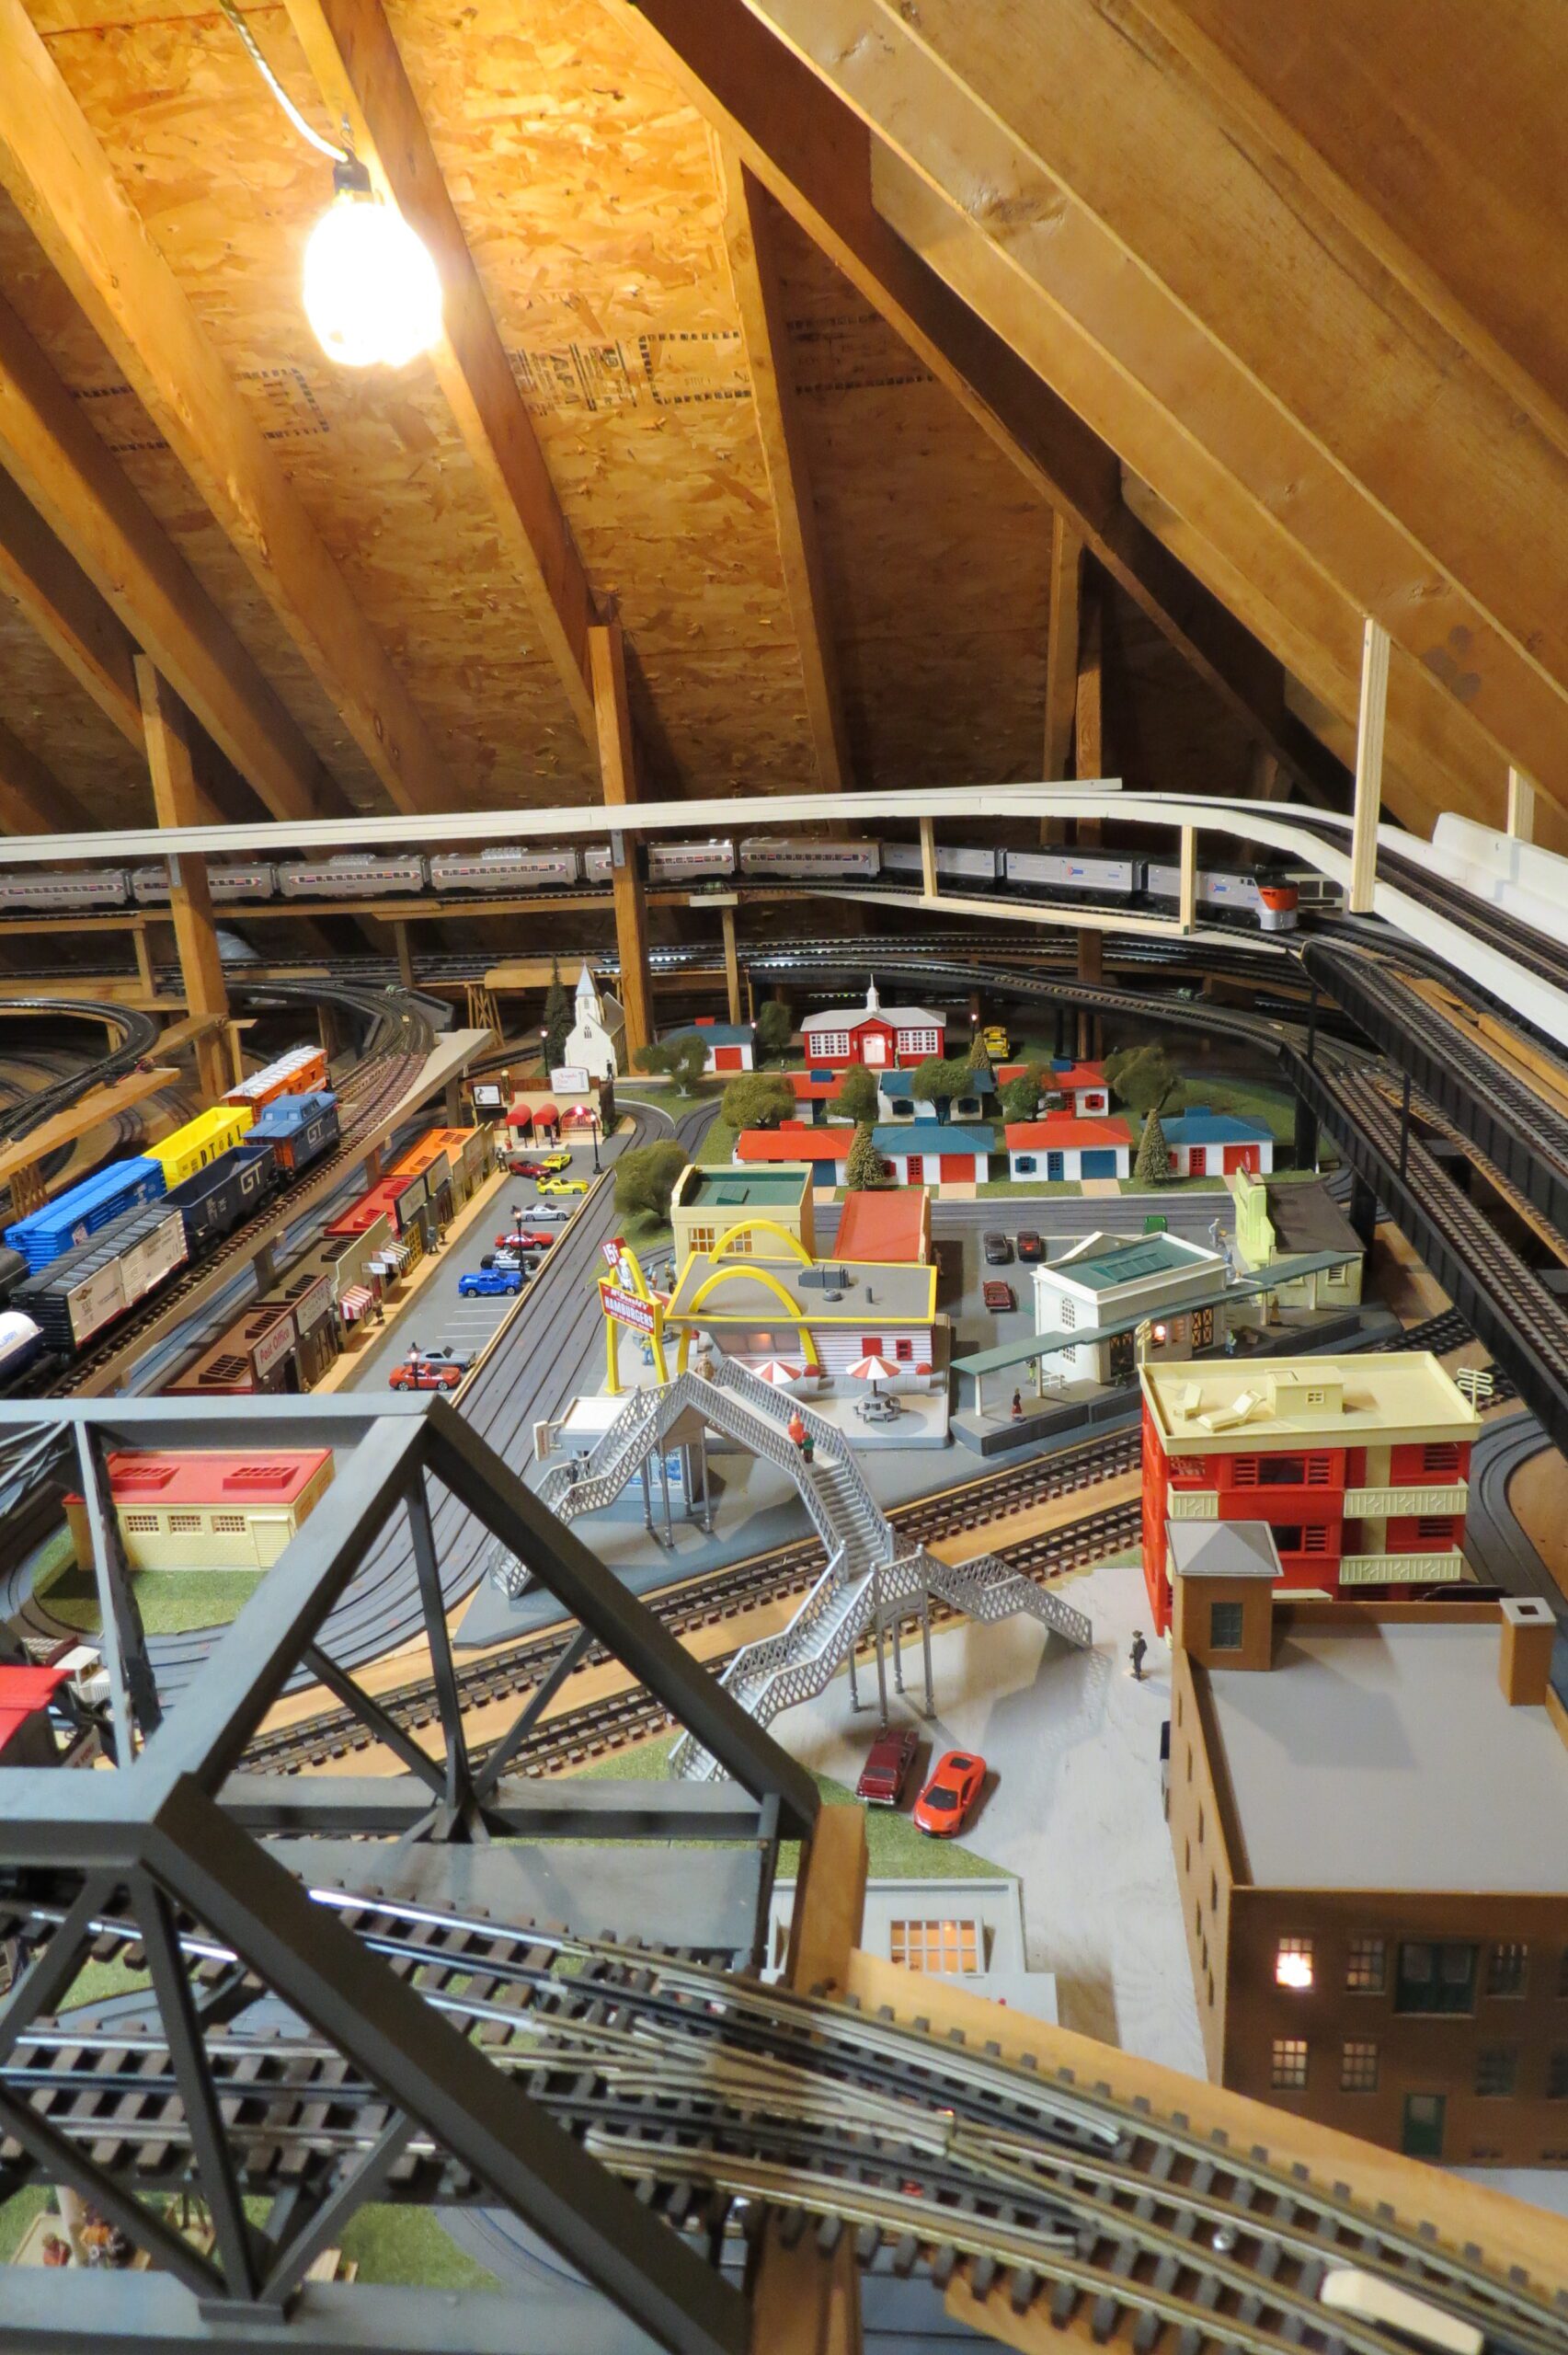
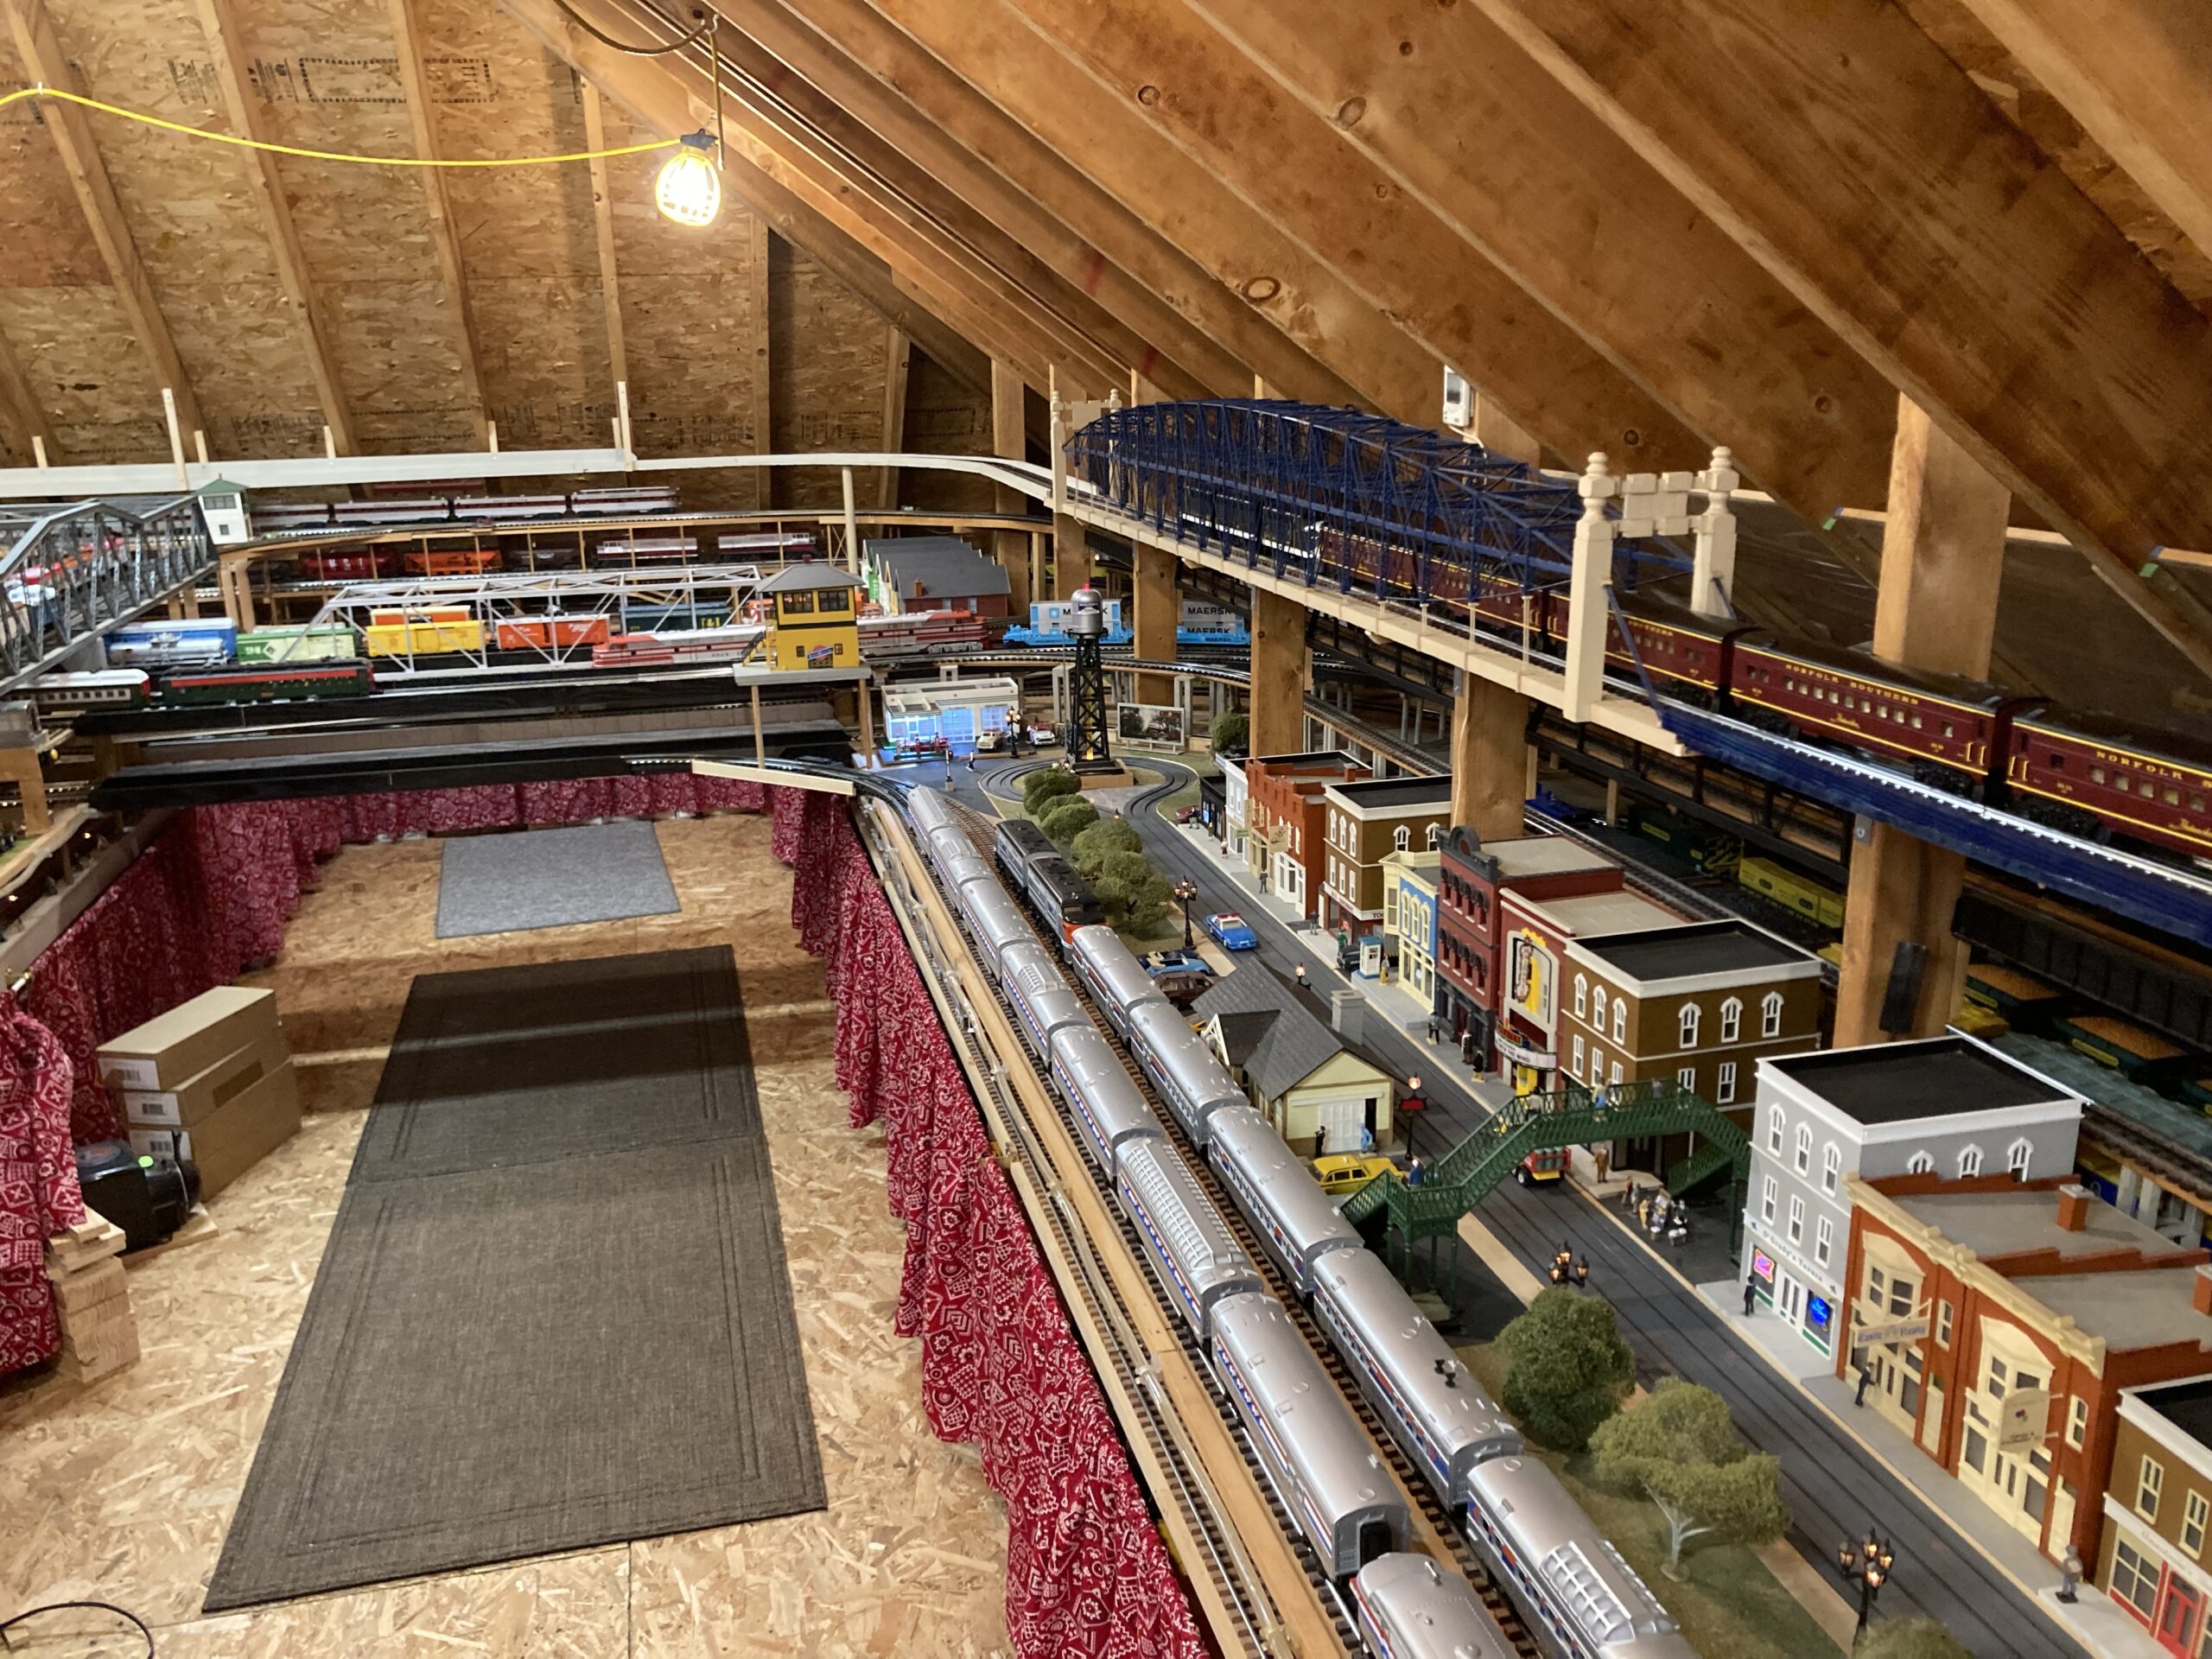
Today, my third layout, is a 5-level layout, over 1225 feet of track, and a mainline that is 379 feet long. There are 23 trains on the layout with usually 10 running at any time. There are 12 Superstreet™ (now Easystreets™) roadways, over 115 lighted buildings, and 20+ lighted or animated signs. You’ll also see numerous (homebuilt) bridges, some as long as 10 feet and one with over 3000 pieces. It also has 20 transformers for train and Superstreet™ operation and 4-9 VDC adapters for lighting and signage. And just enough equipment to run.
It sounds like that would have taken all of the last 50 years or so, but it didn’t. It took only 3 years. This is within reach of any operator. Yes, clubs and organizations have more space, more manpower, and more financial resources but with planning, simple research and some creative problem solving, gradually my first empire emerged in only 3 years – the time it took to acquire enough track and trains!
It started with an 8 by 16 tabletop in a corner of the basement shared with a laundry room and pantry area. Going to swap meets with friends and buying (used) trains, track and a few buildings jump-started it. Within a few months I was operating 3 trains: a double track mainline around the table and a yard operation – all interconnected. In 3 years, from that humble start, the mainline on that table was 438 feet long and could run 4 trains. In all, 7 trains were running on added routes.
Sidebar: I am 0 for 2 explaining swap meets to my kids, who were my train buddies. When my son, Paul, was about 5, he wanted to go to a swap meet along with my friends Wayne and Gary Anderson. Concerned that he would get bored and want to go home early, my wife Carmen and I tried to explain in detail what swap meets were. Come the day of the meet, we gave him one last chance to back out. His reply: He wanted to see people trade meat for trains!
When he outgrew trains, our daughter, Jill, became a great train buddy. Like her mother, she is a great shopper and looks for bargains. To that end, I would give her my “modest” wish list and let her roam ahead. One meet, she came running back literally out of breath: She found an item on the list! She “dragged” me over to the vendors table and proudly announced, “See, right here and it is even (marked) less than you were willing to pay for it!”

Railroad switches (turnouts) were expensive, and not many types were available. So, I built 28 realistic railroad switches to fit the track plan, including double crossovers, slips, wyes and right or left-handed switches. The last homebuilt one was retired just 2 years ago; most lasted 20 or more years.
In the intervening 50 years, changes in technology and the marketplace resulted in gradual upgrading: all older equipment was upgraded or replaced with new or newer equipment from Lionel, K-Line, MTH, Weaver, Williams, RMT, and others. Original Plasticville™ buildings were replaced by buildings from Lionel, Walthers and more recently Menard’s and others.
My current layout – the third — is a donut in the attic with the stairway that enters in the middle of it. But the track plan for a long mainline that is explained here works on any shaped layout: a rectangle-shaped, L-Shaped and a donut shaped design.

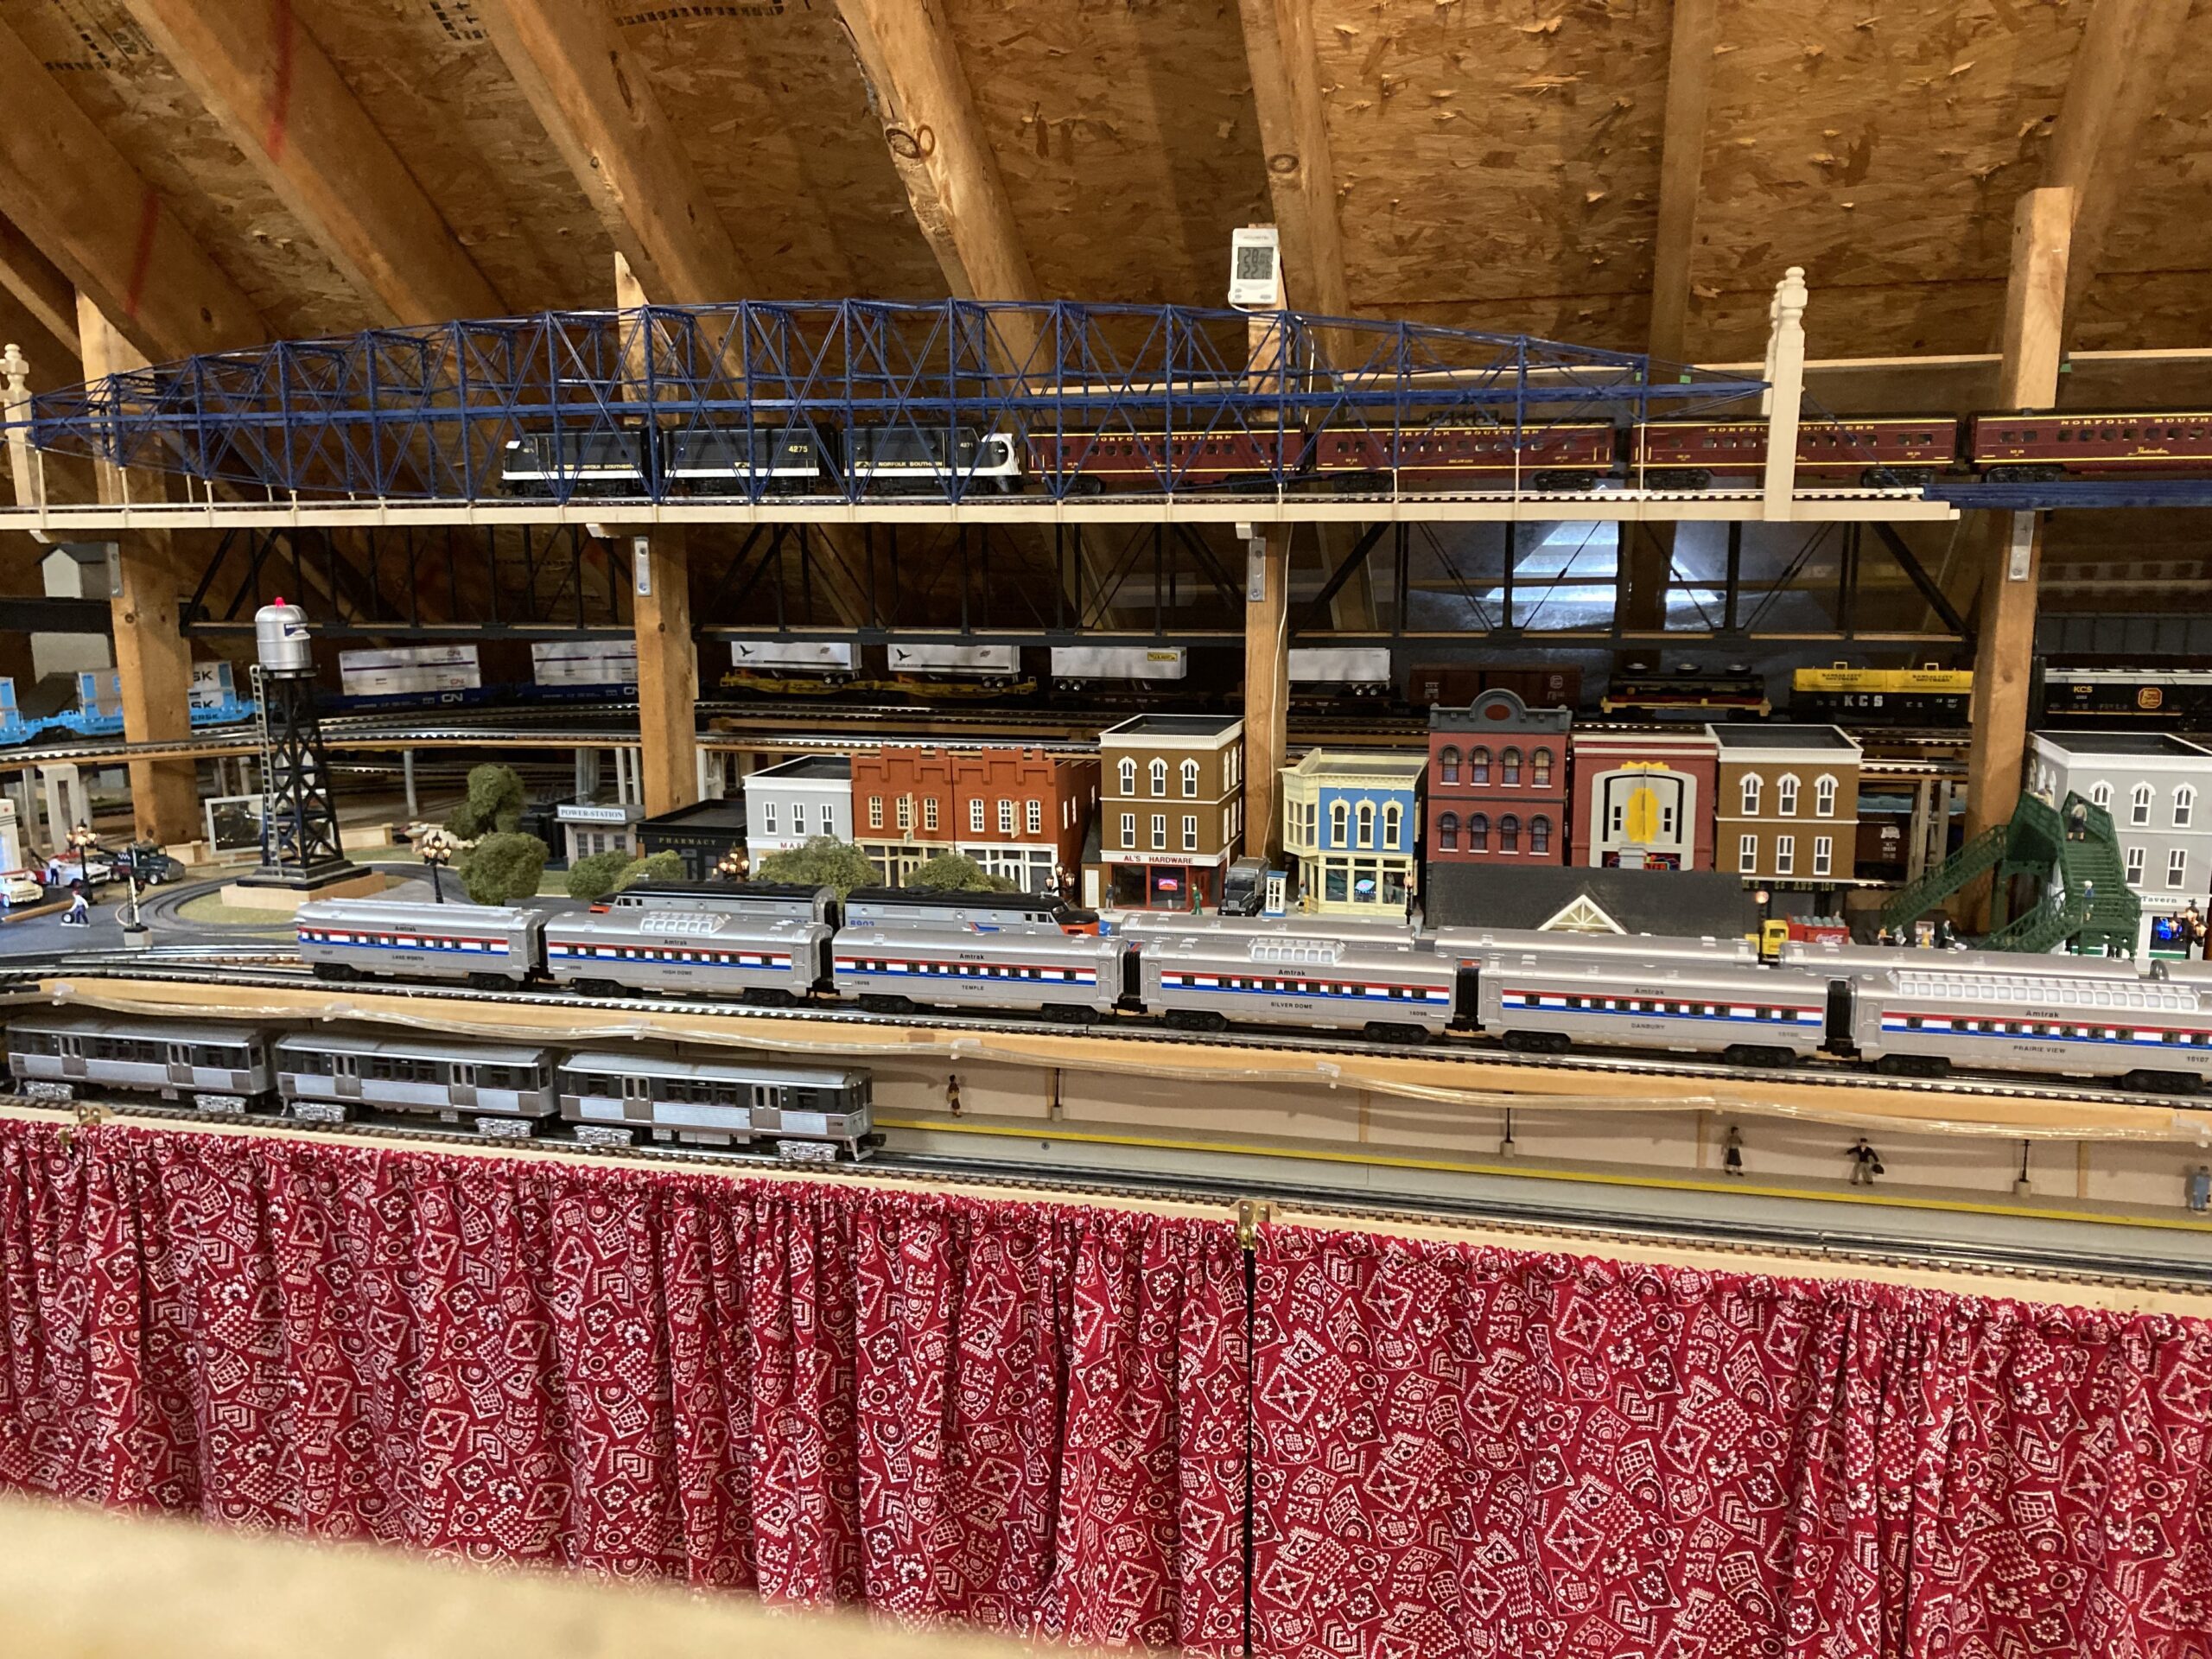
To make a statement, when coming up the stairs, the first thing you see is “Mainstreet” – I am not noted for my catchy names. This is a typical small town downtown area with a line of businesses, a carousel on one end and a water tower and gas station at the other and lots of lights.
Below “Mainstreet” is a subway line. Typically, MTH subways are run, but not always.
Sidebar: MTH made Chicago subways of the vintage that Carmen and I rode when we were in school there and dating. It is likely that over the years we have ridden on the very cars that were modelled.
A railway station positioned above the subway with two tracks to allow bi-directional operation. The trains alternate in operation. Fronting the buildings is a “Superstreet™” and a string of street lights which were two of my many projects working at K-Line.
Lighting has been added to all the buildings, including lighted/animated signs from Miller Engineering. A fan favorite is O’Grady’s Tavern which features both Miller’s and Pabst lighted beer signs.
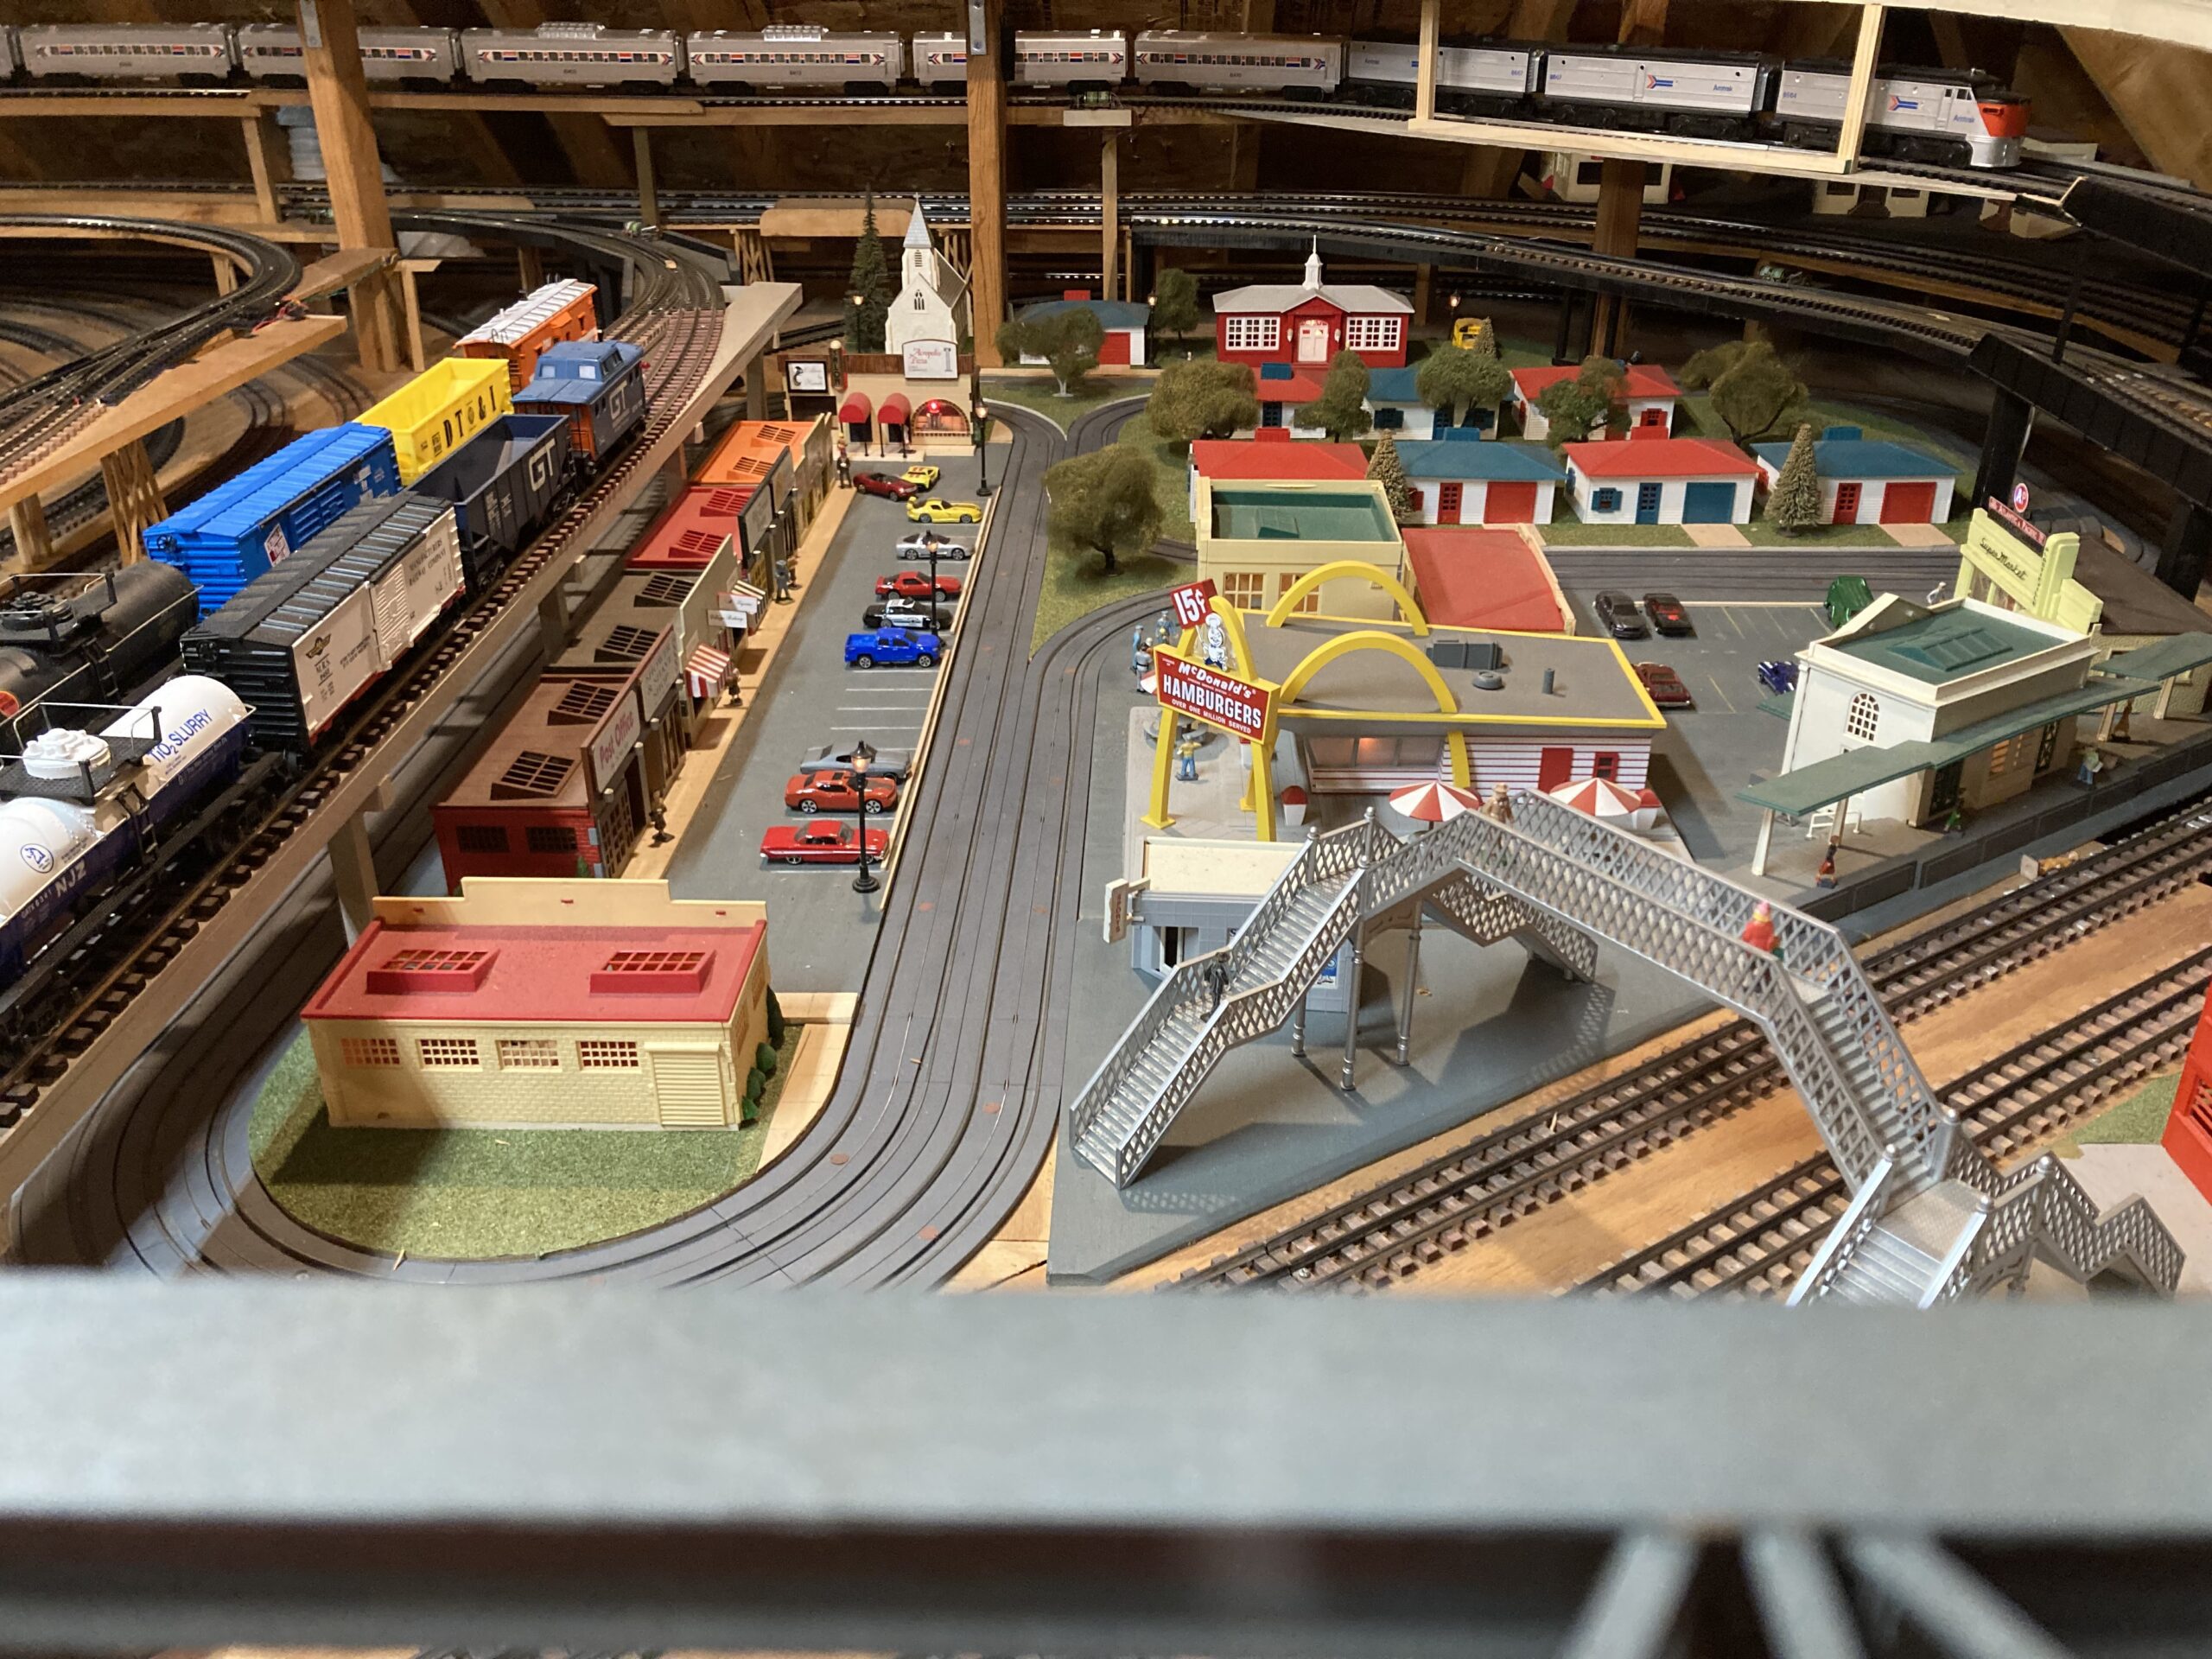
Behind “Mainstreet” is a 4-track industrial yard that you would also see in many towns and cities. The plan here is to alternate 4 trains. The loop is small so alternating trains is just 1 way to avoid having trains go around loops in a short period of time. Trains reappear about every 4 minutes, instead of every 30 seconds or less.
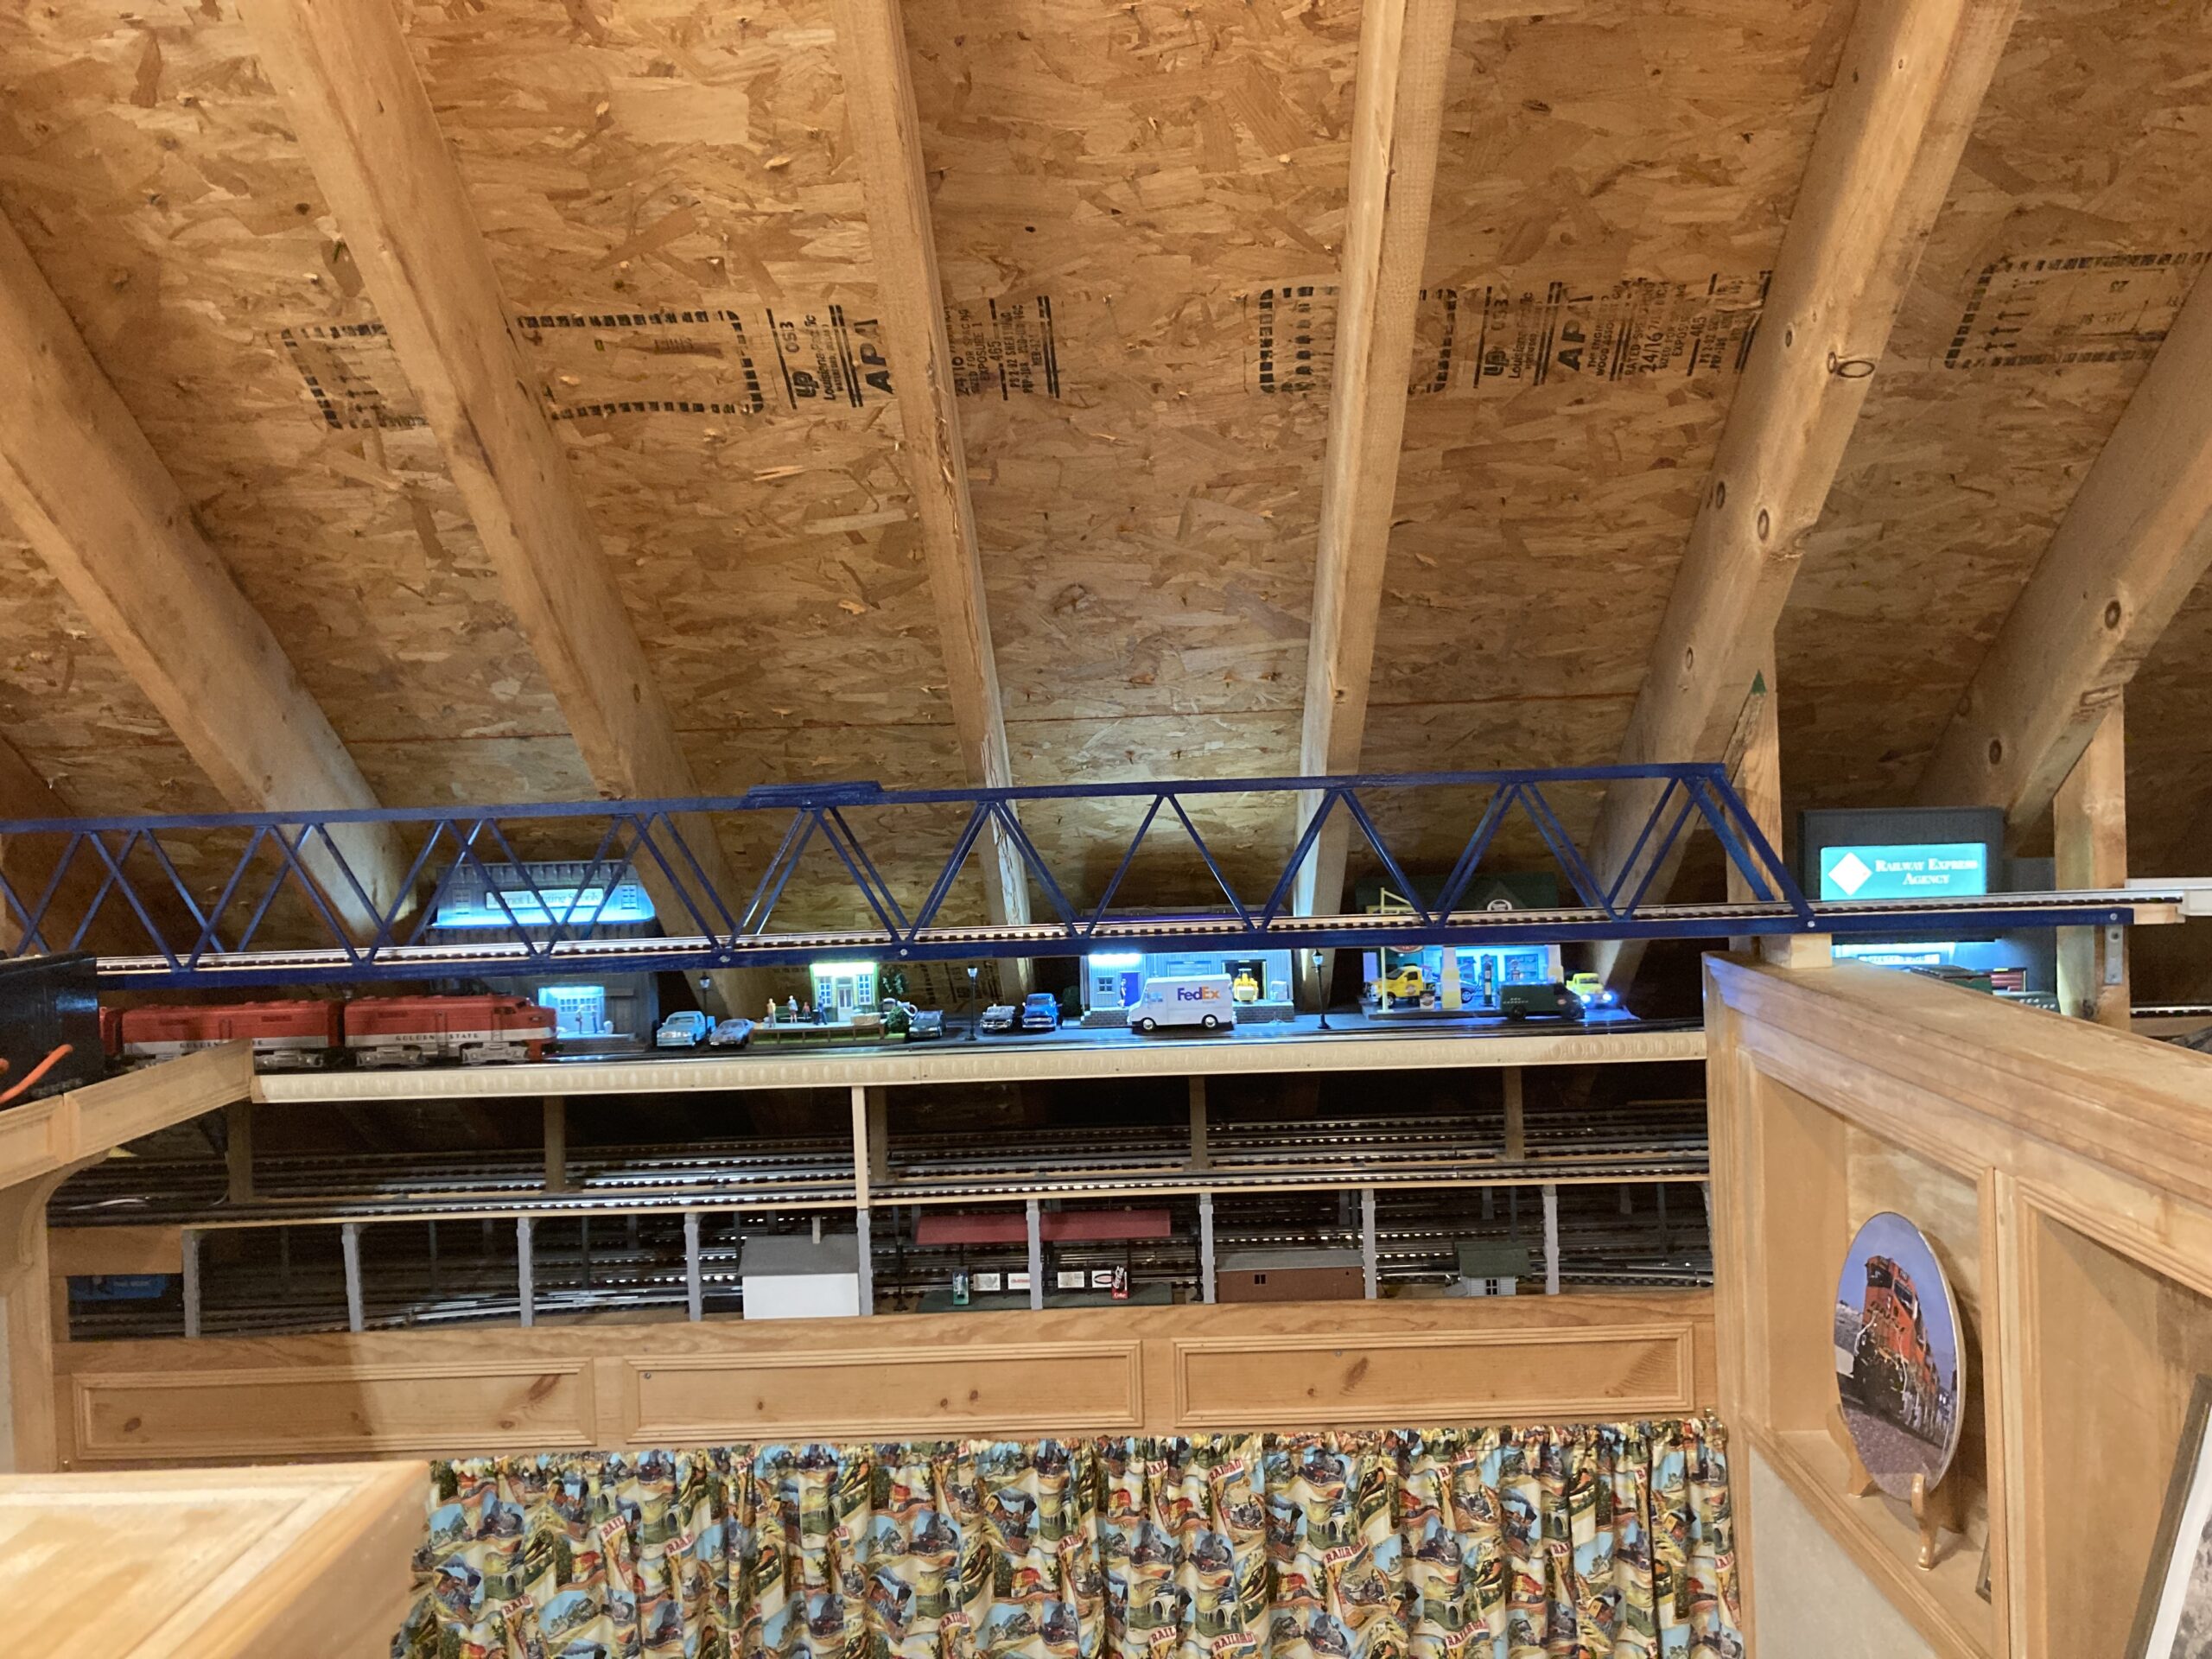
Above “Mainstreet” is an elevated line. K-line made sets for both the North Shore and the Chicago, South Shore and South Bend. Growing up I lived abutting the Chicago, Milwaukee and North Shore line right-of-way. Carmen grew up South Bend and rode South Shore. So, it was fitting to include both on the layout.
Recently added were a 4th level and a work-in-progress 5th level because I still find treasures – equipment of railroads that are from the local areas I reside – to show off. The last level will be topped-off with more unique and modern bridges like suspension bridges.
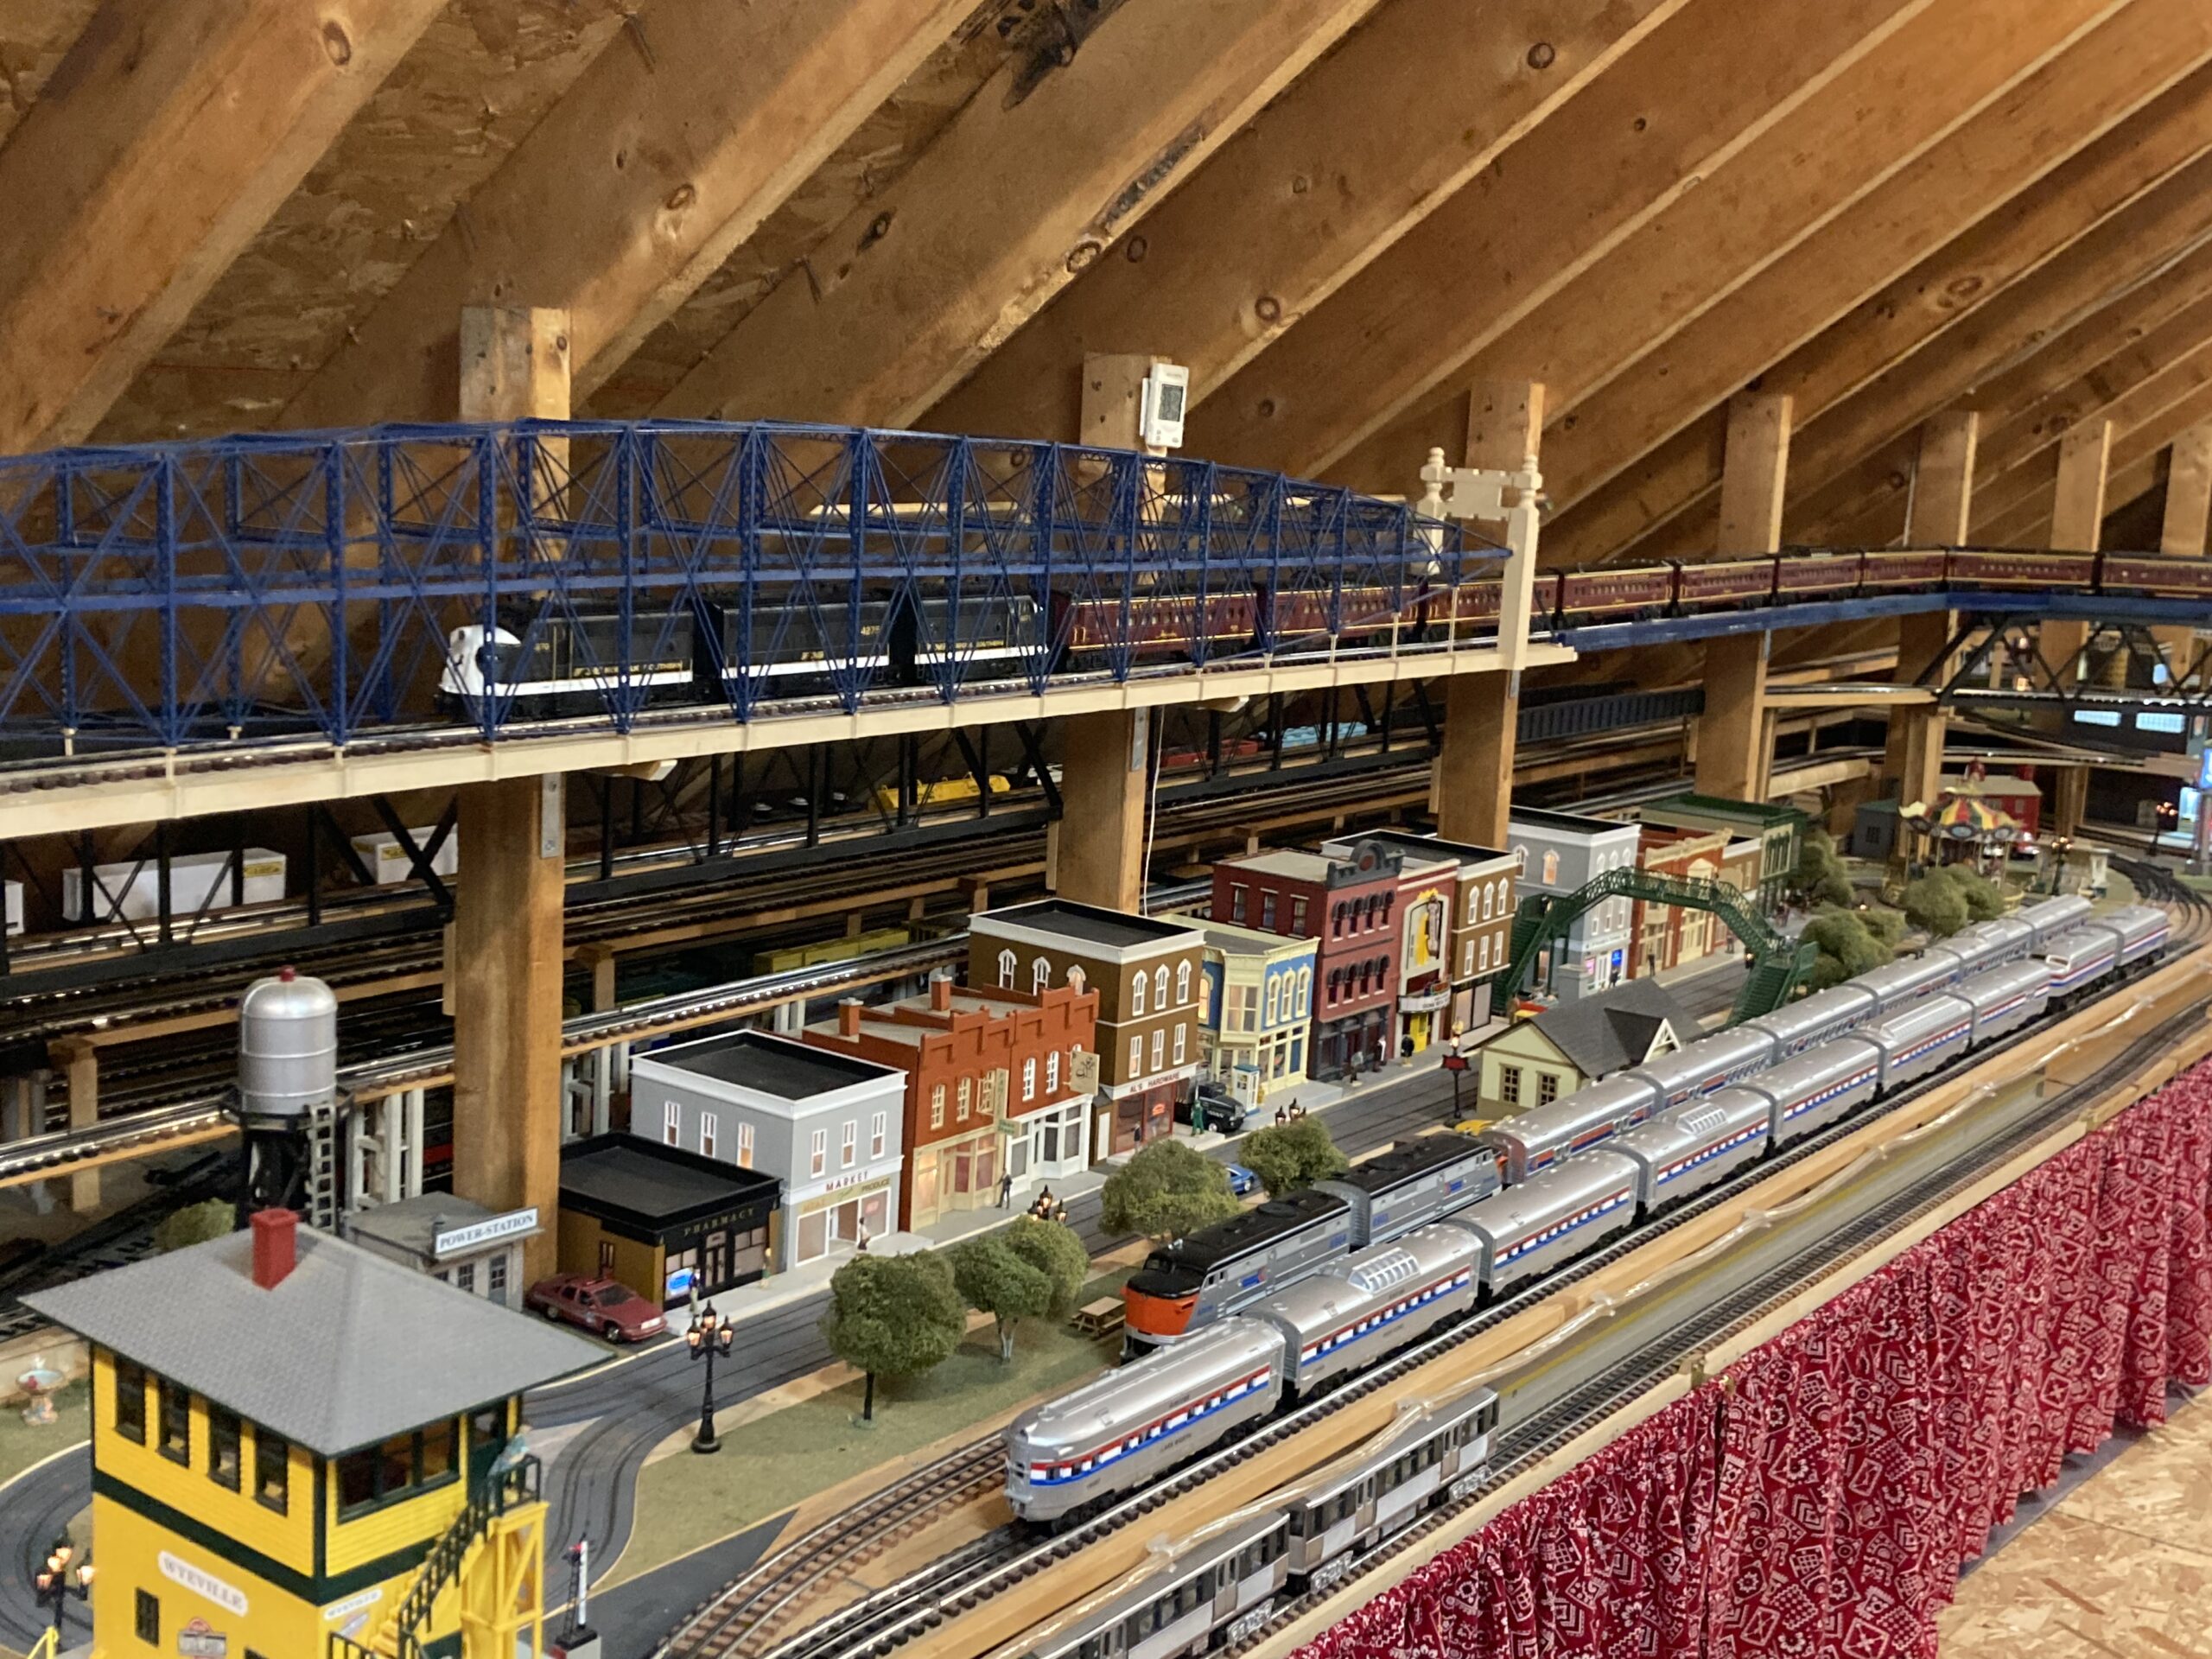
Bridges, which would likely have to be scratch built, were in the original planning. Because showing off trains is paramount, the focus was on Pratt and Warren designs which have the fewest members to block views of the trains. At the time, books and magazines were a source of bridge ideas. Today, use the internet and search for images of bridges. Simply scale a picture and buy hobby wood for the structure. The showcase bridge is the lenticular Smithfield Street bridge from Pittsburgh. The pictures show it to be a double track with 3 lenticular arches, but 3000+ pieces into it, a single track was it.
Sidebar: If you want a more accurate scale of any bridge type, try to find a copy of Harold Russell’s article that appeared as a 6-part series in Model Railroader Magazine starting in July 1988 titled “ABCs of Bridges”.
The layout is encircled with a railroad themed curtain and with light strings for use when running night operations as the attic would be literally pitch black. Both were planned and executed credit by Carmen.

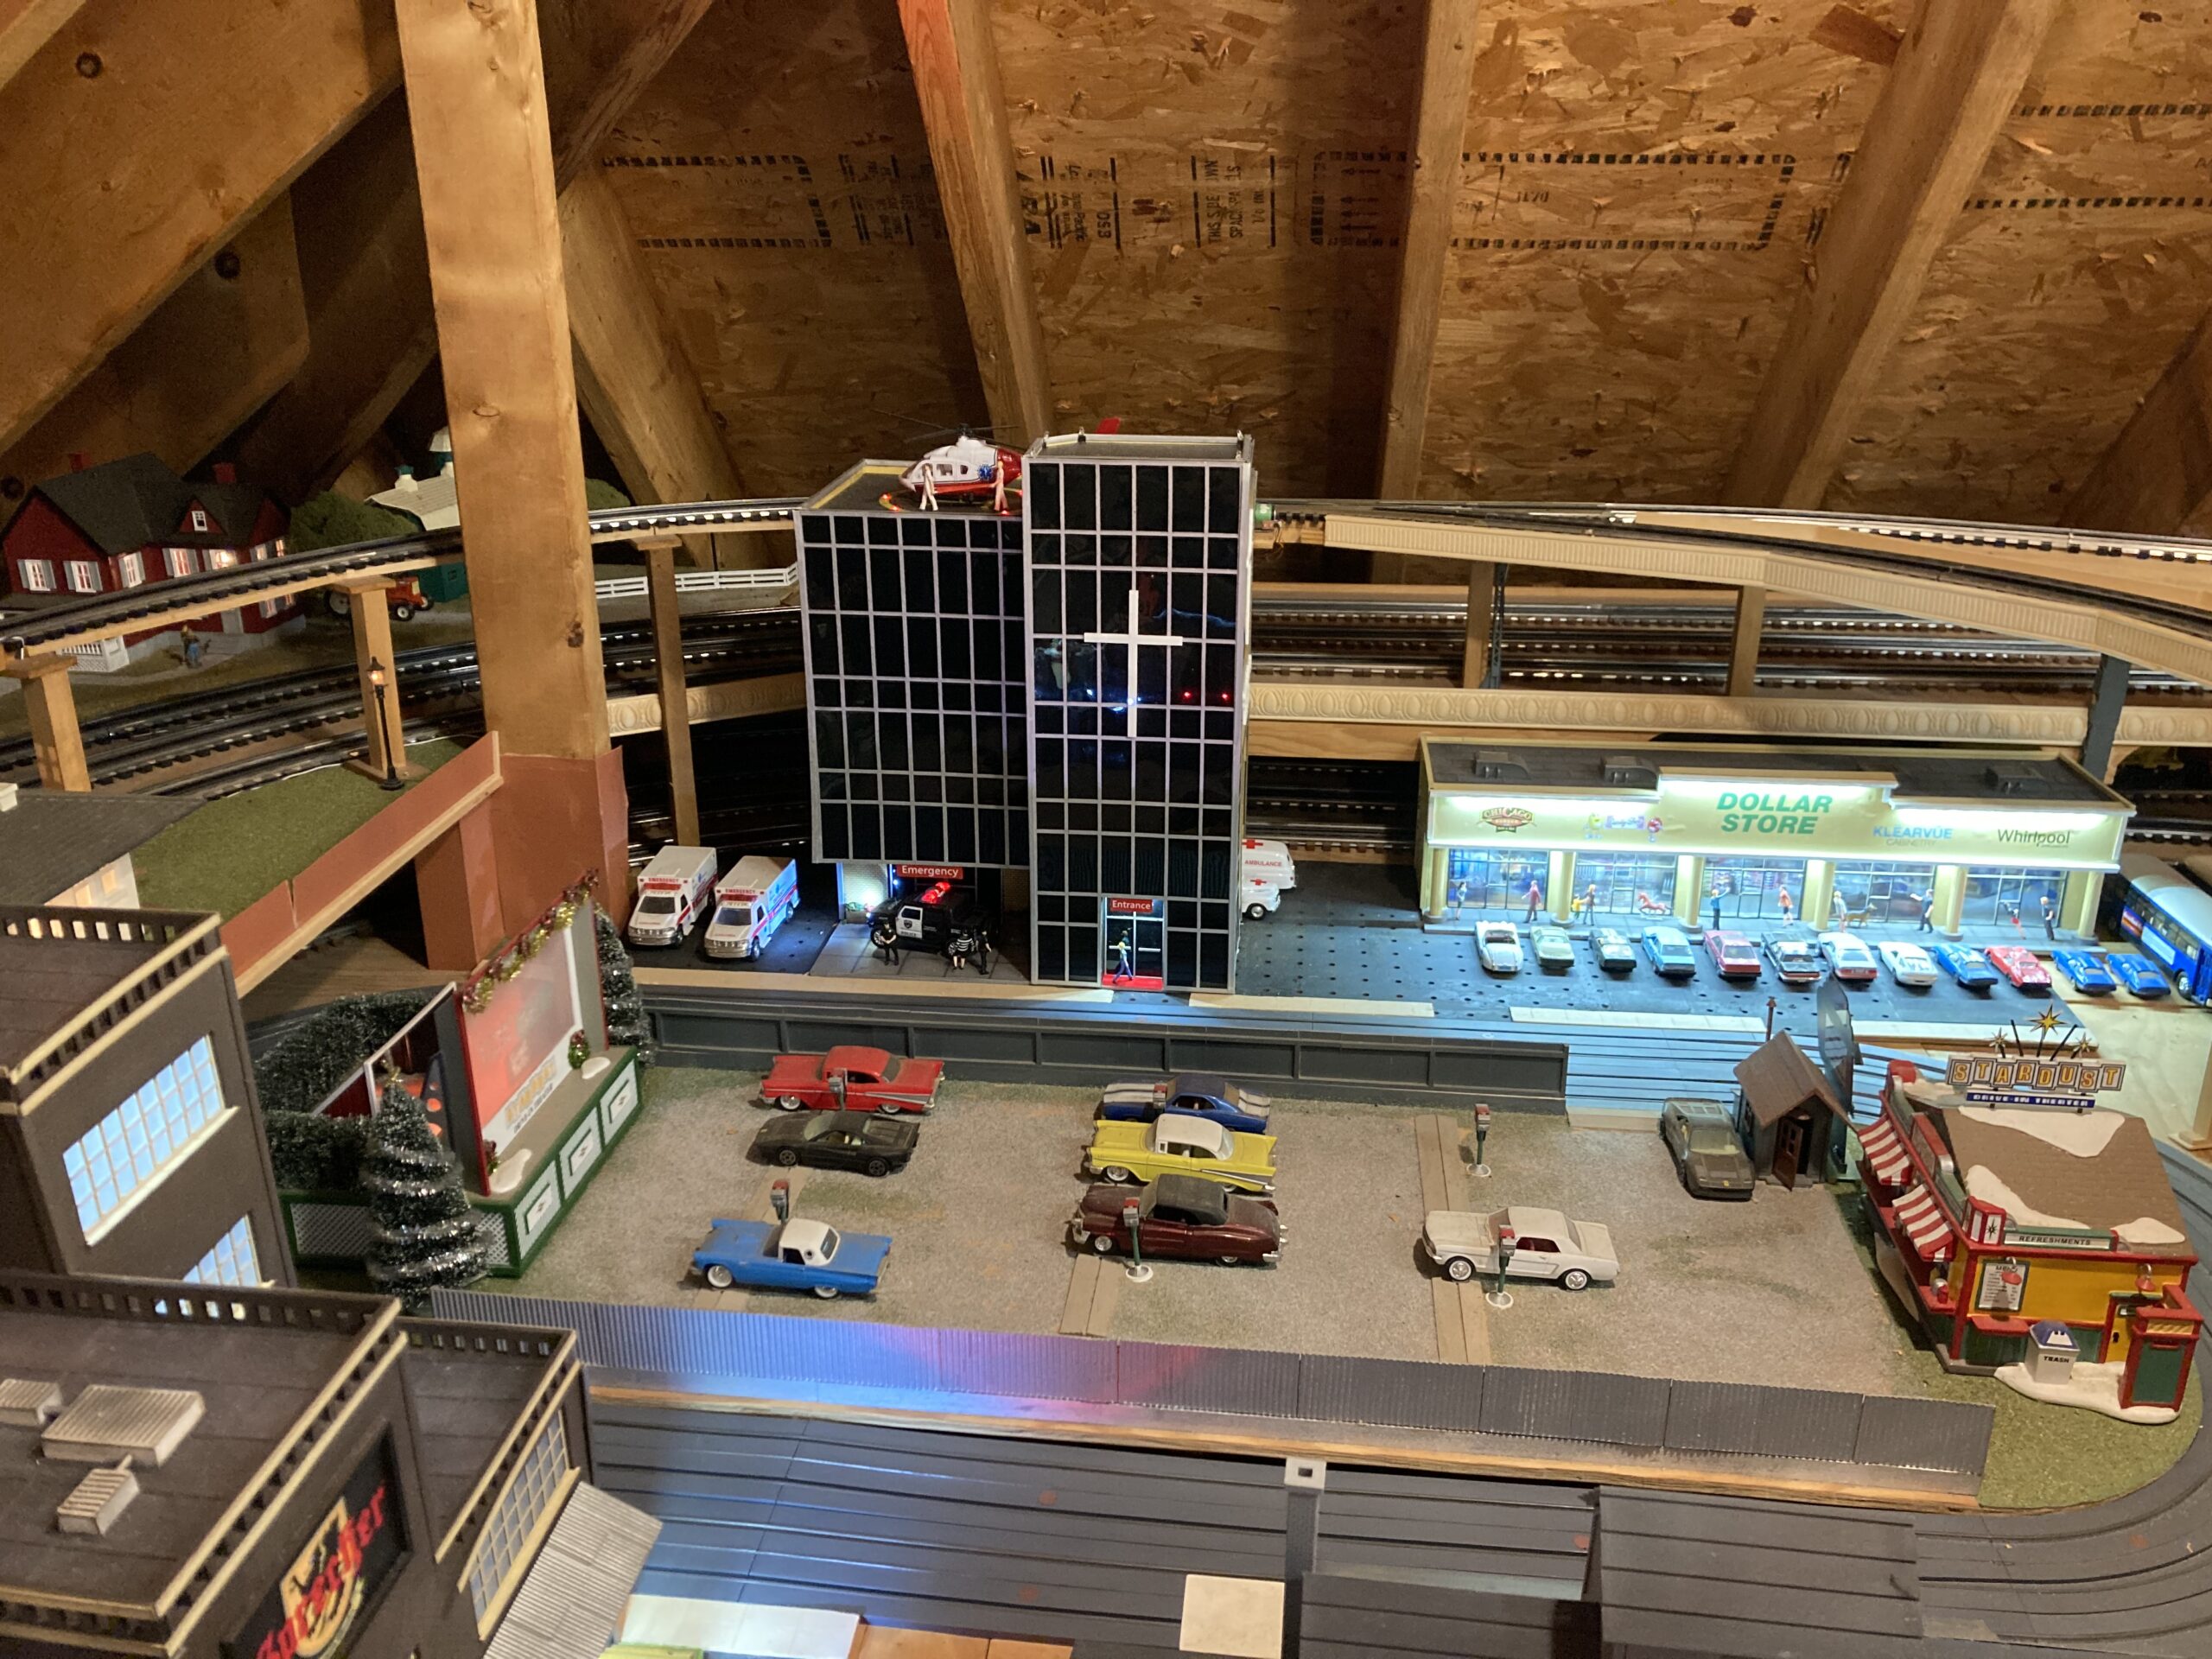
Adjacent to “Mainstreet”, are two smaller entities: A residential area to the left and an industrial area to the right complete with Superstreets™, buildings and outdoor theater.
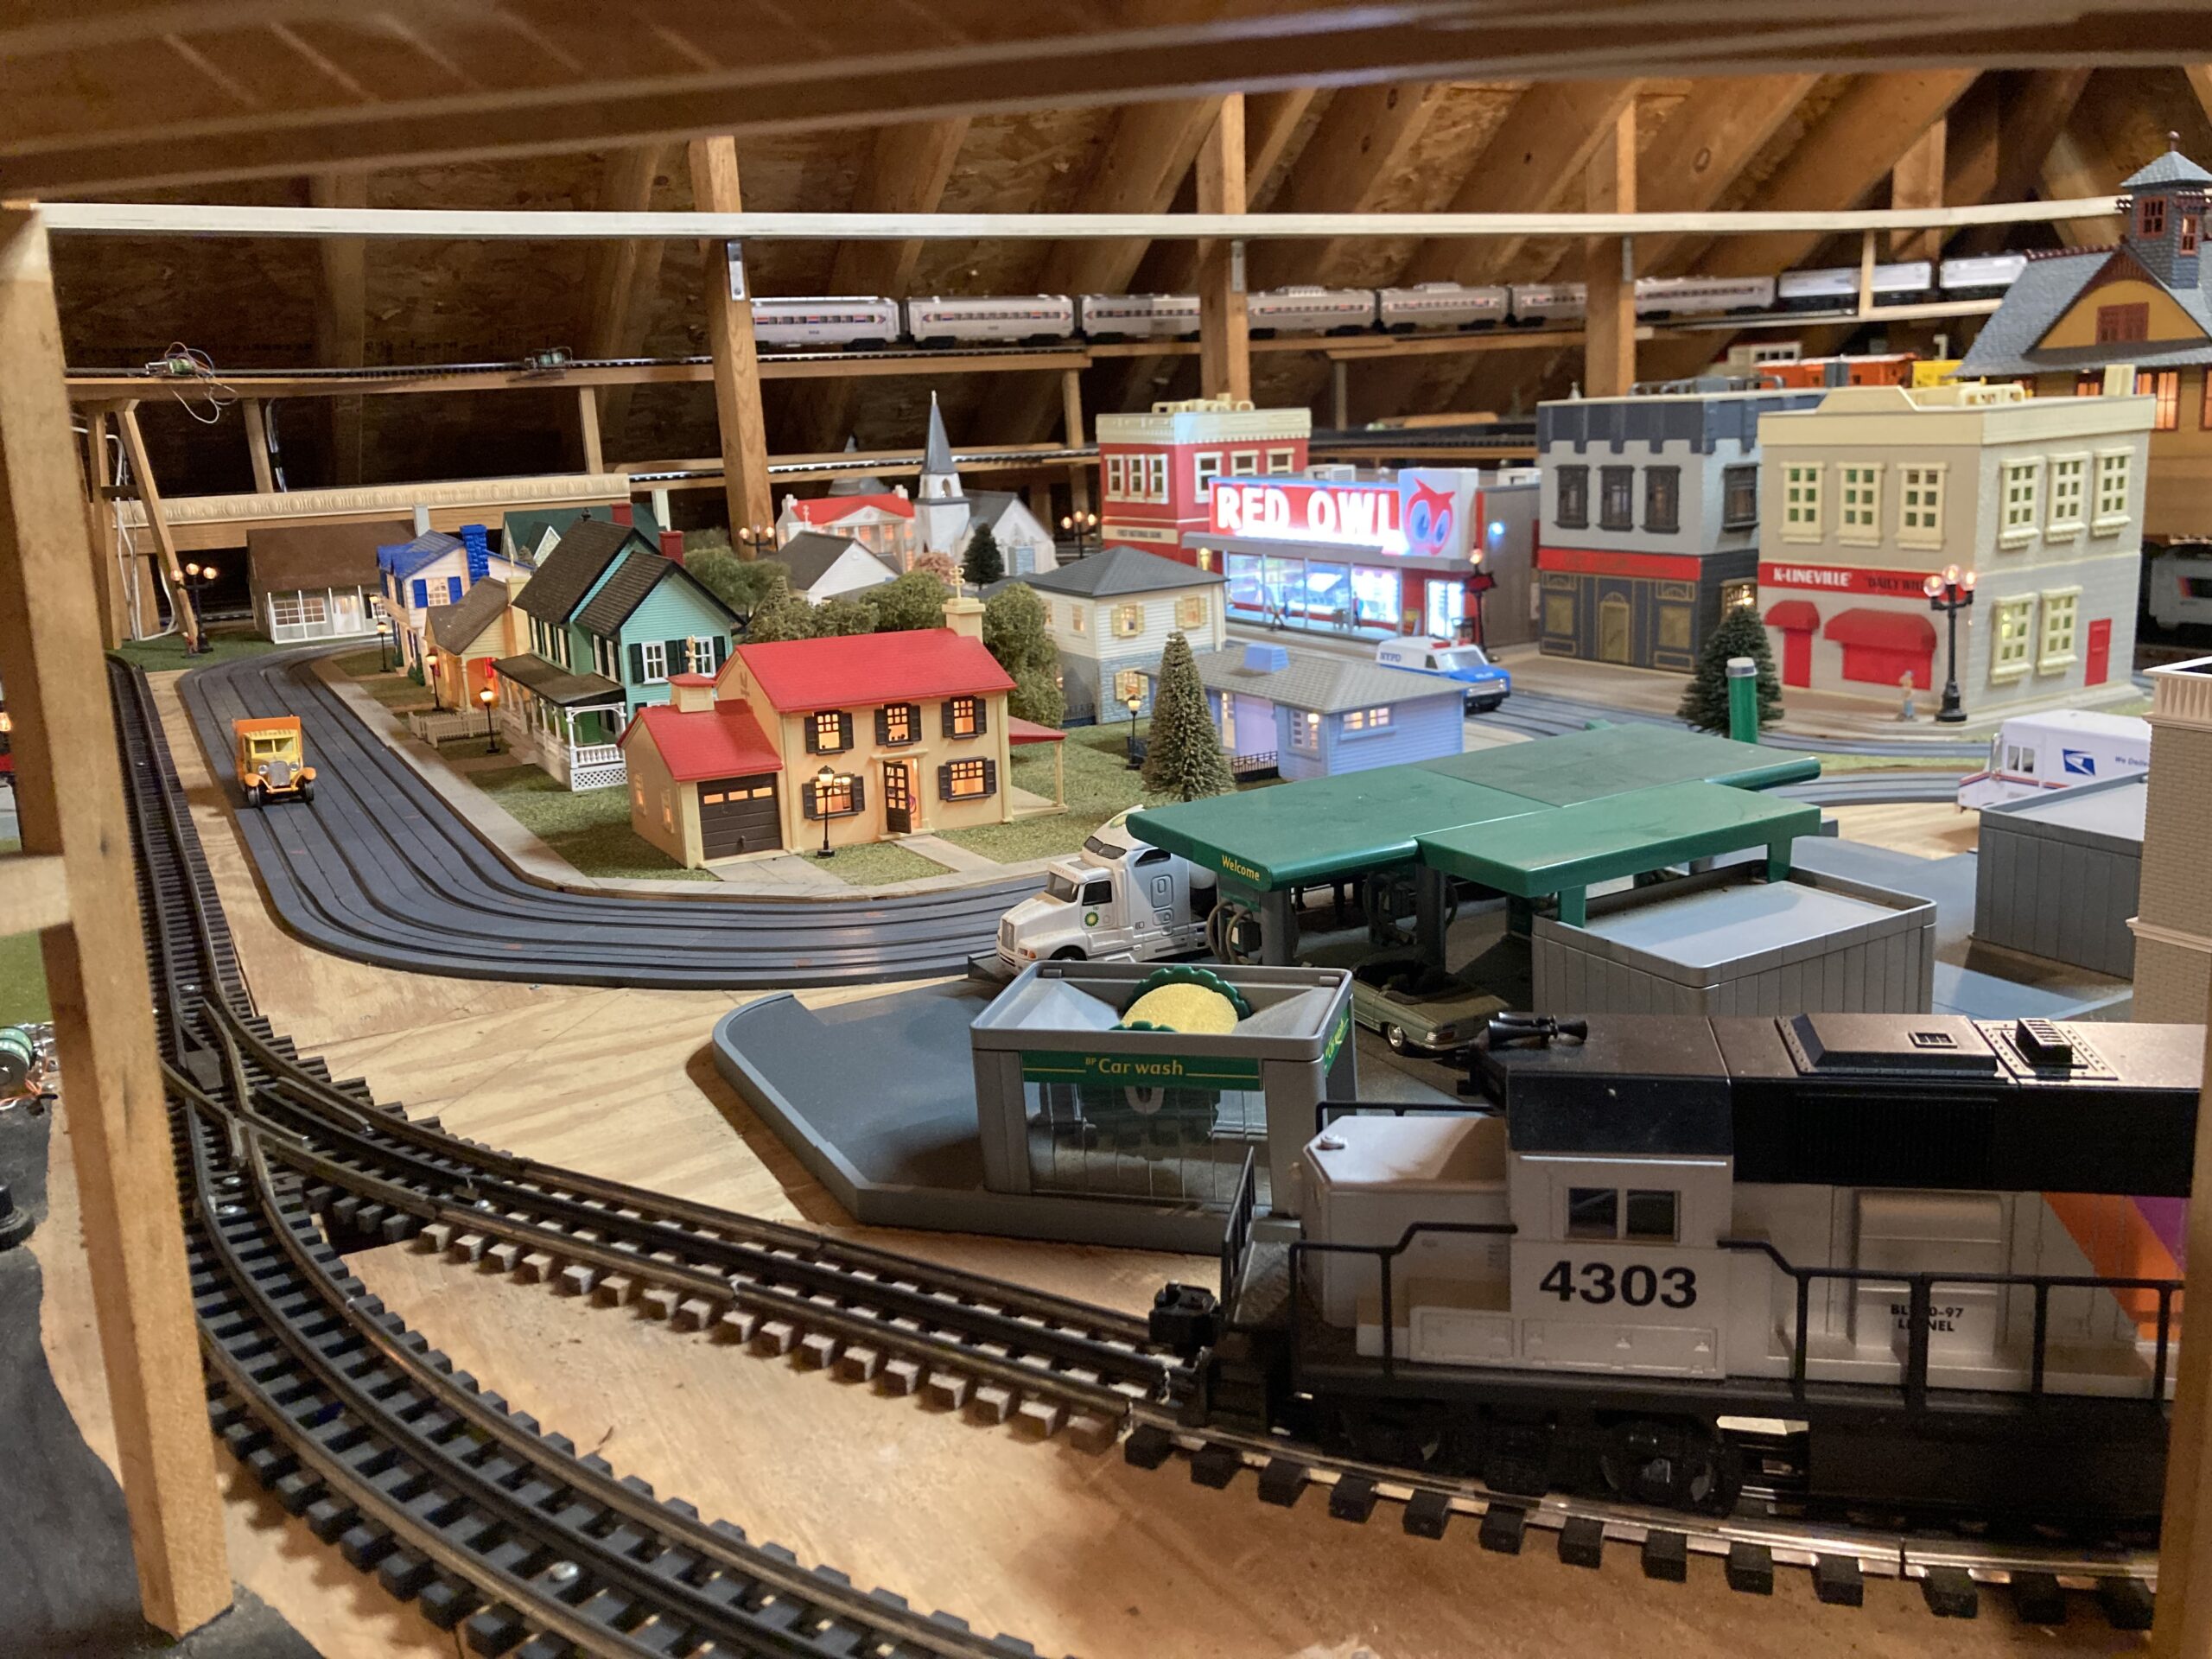
Turning completely around, to the right of the stairway are two towns, separated by the railway. One side features a 1950’s McDonald’s and a strip mall but with housing and apartments and, of course, Superstreets™ that usually has a UPS truck running. The left side closest to the stairway is a more bustling area with stores, a BP gas station, train station (including a Rico station on the second level for the North Shore and South Shore) and Superstreets™. The tracks that run through this section alternate 3 trains each on two levels.
In front and above these towns is a double track bridge. Both Lionel and K-Line made “beer” cars. Growing up in Wisconsin, I had to give a nod to that history, so as you might guess, two “beer” trains are there.
Turning further toward the left is the open stairway with bridges for the trains but also some buildings and building fronts. Most of these are recent additions from Menard’s.

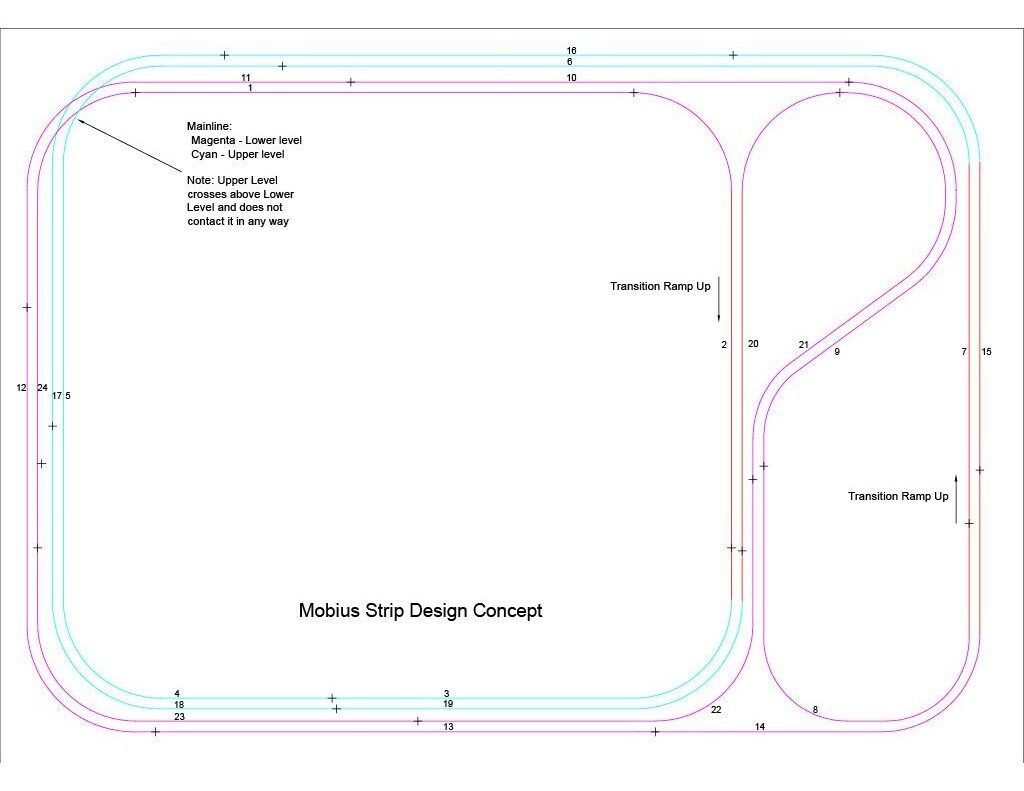
Now we come to the common highlight of all my pikes: I call it my Mobius strip mainline concept as most folks are familiar with that vexing loop. The purpose of this design is to lengthen the mainline to hundreds of feet in a very small space but to also confound and grab the attention of a viewer. It does this in multiple ways:
- There are multiple trains running on the same track
- Since it looks like a double track mainline a viewer sees the train running both ways past the same spot
- This variation has a trick hidden siding that can be used to shuffle the order of the trains running.
This concept requires NO SWITCHES and NO CROSSOVERS and NO COMPLEX WIRING!
Sounds complicated to do, but really is not. If you are not familiar with a Mobius strip, you can easily make one by taking a narrow strip of paper and joining the narrow ends to make a loop. This gives you a common loop you would see in chain-like decorations. If you take your finger, you can follow the loop around on the outside and placing you finger in the inside you can do the same. They are separate, independent loops. Now imagine the outside loop is one set of tracks and the inside another set of tracks just like a double track mainline.
Now we all know that trains don’t run upside down. With the Mobius Strip, we can fix that problem. To make a Mobius strip, take that same strip of paper, twist one end a half rotation and join them. Here’s the magic: If you follow the loop with your finger, it will travel both the inside and outside as a single loop. It took me some months to figure this out, because there’s a trick to doing this for trains without the need for switches or crossovers.
Here’s how:
Step 1: Start with 2 levels, each has two loops – a double track mainline. Remember directionality: one loop runs trains clockwise and the other counter-clockwise.
Step 2: Pick one side of the layout, and cut off the ends leaving essentially 4 C-shaped tracks; 2 on each level
Step 3: Remembering directionality, connect the ends of the loops. Though mathematically there are 24 ways to reconnect the loops, only three will produce the desired result of 1 single long loop.
Step 4: When drawing this out, it will look like the tracks cross. Remember, you are working in 3, not 2, dimensions. Where lines seem to cross, keep one line on the lower level and the other on the upper level then make the transition between level. (Reference the attached drawing.) Caveat: Keep the loop directions consistent or you will have a head-to-head collision design. Scenery can be used to disguise the actual split.
The first layout loop was 438 feet long. This was taxing to handle 3 or 4 trains manually, but TMCC and DCC make the job very simple today. My second layout with a 590 foot mainline was built to handle 8 trains.
The wattage needed to run that many trains requires more than 1 transformer, so electrically, the mainline was subdivided into zones or sections, using multiple transformers, that actually promoted the ability to run more trains. My current layout features a 379’ mainline broken into 8 sections for electrical distribution, but 24 blocks for tracking the trains on my control panel. This mainline requires about 3-1/2 minutes to make a loop at a scale speed of 60 mph .
One of the heart-breaking things I saw over the years was damage to plastic shells from the light bulbs. Most model train companies make limited sized runs and that often aren’t ever repeated, so replacement is not likely. Most light bulbs use over 90% of the energy to generate heat and not light; LEDs are the opposite. Reading how easy it is to make Voltage regulators (I use 12Volts) I replaced bulbs in all my passenger cars, cabooses and engines with LEDs. This also eliminates flickering which for some viewers is a medical problem.
Another source of avoidable damage is to the paint as a result of removing and replacing the item in its box. A co-worker, Pat Cain (an expert in plastics) recommended plastic bags that wouldn’t stick to paint, like the ones used in produce departments at grocery stores. You should have seen the incredulous reaction of the store manager at a nearby Jerry’s Supervalu when asked to sell only plastic bags! He finally agreed: a box of 1000, for $10. Needless to say, I still have some around, but my trains still look like the day I bought them.
Early on, most of my engines were under powered to pull the lengths I wanted. Lionel’s AC motors were the exception. The industry converted to DC motors and most use two per engine which didn’t measure up. As a result, with help from an electrical engineer, Barry Rice, all non-powered engines received added motors. He replaced the transistors on the control boards handle the increased electrical load. He showed me how to remove and replace them, but in the end modified all himself!
About the same time, George Fleury of III Rail Trains introduced me to K-Line. He urged me to contact Sherman Cooper (service manager at K-Line). K-Line did upgrade their boards and did supply second, and even 3rd, matching powered units on as an option.
Over time, Mr. Cooper and I talked about the position of the rubber traction tires on the trucks. I found that there was a net torque on the truck. This often led to derailments in switches and crossovers or derailments when simply pulling long trains especially up long inclines. With a small gear puller it was easy to re-arrange the wheels with rubber tires, but in the end, I bought K-Line replacement wheels both slotted for rubber tires and blanks to replace worn wheels.
Sidebar: While at K-line, I did a study on lubricants. It is vital to the life of the trucks on your equipment to use a lubricant. Without it, trucks would wear out in as few as 130 hours of use – especially the heavy aluminum cars. I prefer a grease over an oil: easier to apply and lasts longer.
The are two common derailments with model trains especially long trains with aluminum cast cars or lighted cars with pick-ups. The first is that the drag load from a long train often causes cars near the front or middle of the train to fall inward on a curve. The second is going too fast around a tight curve like O27s, causes the engine to fall outward. Experimentation showed super elevation wouldn’t work for model trains as it increases the possibility of a car tipping.
Adding weight to the cars had two negative issues: (1) as their position in any consist will change, you’d have to modify all of them and (2) it would greatly increase the drag and actually contribute to derailing. A better solution is using “bigger” curves. I would also like to credit Paul and Niel Petersen who helped me build an instrumented test track that allowed me to test engines with a load simulation representing a train of various lengths and measure the electrical load on the engines by measuring the rolling friction of all the rolling stock I had at the time to determine the drag.
The engine tipping is a matter of simple physics. Without a transition, going into a tight curve right from a straight track is like hitting the engine on the side with a mallet in the form of a centrifugal force applied instantaneously. With Gargraves track there were a large selection of curves or you can make your own using their Flextrack, but in this last layout, all curves and switches are from their wide selection.
In previous layouts, I did make scenery: plaster cliffs and mountains. I had some success using Astroturf™ to make farm fields. I could paint the walls blue for background (but this one’s in an attic!). I used perhaps 100 Woodland Scenic trees.
Sidebar: I used a moving company to transport my trains to my current residence. But the cast trees were badly broken. After some thought, I put in a claim for 80 trees. I’ll bet it didn’t take 30 seconds for a company official to call me to ask what the heck did they move!
I also ballasted my track on the first two layouts. I decided not to do that on this layout. Layouts aren’t forever and modifications and upgrades are an important part of this hobby. Besides moving bags of sand through the house and up two flights of stairs to the attic just wasn’t in the cards. I leave it to you the reader to guess why! LOL!


