The Gallitzin Western Railway An O Gauge Toy Trains Layout
by Bob LeBras To date, I have spent a great deal of time writing about the individual pieces in my toy trains collection focusing, in detail, on their relative merits, and offering my personal recommendations. In addition, I have photographed and authored articles about several great layouts, as well as other aspects of the hobby. However, I have not given the same overall treatment to my own layout, the Gallitzin Western Railway.
The reasons behind my neglecting the “view from the top” approach were two-fold: 1. The layout isn’t finished and has no scenic detail. 2. I could not arrive at an angle from which to write about it. In other words, the layout isn’t special, big, or remarkable, so what is there to say that will interest others?
In November 2000, fellow TCA member, Brady Burdge, wrote to me suggesting an angle: Relate the story to my preference for toy trains versus hi-rail. Because I liked the concept so much, I saved a hardcopy of this e-mail in my “Pending” folder waiting for the day when I would actually finish my layout and write about it.
Since that time, two things have happened: 1. Rather than making any attempt at superdetailing, which is neither my desire, nor forté, I have decided to chuck that concept and go strictly with the toy trains look cramming as many accessories, lights and trains onto the platform. 2. The Gallitzin Western will, most likely, never be really complete. Few layouts ever are 100% done and, quite often, if they are, that’s the time to rip it out and start over. Hence, now is as good a time as any to feature my small railroad empire.
During my youth, in the 1960’s and 70’s, all I had for trains was a Lionel Hudson starter set circa 1956, a poor running DT&I switcher, a few extra signals and sections of track, some switches, a styrofoam tunnel, a 4′ by 8′ piece of particle board atop a ping pong table in the basement, and the limitless imagination of a young boy. The latter resource was, indeed, my greatest asset.
Since my early layouts were never permanently secured, I could alter them whenever the mood struck me. With limited trackage and space, I managed to come up with a wide variety of trackplans by simply combining sections and switches until everything fit. It was never so complicated as to require any sort of scale diagram, and all of the wiring was done by the time-honored method of trial and error; if it smoked, and it wasn’t a smoke pellet, it was a short.
For nearly 20 years, I enjoyed toy trains in this fashion reshaping my tabletop world over and over. Then, abruptly, I sold off my meager collection and withdrew from the hobby. Although the train bug never really left me, it would be nearly 20 years, and becoming a homeowner before I would consider delving back into the wonderful world of O gauge toy trains. The purchase of a ZW transformer, without owning a single train, section of track, or accessory, sealed my fate.
At first, like many collectors without a layout, or a plan, I began buying up trains on eBay and the web without truly knowing whether they would physically fit on an eventual room-sized platform. Also, at the time, all I knew was Lionel, and had never heard of MTH or Williams. I remembered K-Line from the 70’s and 80’s and, also, remembered that it was relatively junky, similar to the Lionel of that era. So, I started collecting that which was familiar to me, and that was postwar Lionel. I tried to ensure that my acquisitions were in great condition with original boxes. However, I soon discovered that, by purchasing everything with boxes, the result was a room full of cardboard. Another factor was that the trains were costing more than if simply purchased in good condition without the box. Having no requirement for additional cardboard, I switched to just buying nice postwar trains and accessories. If it had a box, fine, but it was no longer a condition of sale.
Forging ever onward, I continued to buy toy trains, accessories, track, switches, scenic details, and pieces parts packing them away in a third floor bedroom. A convenient, yet odd-shaped, five-sided bedroom on the second floor was designated as the official train room. The extra side was the location of a former fireplace in the 80 year old structure.
Two opposing walls of this room are paneled, one with a small closet door and the other with a large window. The former would be the canvas for hanging railroadiana and pictures. On the latter wall, I constructed a cantilever shelf for a small television. One wall was painted off-white. The color was changed to sky blue and clouds were fashioned using a sea sponge, and a mixture of white and blue paint. The fourth and fifth walls were covered in fake applied brick also painted off-white. I decided to paint the faces of the brick a color that closely matched the outside of my home leaving the “mortar” joints off-white. The effect is pretty decent and I’ve even had visitors ask if the brick is real.
The room is carpeted in dark blue and has a drop ceiling with ceiling fan installed. I painted the transom and closet door the same blue as the sky wall. My home is heated by radiators, each having a metal concealing cap over them. The cap in the train room was sprayed with Rustoleum dark grey to make it blend into the background. Now that the bedroom itself was ready for conversion to a train room, it was time to plan the benchwork.
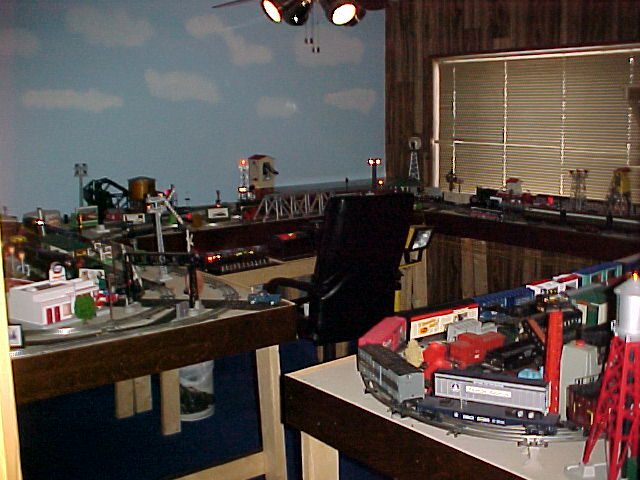
I use the term “plan” very loosely as it involved a few measurements, rough sketches, some wood and homasote, bolts, screws, and my limited carpentry skills. As my intent was to have a toy trains layout versus a scale model railroad, all that was required were six flat platforms each with legs, and bolted together for stability. From the shape of the room, and my desire to avoid “duck unders,” I arrived at a wraparound “G” configuration providing accessibility to all parts of the layout. The wood was cut and the tops of the platforms were constructed in my basement workshop. Attachment of the legs and final assembly was performed in the trainroom. The rough plywood and 2×4 edges of the tabletops were finished by attaching red oak stained strips of 1/8 inch birch plywood.
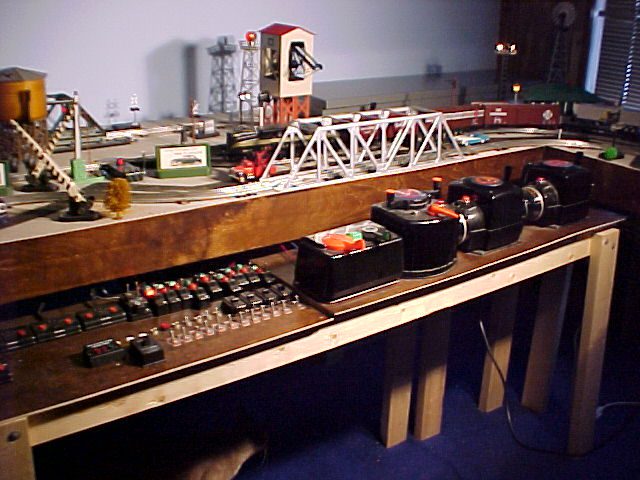
Next, came the control panel. Again, going with the toy trains look, Most of the controls would be original to the accessories. Lionel switch controllers, UCS track controllers, and a #97 and #456 controller would share the flat top panel, also bolted to the layout, with two ZW’s, a KW and TW transformers. The exceptions to the original controls would be modern toggle switches for block and accessory activation, and the replacement of those cheap modern momentary buttons with equally cheap inset doorbell pushbuttons. If I needed to add another control, I’d just drill another hole.
Finally, it was time for the moment of truth: What would really fit on these platforms?
Just like the good old days, there was no trackplan. I had constructed significant benchwork, but I had no idea what the layout would really look like, nor a plan of how it would operate. At this point, all I knew was that I wanted alot of track, enough space to park many trains, and the ability to run at least two trains simultaneously. As a tribute of sorts to my youth, instead of using track planning software, or even a graph paper sketch, with a pile of track and switches, I began piecing the rails together. The goal was to use every #022 switch in my collection.
As mentioned, when my interest in the hobby was reignited, I knew very little about modern toy trains. As a matter of fact, I did not understand much about the old ones either. I just knew that I liked them. Although my RailScan @ wuarchive website had been online for years, I had no idea that there were discussion groups devoted to electric toy trains (such as Toytrains and Lionel Collectors). The concept of toy trains clubs was totally foreign to me (such as TCA, TTOS and LCCA). Believe it or not, as far as I was concerned, York was just another city in Pennsylvania. The one that sported the big barbell dude.
For about 15 years, my train universe revolved around Lionel O-27. Therefore, as an adult, I purchased massive quantities of O-27 track and many, many #1122 switches. I do not recall how many turnouts were in the final count, but there were nearly 600 sections of used track. Given the comparatively small amount of tabletop on the benchwork, all I can say is that I was being very overly optimistic.
Of major concern, as the time drew near to lay rail, was the fact that all of the track was second-hand and, subsequently, rusty. Attempting to clean the rust using a variety of liquids, scrubbing pads, and grinding bits and brushes, attached to both a Dremel as well as a drill, clearned very little of the rust. Nothing was terribly effective, and any method was extremely time consuming. I turned to my train guru, Ted Symonds of CoolTrains.com, for an answer. His response was simple, “Buy all new track and make it O gauge.”
“But I have all these #1122 switches,” I lamented.
Ted replied, “Sell them and the track on eBay. There is nothing better than the postwar Lionel #022 switch.”
I reluctantly agreed, understanding that this was the best solution. I haven’t regretted the decision for one second since. The constant voltage switches are great and the track is clean and shiny. Purchasing far less O gauge than what I had acquired in O-27, I began piecing together the trackplan adjusting it until I had accomplished my goals of complete switchability between two simultaneously operating loops with adequate yard and siding rails.
Naturally, since postwar trains were my primary collecting focus, the postwar period between 1945 and 1965 was a logical choice as an operating era. This clearly defined purpose would serve me well in future acquisitions eliminating such decisions as whether to buy an F3 or a Genesis for my passenger consist. Clearly, these kinds of choices were predetermined; one less thing to think about.
I fiddled with the track for awhile, but the olde-tyme know-how came back to me like riding a bicycle. It took a surprisingly brief period to fashion a layout meeting all of my requirements. While I was working on the trackplan, using Lionel tubular O gauge track on a flat series of interconnected platforms, I realized that the effect was decidedly toy trains versus hi-rail. Although this was the case and my primary interest has always been operating trains, at this point, I still wanted to create some measure of scenic detail beyond the trains to provide visual interest.
After settling on a trackplan, and acquiring a couple of extra #022’s to cram in more short sidings, I began placing the vintage and new accessories. An estimated 95% of my trains have been acquired from two sources: 1. CoolTrains.com, and, 2. eBay. The TCA Eastern Division train meet at York has played a relatively minor role in actual purchases, but has been a great source of inspiration and desire.
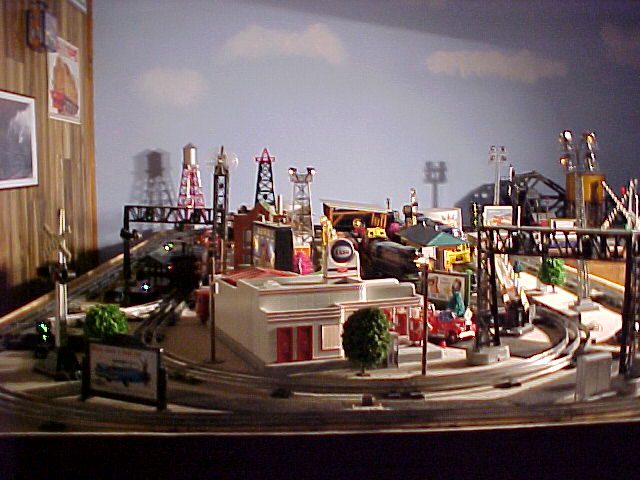
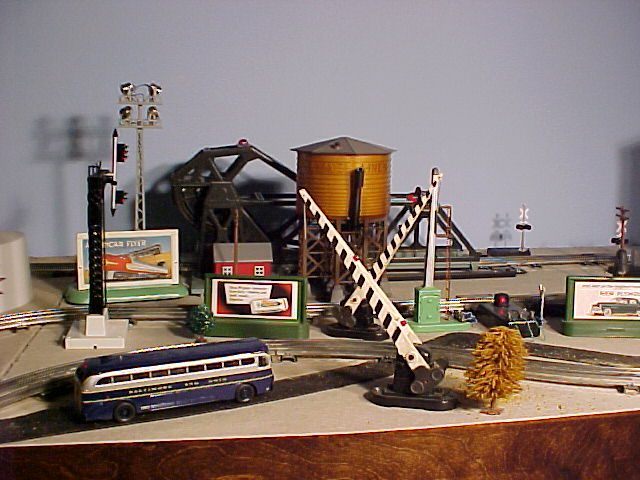
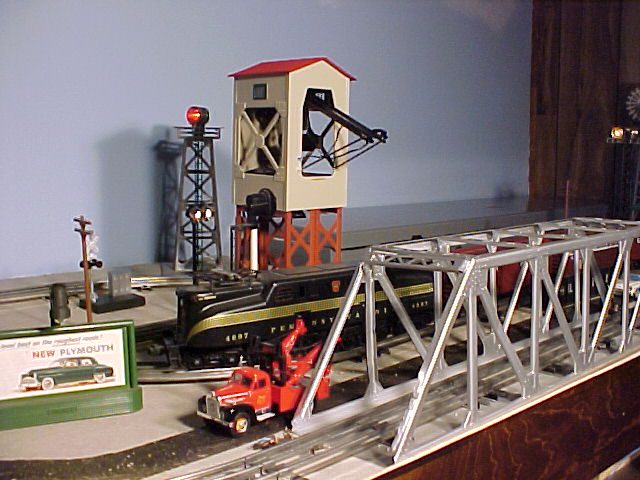
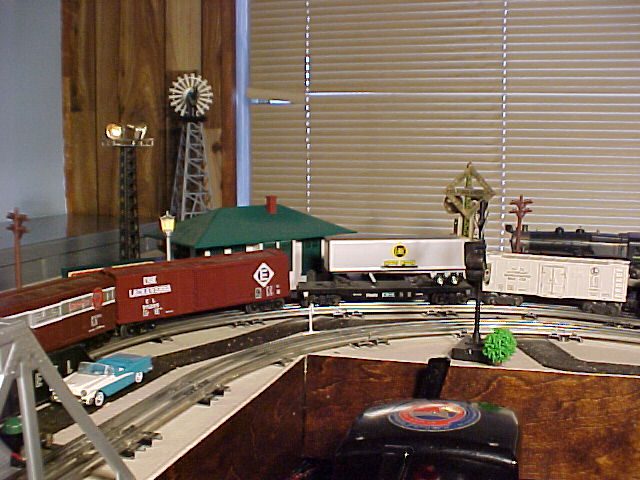
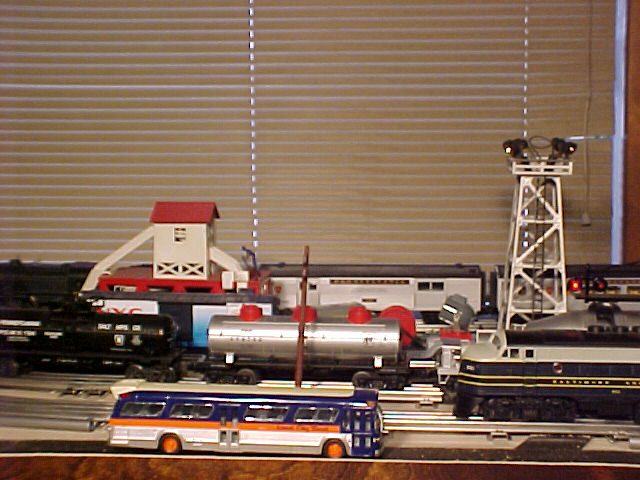
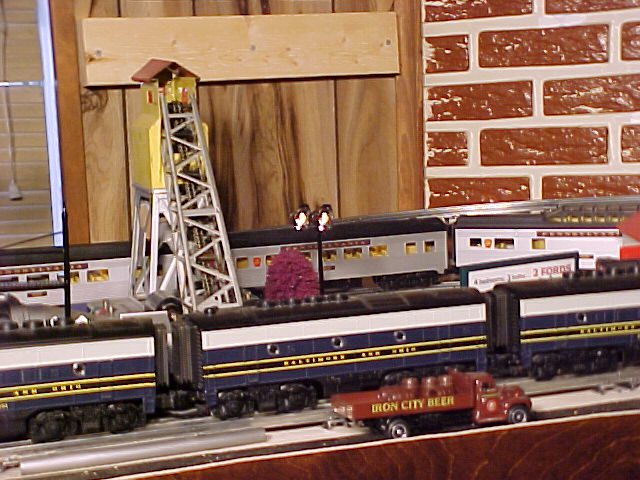
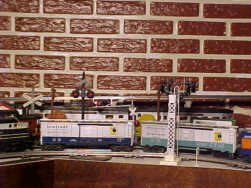
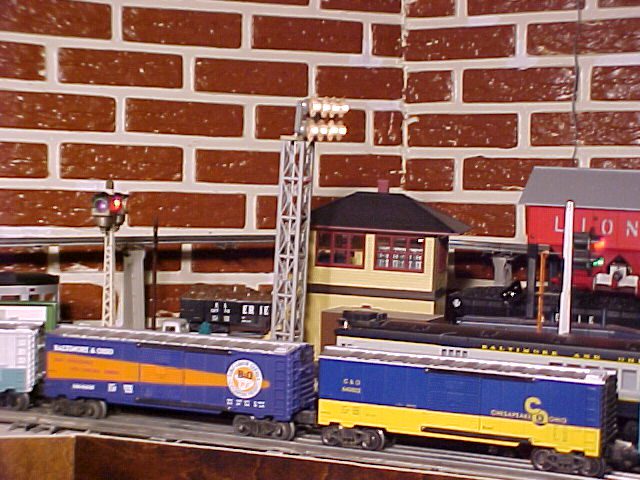
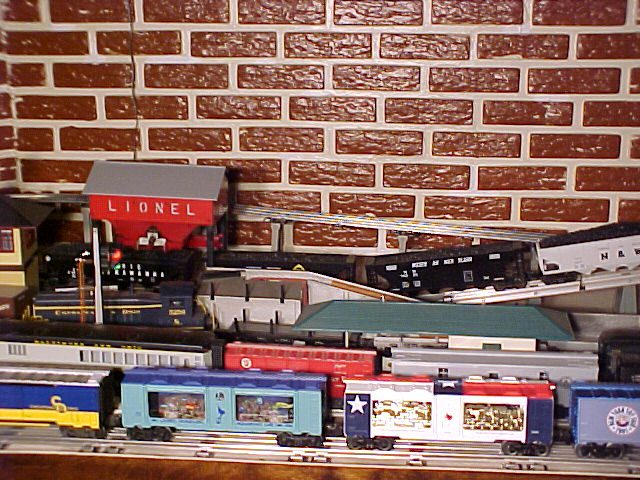
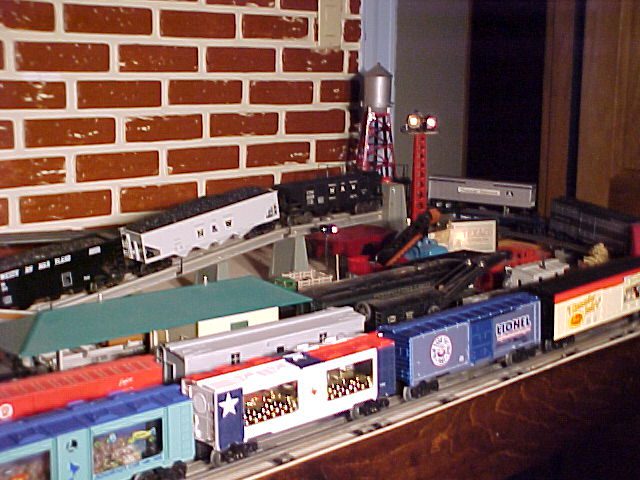
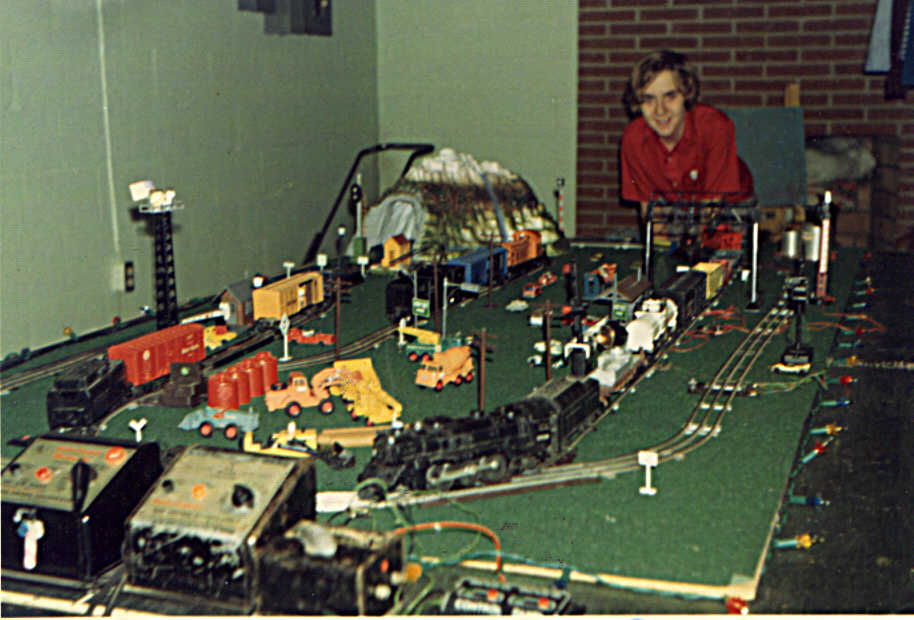
The operating layout is designed with an outer loop that follows the outside perimeter of the entire six platforms. The outer loop crosses a modern Lionel Bascule Bridge and a #110 Trestle Set provides aerial lift. An inner loop on the largest platform (4×8) is connected to the outer loop via four switches for complete in-out access without reversing. A long siding switches off the inner loop and parallels the outer loop passing under an MTH Flyer Coaling Tower, a postwar #132 Automatic Stop Station, a modern Lionel reissue #497 Coaling Station and terminates with the #456 Coal Ramp. This siding has a short one coming off of it at about mid way to service the #352 Icing Station. Another long siding, also parallel, switches off the first passing the #97 Coal Tipple ending at a lighted bumper past the postwar #256 Freight Station. Just prior to the station, a siding splits from the long to provide access to the #364 Lumber Loader and #397 Coal Loader. Between these two sidings, and next to the station, I installed a “track to nowhere” abutting the station on one end and installing a lighted bumper at the other end. Finally, inside the inner loop, there is another short siding beyond a #356 Operating Freight Station that serves the town. Every deadend siding, except for the one terminating with the coal ramp, is protected by a postwar diecast lighted bumper. Each section of siding between switches is divided into a block. The inner loop is one block and the outer loop is split into two blocks. The loops are designed for clockwise train movement.
Like laying the track, the location decisions for various accessories progessed quickly and followed the obvious space requirements for each piece. At the center of the largest platform, I created my “Main Street” by installing inexpensive diecast street lamps. Roads and parking lots were extended to various parts of the layout using AMI Instant Roadbed. The town consists of an MTH operating ESSO station, a vintage Lionel #334 Operating Dispatching Board, a Lionel electric generating station kit, an MTH repro #455 Oil Derrick with some Lionel “Linex” oil storage tanks, and a Lionel loading dock kit that will be replaced.
With all this stuff, more or less, in place, it was time to wire. Given the design M.O. so far, it shouldn’t be surprising that. electrically, the underside of the layout is far more chaotic than above board. Instead of organized circuits, I drilled a hole in the platform, ran wires down, made each connection individually, and tested it for function. In this instance, function followed form, and everything does function, however, the form is basically spaghetti. There are wires criscrossing in a maze, and terminal strips of varying sizes seemingly randomly placed beneath the platforms like leeches on a juicy tourist. If I decide to do it all over again someday, I will not follow my own example.
The flat control panel with the four transformers and mostly original accessory controllers is at a comfortable height for operating while standing or sitting. I identified the transformers as 1, 2, 3 and 4 from right to left. Each throttle was given a letter designation from right to left as well so that, for example, a “2D” identification on a terminal strip would indicate the left main trottle on the second ZW. Each transformer was checked for synchornous polarity and assigned control over a specific block. Running a train between two blocks sometimes requires the coordination of two separate throttles. Control is pretty easy between ZW throttles, but gets tricky between a KW and ZW. I imagine this form of control would be akin to lashing up a couple of diesels and leaving the MU cable disconnected.
Power to each block is controlled by a toggle switch. Since two trains may occupy two continguous siding blocks controlled by the same throttle, power has to be cut to the rear block to move the leading train, while leaving the rear one in place. As in prototype railroading, two toy trains occupying the same control block can have disastrous results.
Alright. The layout is built, up and running, and looking like a classic toy train railroad. The final major construction step of securing the track and accessories to the platforms was greatly assisted using a variable speed cordless drill. What’s left to do?
Three things:
- Finish the scenery.
- Decorate the trainroom walls with railroadiana.
- Give the rail empire a befitting name.
The first item on the punch list could wait. Having two rambunctious cats (Ghost and Nefertiti) who, in reality, own the house and merely allow me to live with them, I knew it would be impossible to keep their little paws off of the layout. Therefore, I had some serious decisions to make regarding detailing. I would later discover, in a dramatic way, that, as a consequence of living with the two fuzzballs, many scenery options would be predetermined thereby limiting my choices and deciding the question of toy train versus hi-rail.
Decorating the walls was an easy one. I had lots of neat pictures and railroadiana to put up, and I always thoroughly enjoy jazzing up a room. I bought some frames and just randomly placed things where I thought they would look good. It was a nice diversion from the intensity of stringing thousands of scale miles of wire while laying on the floor.
Number three on the list was an interesting challenge. I put together different monikers in my mind, but wasn’t completely satisfied with any of them. Since I am a native Pittsburgher having traveled throughout western and central Pennsylvania, I sought a name that reflected the heritage and history of the region.
Surfing a knarly brain wave, I stumbled on the idea of holding a contest to determine the name of my toy train railroad empire. Offering a new in the box Lionel Route 66 flatcar with two black sedans as first prize for the winning entrant, I sat back and waited for the responses.
Overall, I was a little disappointed with the total number of submissions, not fully comprehending why folks would pass up the chance to get a free piece of rollingstock in exchange for a mere suggestion. Indeed, this was the case and, in the end, there were not a great many names from which to choose. However, as it turned out, I only needed one roadname, and it was provided by Dr. Joseph Lechner: Gallitzin Western. While several other fine suggestions were offered, Lechner’s Gallitzin Western combined a great little town on the former Pennsy mainline with territory to the west which includes Pittsburgh.
Russian prince Demetrius Gallitzin was born in Hague, Holland, December 22, 1770. His father, a Russian prince, served as Envoy Extraordinary to Hague. His mother saw to his education and both were introduced to the teachings of Catholicism. To round out his education and to prepare the boy for manhood, a two-year trip to America was planned. In 1795, at the age of 22, Demetrius landed in Baltimore.
With a letter of introduction to Bishop Carroll and needing a place to stay, Demetrius entered the Sulpician Seminary. With the desire to become a priest, he completed his schooling and became the first Catholic priest to have received all his orders in the United States. In becoming a missionary priest, he gave up his rights to Russian nobility and was assigned to the Conewago Mission in Pennsylvania some 60 miles from Baltimore.
A priest was summoned to give last rights to a sick woman on the Pennsylvania frontier and Father Gallitzin made the journey to the McGuire Settlement in present Cambria County. Father Gallitzin, having a desire for his own parish, saw the need for a parish to serve the Catholic settlers of the frontier. He petitioned Bishop Carroll of Baltimore to assign him to the frontier and in 1799 permission was granted.
Father Gallitzin set about establishing the church of Saint Michael’s and later laid out the town of Loretto. Though offered Bishophood in other areas, the “Missionary of the Alleghenies” remained with his parish to his death on May 6, 1840. Father Demetrius Augustine Gallitzin will long be remembered as the “Apostle of Western Pennsylvania.”
In Gallitzin Borough, an important transportation crossing along the Main Line, the twin railroad tunnels breach the mountain summit at the Cambria/Blair County line. The tunnels were built by the Pennsylvania Railroad in 1854 and 1905 and measure 3612 feet in length. Still in use today by Norfolk Southern, you can feel the awesome power of trains as they pass through the tunnels daily.
With the roadname question resolved, it was finally time to plug in the transformers, add the trains, and start running a railroad. Of course, there were some glitches and quirks to work out. It took some acclimatization to coordinate operating trains using two throttles. However, wiring everything individually, and testing its function prior to moving onto the next segment served well the goal of relatively smooth initial operation.
Operationally, the rail traffic flow on the Gallitzin Western is pretty good. A primary hinderance to performing some interesting switching maneuvers is the placement of six trains with locomotives on all of the sidings. Moving trains from the farthest points is like playing that game where you slide the numbers to make a sequence from 1 to 30. It’s a technical challenge to shift everything out of the way, and, at times, nearly impossible to get it all back. The plan is to build some storage shelves to alleviate the congestion and allowing maximum operational enjoyment from my hard work.
While most of the trains and accessories came together naturally, two oddball passenger cars presented an integration challenge. The first is prewar Lionel O gauge tinplate. Nothing fancy and no wheel sets. I got it as a gimme in a mixed lot grab bag eBay auction. Initially, I simply had the orphan on a dresser, but got the idea of placing it next to my Esso gas station as a storage shed. The other misfit is a 1989 TCA National Convention heavyweight passenger car. It is lighted and has silhouettes in the windows that appear more like the people are partying rather than riding on a train. This party look inspired me to place it on that “track to nowhere” mentioned above coupling it with a postwar Lionel Lines red caboose. The effect is that this car serves as a restaurant at the adjacent passenger station.
The Gallitzin Western continues to evolve and grow. While there is no real estate left to add large accessories or expand rail construction, accomodations can always be made for smaller do-dads such as lights and signals. As of this writing, I am installing two floodlight towers, a new crossing signal system, and a prewar Lionel #76 block signal.
One of the electrical innovations I have discovered along the way is the joy of solderless crimping. While for those expert in wiring this seems a no-brainer, for me, it was a revolutionary concept akin to discovering the terminal strip. On a whim, I picked up a neat assortment of connectors at Home Depot one evening, and have been been happily crimping ever since. Whenever the opportunity arises, I have retrofitted earlier direct wiring to include terminal strips with solderless crimped connectors. Eventually, I would like to rewire the entire layout into a logical series of panels and circuits.
Not every idea that I implement turns out to be a good one for my situation. I sought an inexpensive alternative to purchasing little bags and bottles of ballast at over-inflated prices. My friend, Dr. Lechner, who gave my layout its official roadname, suggested that I try cat litter. Naturally, I worried that Ghost and Nefertiti would find too much to enjoy about that concept, but was lured by this extremely low cost solution. I thought that if I used a different brand, combined with the fact that it wasn’t in their kitty box, they would leave it alone. Further, it was suggested that I bond the ballast using a mixture of white glue and water so that it would not scatter, would not find its way into turnout mechanisms, and would not get pulled into locomotive gears. While the overall concept sounded good in principle, I had some trepidations about the plan.
Instead of diving head-on into full-scale ballasting, I bought a bag of unscented, clay-based cat litter and began applying it to the inner loop and part of the outer loop. I used a narrow pitcher to pour a pile along stretches of track then, with a small regular paint brush, I “sculpted” a roadbed with gentle brush strokes. The effect was quite satisfactory, but I wanted to conduct a long-term experiment with the cats in order to determine their level of interest. I wasn’t keen on bonding the material as this would be too permanent making future alterations, additions and repairs to the trackplan difficult. I conducted a test bond on a piece of homosote in the basement and found that, after applying the glue, the ballast turned into a material similar to composite rock.
For about a half year, the only thing I noticed was that the cats would move the litter around which was easily repaired using the brush. One day, I walked into my trainroom and noticed a pungent odor. I couldn’t pinpoint where it was coming from so, turning on the overhead light, I scanned the ballasted areas of track to see if there were any hidden accidents. Sure enough, at the switch tracks between the inner and outer loops, there was a dark wet spot indicative of illegal use of ballast. Immediately I grabbed my Fantom Thunder vacuum cleaner (I had burned up my previous Fantom Fury vacuuming plaster and debris associated with extensive home renovations so I knew the Thunder could handle cat litter) and started removing the ballast as quickly as possible. This job being a time consuming process, I thought it could be done in stages. However, this thought turned out to be quite wrong. Two subsequent incidents occurred at different locations requiring an immediate, concerted removal effort. I vacuumed all of the cat litter off of the layout and learned a valuable lesson.
Of equal importance, I came to the realization that any attempt at scenic detailing would be met with the cat’s double destructive efforts. I look at them like children; they don’t know any better, they only want to play, and who can blame kids who just want to play with trains?
The toy trains crossroads had been reached and, at this juncture, I wisely decided to take the low road. I wasn’t sad, nor upset. Given my areas of interest and understanding my limitations, the Gallitzin Western Railway would forever be an O gauge toy trains layout.