Kids Club Tunnel Project
Desert Division Kids Club
By Chris Allen

This is the start of a two part project for you to build a tunnel for your layout using things you may have leftover from the gifts you received. This is a fun project that will require some adult supervision, so ask Mom and Dad or Grandma and Grandpa to give you a hand and promise to help on the cleanup too, because sometimes things get a little messy.

Model railroaders have always recycled bits and pieces of everyday life into their layouts. That’s the fun thing about building train layouts, making your own little world and using your imagination. To build our project, we’re going to need some cardboard, and also look for Styrofoam boxes that may have protected the gifts you or someone in your family received this year. You will also need either Elmers Glue or ask an adult for help with a glue gun. Photo 1 shows what we used to get started.
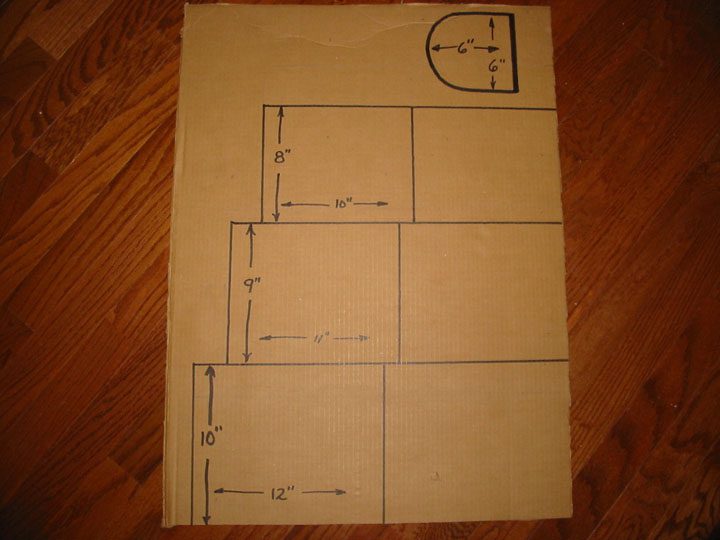
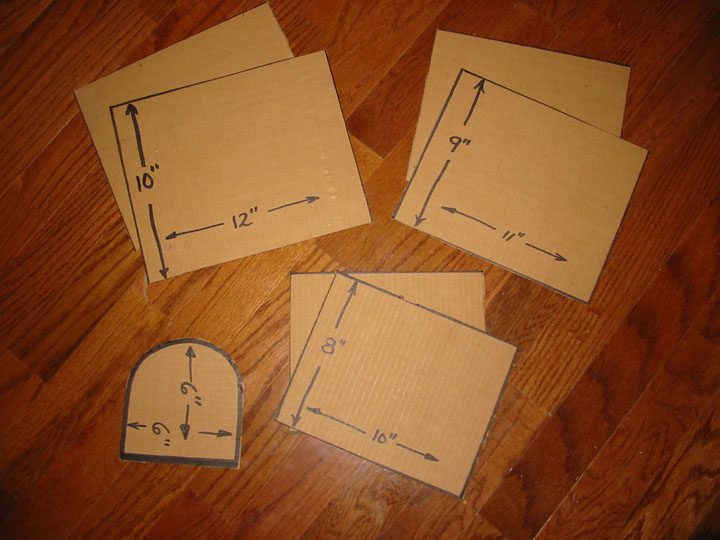
Next, ask an adult to show you the ribs of the cardboard before you measure, and cut and make sure the ribs of the cardboard are going up and down when you cut the pieces, as this will give your tunnel extra strength. You will need to measure your cardboard box and cut seven pieces. Cut two pieces 10 inches tall by 12 inches wide, two pieces 9 inches tall by 11 inches wide, two pieces 8 inches tall by 10 inches wide, and for the final piece, cut a shape 6 inches wide by 6 inches tall and shape it like the tunnel. We had a big cardboard box and Photos 2 and 3 show you how we cut our pieces.
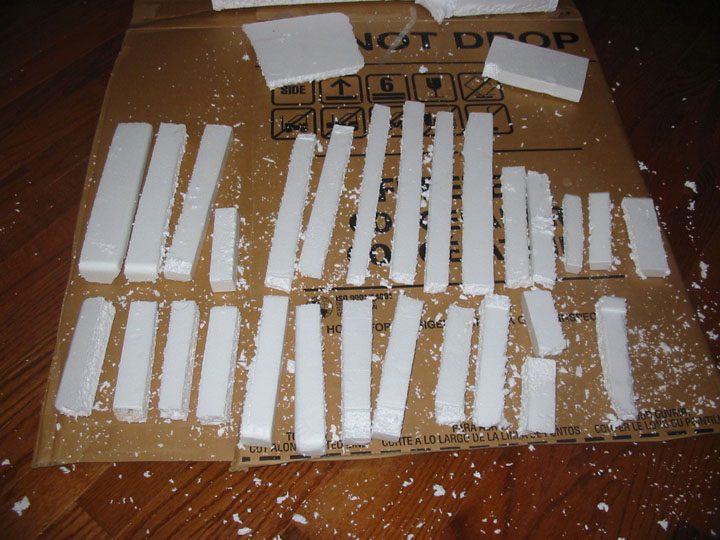
What happens next is the messiest part of the project, so make sure you help with the cleanup. Take your Styrofoam box and begin cutting it up into various lengths. Get your parents’ help, and they can cut the box up using a saw or sharp knife. The pieces don’t have to be perfect or exact. They can be various lengths but need to be the same width. You can see the mess we made in Photo 4.
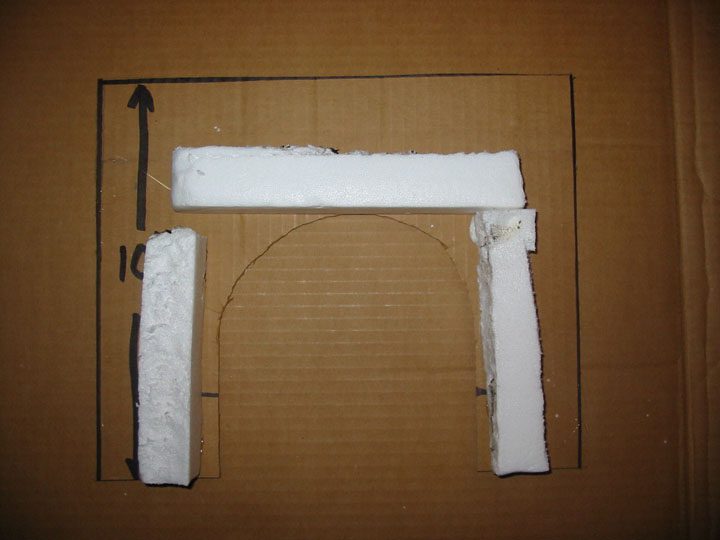
Now we start building! Using your skinniest pieces of Styrofoam, glue the two 10 inch by 12 inch pieces of cardboard together as shown in photo 5.
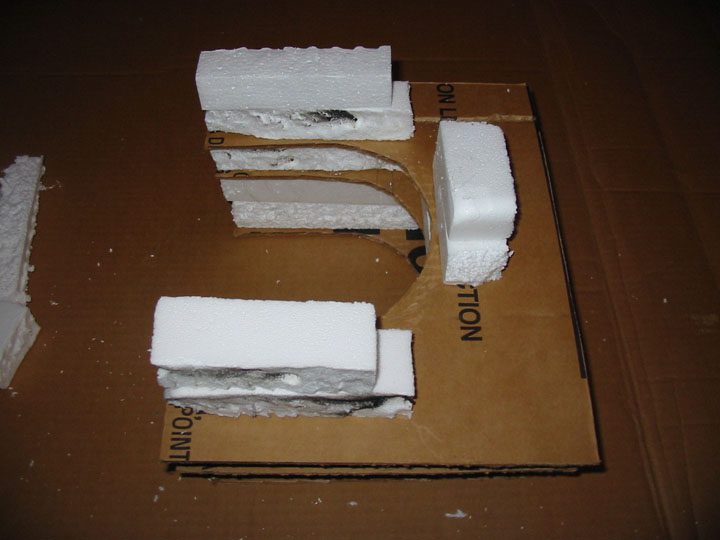
Next glue two layers of Styrofoam to make it about twice as long on each end of this first piece. If you are using Elmers glue it will take a day for the glue to set strong enough for you to begin to expand your tunnel . Asking an adult to help with a hot glue gun will get this part of the project done in about 30 minutes. Continue to build your tunnel adding an extra layer of Styrofoam to each new extension, so that the middle section had one layer of Styrofoam, the next two layers of Styrofoam pieces and the outside two had three levels of Styrofoam. ou may also want to leave some gaps as we did in Photo 6. That part of the project will get explained in the next issue when we add the mountain to our tunnel, for now you can place the half completed tunnel on your layout and run your trains through it!
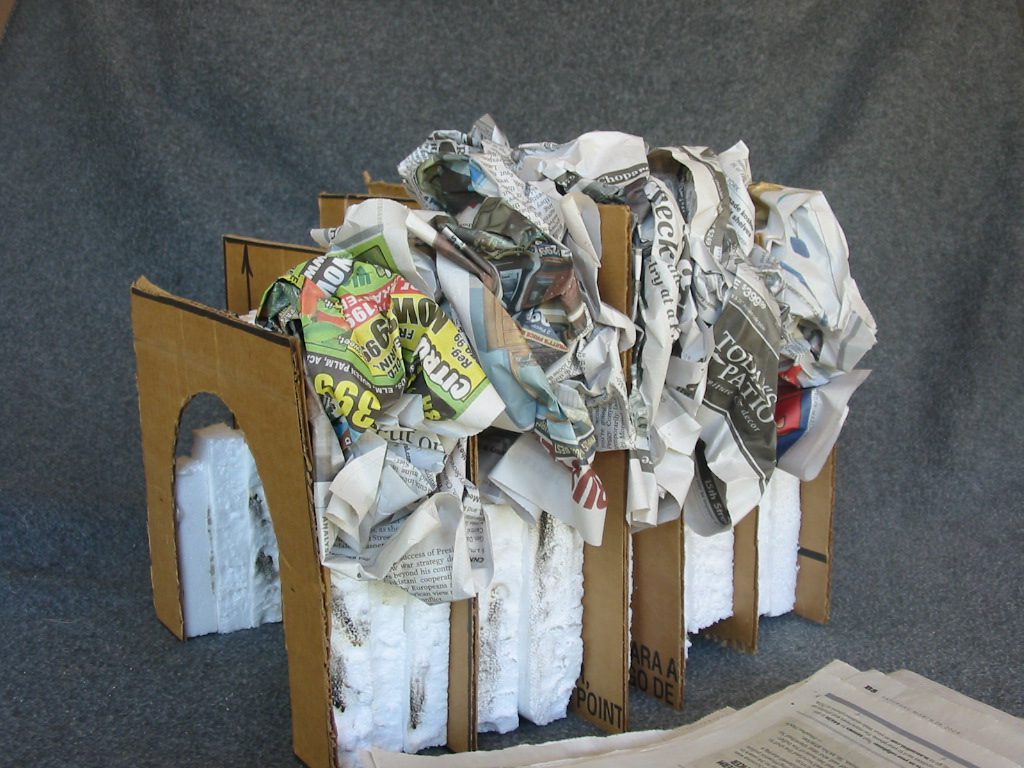
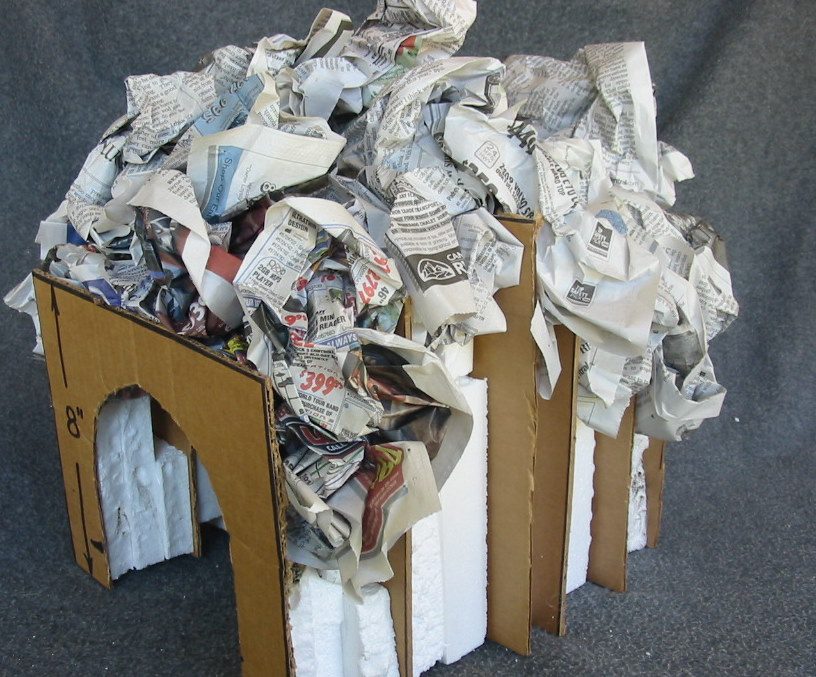
In Part 1 of our tunnel project we built our tunnel out of scraps of Styrofoam and cardboard that was going to be thrown away. Keeping with our re-cycling and re-using theme, Part 2 will also ask that you look around the house for most of the things we need to finish up your tunnel. At the end of Part 1 your tunnel should look something like Photo 1. Remember you were using various widths of Styrofoam so the distances between your pieces of cardboard might be different from the one we built. That’s okay, because all railroad tunnels are different anyway. To finish our project we will need some newspapers, some White Glue, an old empty spray bottle, a drop of dish soap, a measuring cup and five or six sheets of green tissue paper. Ask for help and work outside or on an old towel or blanket that can get washed afterwards, we are going to get messy!
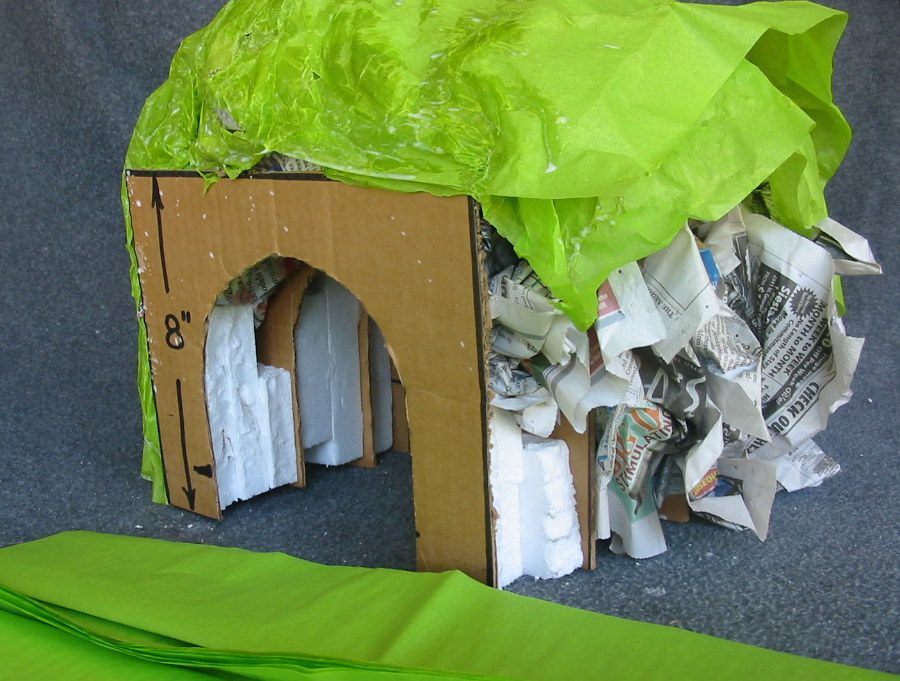
First measure 8 ounces of white glue into your spray bottle, then add 8 ounces of water, and just put two or three drops of dishwashing soap, not too much, just a couple of drops. Shake your spray bottle very good so everything gets mixed evenly. Begin tearing your newspaper into half pages and begin to crumple and fit them in between all of your cardboard. Really fill up all the spaces but don’t stuff it in too hard, it should look like Photos 2 and 3:

Now the messy part! Spray your newspaper with your glue and water mixture until the paper is wet, then let it soak in for one or two minutes. Using your hands slowly push the newspaper together so they all touch each other and then add your first sheet of tissue paper. (Photo 4) Slowly add all of your sheets of tissue paper spraying and soaking each layer. If your paper tears, just make a patch with any extra tissue paper you have. Mountains and hills aren’t smooth so if your paper has wrinkles it will look better. If you can’t find green tissue paper don’t worry. Ask an adult to buy a very cheap roll of plain white paper towels and use them just like the tissue paper. You will need to make two batches of your glue and water mix because paper towels really soak up the mixture fast, but when your done you’ll get the extra fun of painting your tunnel with poster paints.
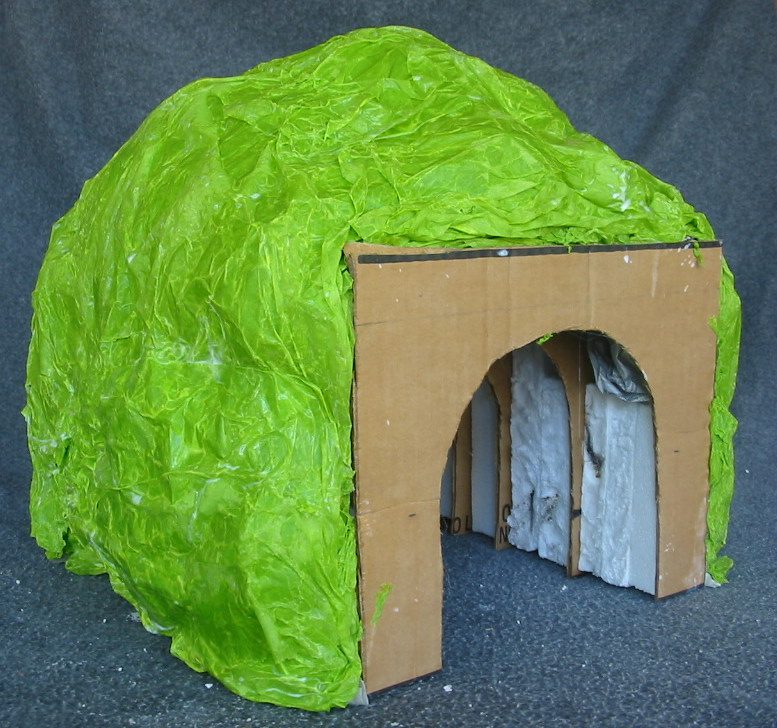
When you’re all done your tunnel should look something like Photo 5. The glue and water mix will continue to drip for a few hours as the paper dries. Keep it on some extra newspapers or let it dry outside in the sun. You can either paint the tunnel portals yourself or buy some at the local train store and glue them on. It’s your tunnel, paint it with poster paints anyway you like.