Build a Guest Room “Quick-Change” Train Layout!

By Bob Harder – [email protected]
Many of us, and our train collector and operator friends, have home model train layouts … OR we/they are always PLANNING to have a layout SOMEDAY! Maybe it’s “When we move to a bigger house …”, or “When we are ‘Empty Nesters’ …”, or maybe “When the kids are off to college … “. There are LOTS of reasons. Whatever the reason, Wait No Longer! YOU can build a Guest Room ‘Quick-Change’ Layout TODAY!
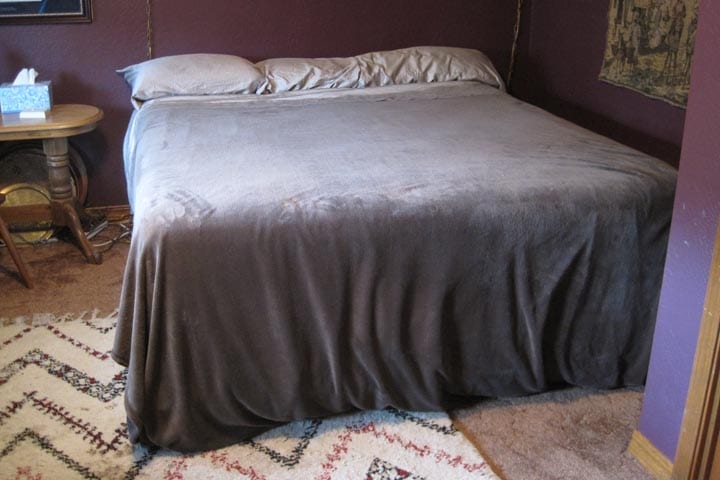
Depending on our houses and family size, we often have one bedroom that serves as a spare room/office/sewing area/craft room/computer room/storage area, or ‘Man Cave’. Whatever furniture, equipment, or ‘stuff’ we have in the room, the top of the bed is usually clear and unused – that is, until now! That room and that bed can be YOUR “Quick-Change” Train Layout overnight!
In my case, I have a 100 square-foot O-Gauge layout in my house, but I also have collected a few modern Standard Gauge tinplate trains, buildings, and accessories. Rather than just put them on display in my train room, I built a Guest Room ‘Quick-Change’ platform and created a new 8’x8′ Standard Gauge layout. I have also built a second ‘Quick-Change’ layout to run four of my 1860’s-era ‘General’ train sets with Western and Civil War themes.
Here’s how you can set up a good-size layout in less than an hour and take it down and store it away just as quickly. The ‘ingredients’ are simple: plastic sawhorses, 2×4’s or similar supports, plywood or MDF/Masonite panels, carpet (optional), and your track, switches, trains, and accessories. Just follow these easy steps.
Step 1 – Determine the size of layout that will fit your bed and room. Usually – depending on bed placement in the room, other furniture, etc. – these layout sizes will fit over these bed sizes: King bed – 8′ x 8′ layout; Queen bed – 6′ x 8′ layout; Double bed – 6′ x 6′ layout; and even a Twin bed can give you a 4′ x 6′ layout!

Step 2 – Buy plastic foldable sawhorses at your hardware or home improvement store (about $15 each). I use the kind with a shelf between the legs when the sawhorse is open, providing a handy place for cars, accessories, tools, etc. For all bed sizes, you will usually need 6 sawhorses.
Step 3 – Buy 6 lengths of 2×4’s or similar support material. I use 2″x3″ plastic downspouts – they are lightweight, inexpensive, and have adequate strength for our purposes. For King beds you will need 6 8-foot lengths. For Queen and Double beds you will need 6 6-foot lengths. And for twin beds you will need 6 4-foot lengths.
Step 4 – Buy 1/2″ 2’x4′ plywood or MDF/Masonite panels to serve as your layout platform (usually about $8 per panel). For a King bed 8’x8′ layout, you will need 8 of the 2’x4′ panels. For a Queen bed – 6 panels. For a Double bed – 5 panels (cut one in half to make 2 2’x2′ sections. For a Twin bed – 3 panels.
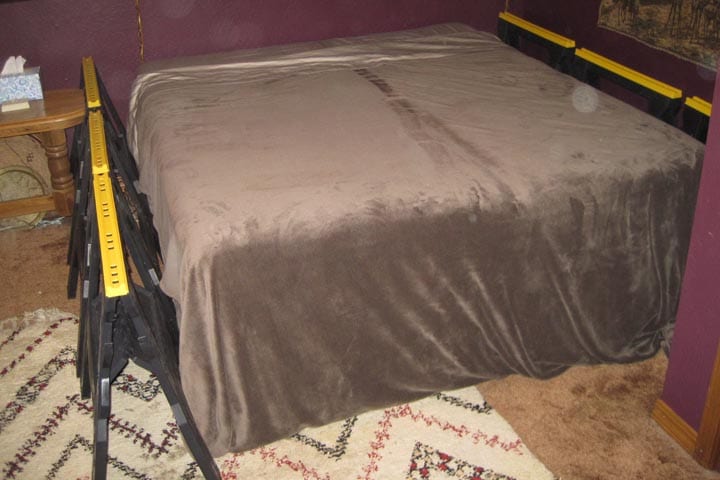
Step 5 – Place the sawhorses end-to-end with 3 down each side of the bed. If the bed is up against the wall, move the bed slightly and place 3 unopened sawhorses between the bed and the wall.

Step 6 – Place 2 of the 2×4’s (or other supports) across the bed and rest them on the top of the sawhorses on opposite sides of the bed. Space the 6 2×4’s evenly along the length of the bed for good support and stability. If the bed is against the wall and you placed unopened sawhorses along that side, the top of the sawhorses may be 1/2″ to 1″ higher than the opened sawhorses on the other side of the bed. Use shims or 1″x4″ boards under the legs of the opened sawhorses to level the 2×4 supports. For king and queen beds, you may want to add an additional 2×4 support lengthwise down the center of the bed for greater support.

Step 7 – Place the 2’x4′ panels on the supports and arrange them for your layout size. For added interest, you can paint or decorate one side of the plywood/MDF panels in a color or colors of your choosing – tan, green, or multi-camo colors work well. You can also paint the other side of the panels for a different look or ‘theme’ – white for Christmas, for example.
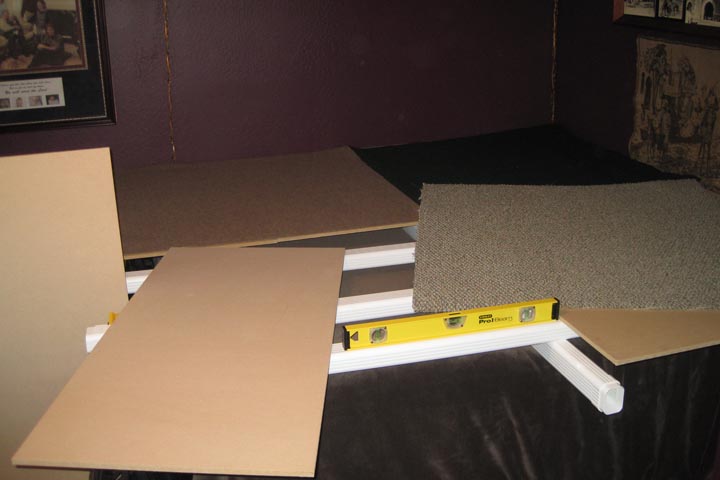
I like using 4’x4′ carpet sections to place easily on the plywood/MDF panels for color and soundproofing.
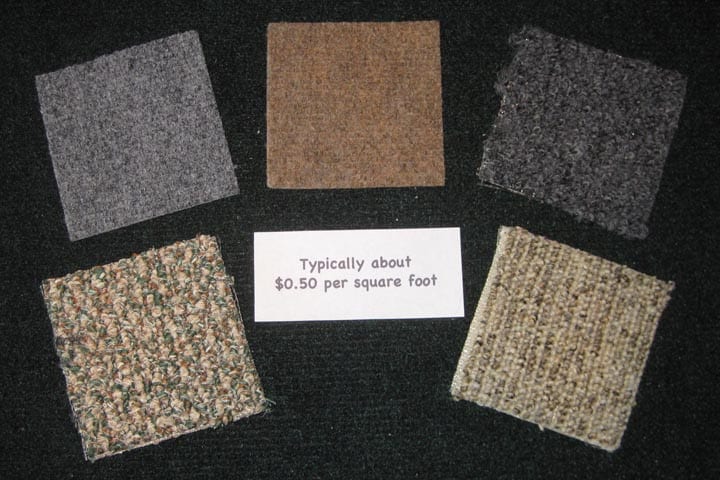
They cost about $0.50 per square foot and come in a wide variety of colors and patterns and can be changed as easily as the seasons.
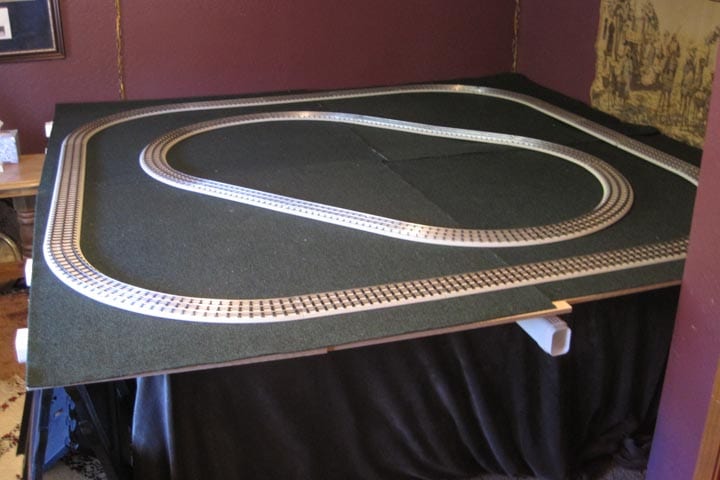
Step 8 – Place your track and switches on the panels/carpet and arrange them to create your train layout. You can change and rearrange your layout anytime you want – a major advantage of a ‘temporary’ or ‘quick-change’ layout such as this.
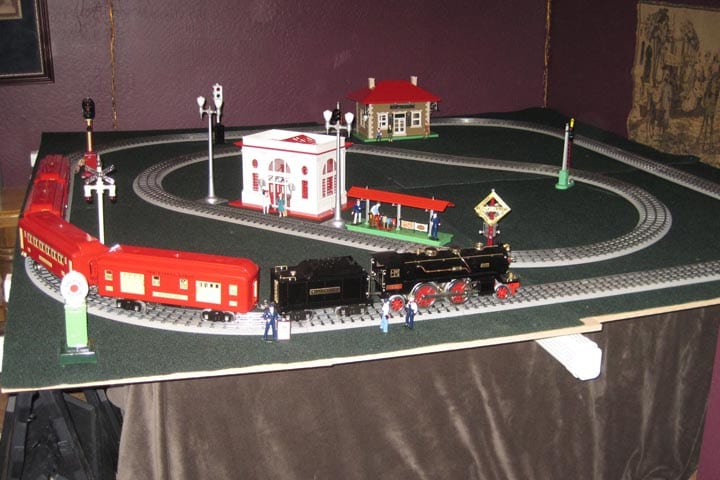
Step 9 – Place your trains, buildings, signals, accessories, landscape, and people on your layout. You can run wires under the carpet or directly under your FasTrack to control your switches, lights, and accessories.
LAST STEP – HAVE LOTS OF FUN! Your ‘Quick-Change’ layout can be modified anytime you want and can be quickly disassembled and stored away when you have friends or family visit for an overnight stay. When company’s gone, set your layout up again and you are back in business. For variety, consider changing your layout every so often: different scale? Lots of operating accessories? All passenger trains? Let your imagination be your guide!
Happy Railroading!


