Weathering Slag: How I Paint the Past
By Zachary Ferreira, TCA #19-73990 Winter 2026 e*Train
Overview
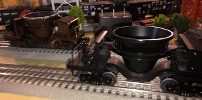
After visiting the Bethlehem Steel plant in August of 2015, I became inspired to mimic part of its weathered and rustic look somewhere on my layout. I decided the most appropriate opportunity I had was to transform my MTH Premier slag cars. These came in sets of 3 and were unlettered but numbered differently in three ways. I have included a before-and-after shot of a finished and unfinished car in this article. Below, I outline a start-to-finish process of how I proceed to weather one of these cars.
3…2….1… Finish Gluing!… Wait What?!
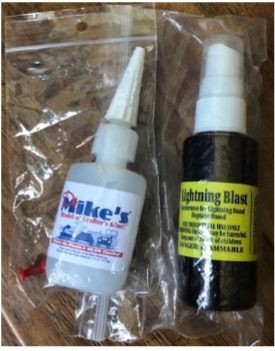
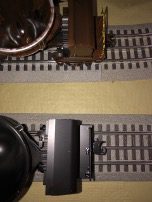
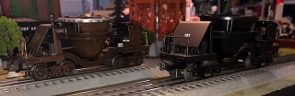
Before I began to bring new (or old) life to these cars, I unfortunately neglected to use them over other pieces of rolling stock. Thus, these cars sat on the shelf collecting dust for a couple of years. Upon re-inspection, I also noticed that some of the handrail stanchions had snapped and needed some re-gluing. I prefer to use Mike’s Model-n’-Crafter’s Glue, in conjunction with a fast accelerator spray. Using the accelerator spray allows the glue to instantly set and eliminates the long waiting time for other glues to dry. After gluing the handrails back in place, one of the side effects of using the spray is that it leaves a little bit of excess on the side of the handrail. I included in this article a comparison photo showing this and a finished car masking up the extra bit of glue. Fixing these minor cosmetic errors gave me even more of a reason to weather these cars.
Let’s get down to business (and what you’re reading this for), the painting!
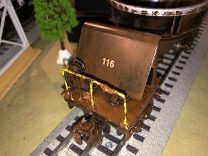
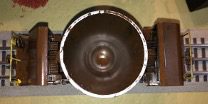
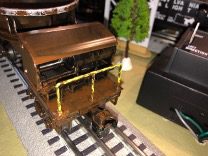
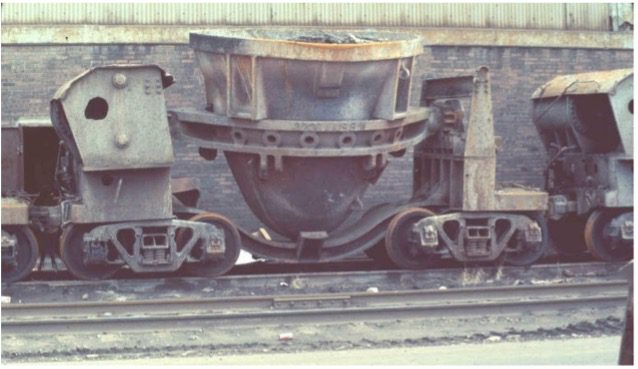
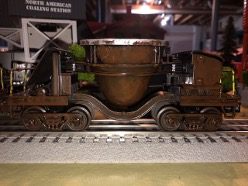
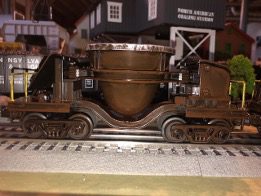
For each car, I am applying a base coat of Testors CREATEFX Brown Enamel Stain to provide the rustic look seen at Bethlehem Steel. I first apply this with a small brush to virtually all angles of the slag car. I make sure to especially hit the wheels, couplers, and even inside the “bucket.” As a continuation from the previous paragraph, I also made sure to paint over the extra glue marks that were provided courtesy of the applicator spray. See the photos that I provided for a visual. After letting the brown layer dry, I finished off the handrails by applying a coat of Testors Zinc Chromate to them. After covering the handrails, I decided to make them look weathered too, and lightly dabbed them with a wet wipe to create the appearance of rust seeping through the original “factory” yellow paint. Lastly, I lightly brushed the outer rim of each bucket with a bit of Testors Aluminum Mat paint to make the slag car look like it had poured slag. See the real-life photo I found that inspired me to do this.
Wrap Up
In my view, the weathering process never ends. I will always find something to add to these cars, whether it’s another layer of rust or maybe even some Bethlehem Steel decals. I encourage those interested in weathering their trains to purchase a dust/powder kit to start, as this type of material is less of a hassle to remove than paint.