Cass Scenic Railroad Passenger Cars
By Zachary Ferreira, TCA #19-73990 Winter 2026 e*Train
See the YouTube video HERE
Hello TCA e*Train Readers,
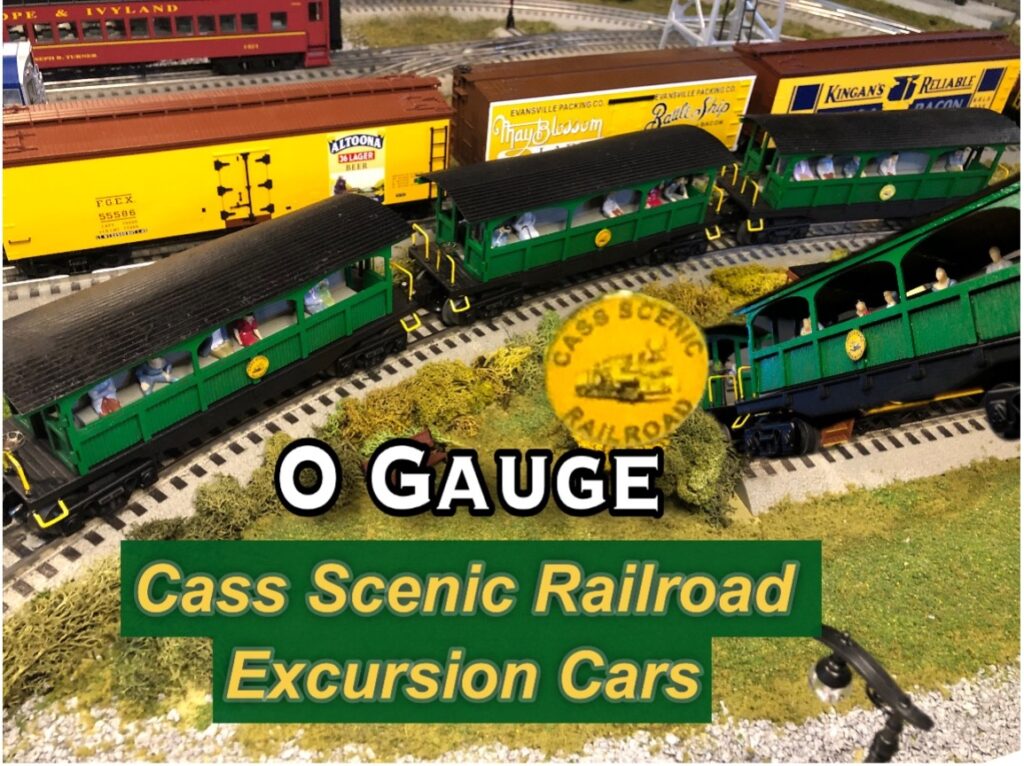
I am pleased to share with you the story behind my O Gauge Cass Scenic Railroad Excursion cars. Please enjoy this article, and I once again thank you for providing the opportunity for young adults and youth to share their interests in this ever-growing hobby.
Overview
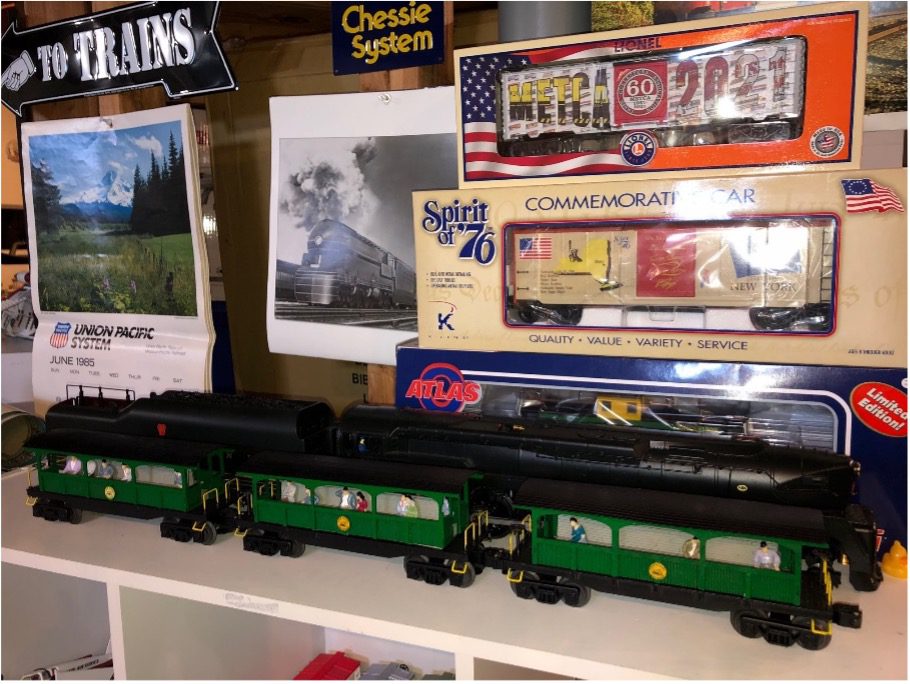
After riding behind Western Maryland Shay #6 at the Cass Scenic Railroad in 2014, I was inspired to find a way to model the Cass Scenic roster on my home layout. After doing some research and turning to the OGR Forum, I humbly found a forum member who produced these cars in kit form. What you see in the pictures are three handmade O Gauge Cass Scenic Railroad open-air excursion passenger cars, which do their best to model the real deal at Cass. Each kit comes with the necessary, laser-engraved (wood) parts that must be exacto-knifed out of their frames, glued, and painted together. I used three Lionel 6411 flatcars (6-16963) as a base for these kits, whose exterior frame and ladder/handrail detail are rather close to the same array and design implemented on the real cars at Cass.
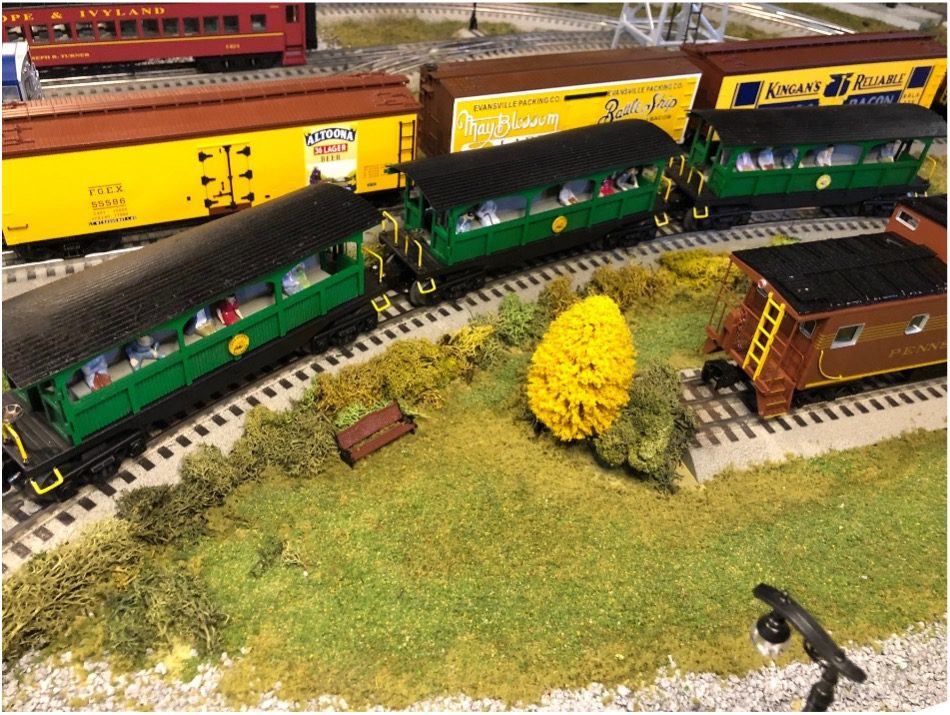
Since these cars come requiring full assembly, simply purchasing a kit does not bring you to a finished product. Each flatcar itself was painted flat black, and handrails were painted glossy yellow. The superstructure of the car is painted flat green, and the roof sections are flat black. The benches inside the cars are painted flat grey, and some Evemodel figures are seated inside the cars. After each kit was assembled, which I sometimes refer to as the superstructure (to differentiate the kits from the separately purchased and painted flatcar), they were carefully glued to the flatcar, resulting in a finished product.
Some Assembly Required…
The kits themselves must first be cut out of their sheets, edges sanded down, and then painted before being glued together. An instruction manual also came with these kits, which helped immensely. First, upon cutting the inserts out, they were sanded down with a fine-grit sandpaper, then each piece was test-fitted where appropriate to ensure there were no major structural engraving errors. Then, the superstructure pieces were painted and carefully glued together. The rooftop section had to be carefully bent to match the same curvature of the car’s support beams.
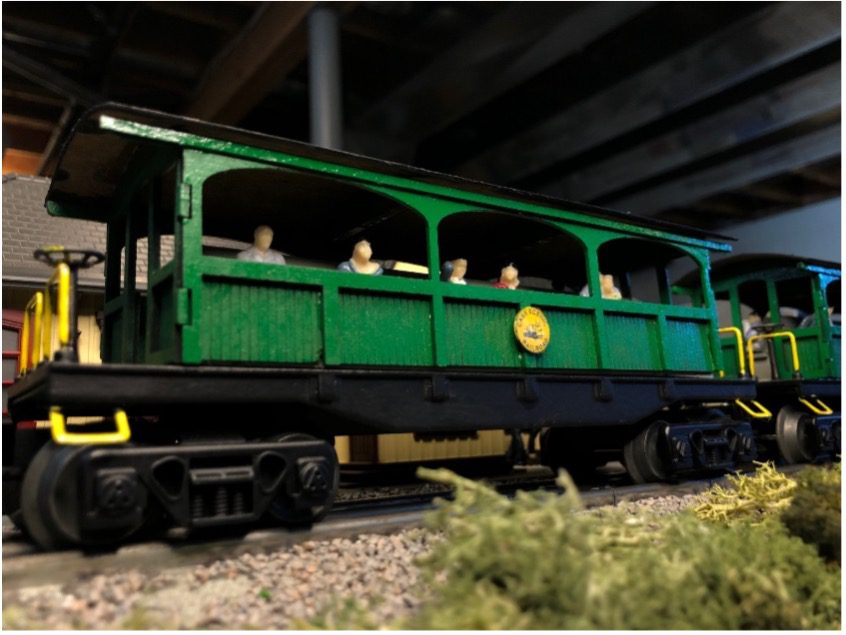
Perhaps the most difficult part about assembling these kits was applying the included Cass Scenic Railroad decals. Before working with these decals, which have the same diameter of roughly a rubber pin backing, the last time I had actually applied decals was in the cub scouts (who else decorated their pinewood derby cars?), more than ten years ago… Thus, not every decal application was perfect, as I had botched one completely, resulting in a last minute paper printout replica. Since I already had the measurements of the previous decals, simply taking a picture and scaling the logo to fit the same diameter as the previous ones, soon turned successful as a final logo-decal as I applied the same night I ran into the problem in the first place.
Concluding Remarks
Just like many personal experiences in this hobby, sometimes all it takes is a new train ride to spark an idea that will eventually come to life. In 2014, my trip up to Bald Knob right behind Western Maryland Shay #6 initiated me to one day replicate the same train in O Gauge. Building these kits not only taught me how to properly apply decals but instilled a greater appreciation for not just these unique trains, but for the people who persevere in their ideas to create them from the ground up. I encourage you to check out my YouTube video covering these cars, which includes running shots of them being pulled by Lionel’s Legacy Western Maryland Shay #6. I would like to thank the TCA again personally for allowing me to share these unique pieces with the modeling public and to freely spread the word about the treasure that is the Cass Scenic Railroad.


